KitchenAid KERS205TSS User Guide - Page 15
Convect Pastry, Rapid Preheat, Drying - 0 parts
 |
UPC - 883049134406
View all KitchenAid KERS205TSS manuals
Add to My Manuals
Save this manual to your list of manuals |
Page 15 highlights
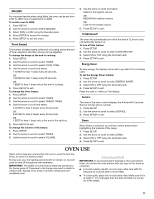
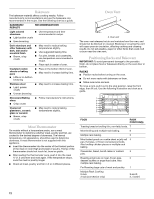
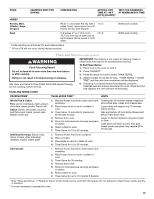
7. At 75% of the cooking time the oven will beep to let you know to check food. Check food using a meat thermometer. If food is done, take food out of oven and press CANCEL pad to turn oven off. If food is not done, continue roasting. Once the set time has elapsed the oven will automatically go into Keep Warm mode for 1 hour and then shut off. If food is taken from the oven before the hour has elapsed, press the CANCEL pad. Convect Pastry (on some models) Convect Pastry is designed to bake pastry items such as frozen pies, turnovers, cream puffs and puff pastry. Use 1, 2 or 3 racks while using this feature. 1. Press CONVECT. 2. Use the arrow to scroll to select CNVT PASTRY. 3. Select the oven temperature using the Quickset pads. OR Enter the desired temperature using the number pads. The temperature can be set between 195°F and 550°F (91°C and 288°C) in 5° increments. 4. Press ENTER pad to set. After 3 seconds, the oven will begin to preheat. "CNVT PASTRY" and "PREHEAT" will appear in the display along with "100°" or the actual oven temperature, which ever is higher. AUTO will display if the Auto Convect conversion feature is turned on. The temperature in the display will increase in 1° increments until the oven reaches the preset temperature. Allow about 15 minutes for the oven to preheat. When the oven is preheated, the oven will beep, "PREHEAT" will turn off and "CNVT PASTRY" will be displayed. 5. Press CANCEL when finished cooking. Rapid Preheat (on some models) Use Rapid Preheat to decrease preheating time when using Bake or Convect Bake. Use for all foods when baking on 1 rack. For best results, use rack position 3 or 4 when using the Rapid Preheat option. For optimum baking and browning results, Rapid Preheat is not recommended when baking on multiple racks. To Activate: After Bake or Convect Bake has been programmed and activated, press RAPID PREHEAT. "1 RACK ONLY" will display, after 10 seconds the display will show "RAPID" and "PREHEAT." Preheat time is 5 minutes. To Return to Standard Preheat: Press RAPID PREHEAT. This will provide standard preheat. "PREHEAT" and the selected function will be displayed. Drying (on some models) For best results, use a drying rack. A drying rack allows air to circulate evenly around the food. If you would like to purchase a drying rack, one may be ordered. See "Assistance or Service" section to order. Ask for the Drying Rack Accessory Kit. The convection fan will operate during the drying procedure. To Set Drying: 1. Open the oven door slightly. The oven door needs to be opened slightly to allow moisture to escape from the oven during the drying process. 2. Place the magnetic door spacer Part Number 8010P146-60 over the plunger switch. The spacer provides a gap between the oven frame and the oven door to allow moisture to escape. A A. Magnetic door spacer 3. Gently close the door until the spacer magnet makes contact with the oven door. The magnet will hold the spacer in the proper position during the drying process and allows the door to be opened at any time during drying without losing proper positioning. IMPORTANT: If the spacer is not placed correctly, the convection fan will not operate. 4. Press CONVECT. 5. Press the arrow to scroll to select DRYING. 6. Select a displayed temperature or enter a temperature with the number pads. Temperatures can be set between 100°F and 200°F (38°C and 93°C). 7. DRYING and the temperature will be displayed. "PREHEAT" will be displayed until the programmed temperature is reached. 8. Press CANCEL when finished drying. Follow the Drying Guide chart for drying times. Check foods at minimum times given. Cool foods to room temperature before testing for doneness. 15
-
 1
1 -
2
-
3
-
4
-
5
-
6
-
7
-
8
-
9
-
 10
10 -
 11
11 -
 12
12 -
 13
13 -
 14
14 -
 15
15 -
 16
16 -
 17
17 -
 18
18 -
 19
19 -
 20
20 -
21
-
22
-
23
-
24
-
25
-
26
-
27
-
28
-
29
-
30
-
31
-
32
-
33
-
34
-
35
-
36
-
37
-
38
-
39
-
40
-
41
-
42
-
43
-
44
-
45
-
46
-
47
-
48
-
49
-
50
-
51
-
52
 |
 |
