KitchenAid KFIS29PBMS Use & Care Guide - Page 15
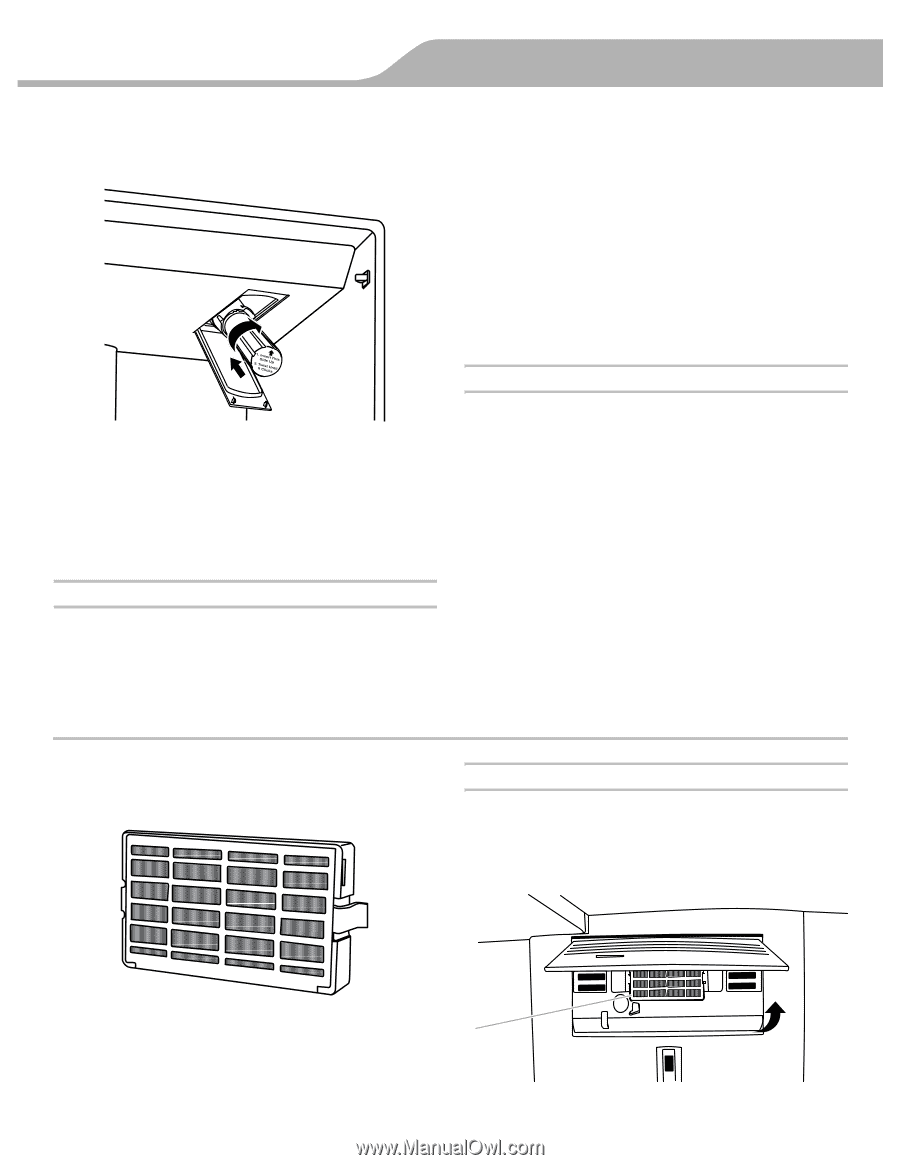
Install Air Filter - water filter
 |
View all KitchenAid KFIS29PBMS manuals
Add to My Manuals
Save this manual to your list of manuals |
Page 15 highlights
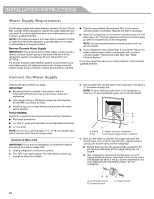
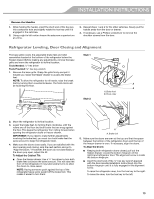
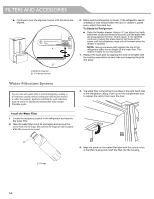
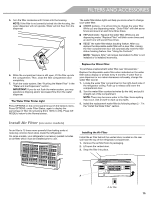
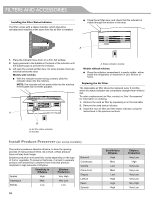
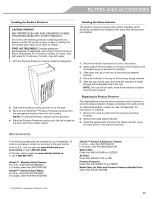
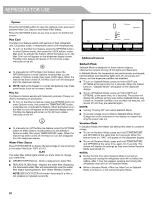
FILTERS AND ACCESSORIES 5. Turn the filter clockwise until it locks into the housing. NOTE: If the filter is not correctly locked into the housing, the water dispenser will not operate. Water will not flow from the dispenser. The water filter status lights will help you know when to change your water filter. ■ ORDER (yellow) - it is almost time to change the water filter. While you are dispensing water, "Order Filter" will blink seven times and sound an alert tone three times. ■ REPLACE (red) - Replace the water filter. While you are dispensing water, "Replace Filter" will blink seven times and an alert tone will sound three times. ■ RESET the water filter status tracking feature. After you replace the disposable water filter with a new filter, closing the filter compartment door will automatically reset the filter status tracking feature. See "Using the Controls." NOTE: "Replace Filter" will remain illuminated if a filter is not installed or is installed incorrectly. 6. While the compartment door is still open, lift the filter up into the compartment. Then, close the filter compartment door completely. 7. Flush the water system. See "Flushing the Water Filter" in the "Water and Ice Dispensers" section. IMPORTANT: If you do not flush the water system, you may experience dripping and/or decreased flow from the water dispenser. The Water Filter Status Light Press OPTIONS on the control panel to launch the Options menu. Press OPTIONS, under Filter Status, again to display the percentage of filter life remaining (from 100% to 0%). Press ICE MODE to return to the Normal screen. Replace the Water Filter To purchase a replacement water filter, see "Accessories." Replace the disposable water filter when indicated on the water filter status display or at least every 6 months. If water flow to your dispenser or ice maker decreases noticeably, change the water filter sooner. 1. Locate the water filter compartment in the right-hand side of the refrigerator ceiling. Push up to release and lower the compartment door. 2. Turn the water filter counterclockwise (to the left), and pull it straight out of the compartment. NOTE: There may be some water in the filter. Some spilling may occur. Use a towel to wipe up any spills. 3. Install the replacement water filter by following steps 2 - 7 in the "Install the Water Filter" section. Install Air Filter (on some models) An air filter is 15 times more powerful than baking soda at reducing common food odors inside the refrigerator. On some models, your refrigerator's accessory packet includes an air filter, which must be installed prior to use. Installing the Air Filter Install the air filter behind the vented door, located on the rear wall near the top of the refrigerator compartment. 1. Remove the air filter from its packaging. 2. Lift open the vented door. 3. Snap the filter into place. A A. Air filter 15
-
 1
1 -
2
-
3
-
4
-
5
-
6
-
7
-
8
-
9
-
 10
10 -
 11
11 -
 12
12 -
 13
13 -
 14
14 -
 15
15 -
 16
16 -
 17
17 -
 18
18 -
 19
19 -
 20
20 -
21
-
22
-
23
-
24
-
25
-
26
-
27
-
28
-
29
-
30
-
31
-
32
-
33
-
34
-
35
-
36
-
37
-
38
-
39
-
40
-
41
-
42
-
43
-
44
-
45
-
46
-
47
-
48
-
49
-
50
-
51
-
52
-
53
-
54
-
55
-
56
-
57
-
58
-
59
-
60
-
61
-
62
-
63
-
64
-
65
-
66
-
67
-
68
-
69
-
70
-
71
-
72
-
73
-
74
-
75
-
76
-
77
-
78
-
79
-
80
-
81
-
82
-
83
-
84
-
85
-
86
-
87
-
88
-
89
-
90
-
91
-
92
-
93
-
94
-
95
-
96
-
97
-
98
-
99
-
100
-
101
-
102
-
103
-
104
-
105
-
106
-
107
-
108
-
109
-
110
-
111
-
112
-
113
-
114
-
115
-
116
-
117
-
118
-
119
-
120
-
121
-
122
 |
 |