KitchenAid KFIS29PBMS Use & Care Guide - Page 9
Electrical Requirements - parts
 |
View all KitchenAid KFIS29PBMS manuals
Add to My Manuals
Save this manual to your list of manuals |
Page 9 highlights
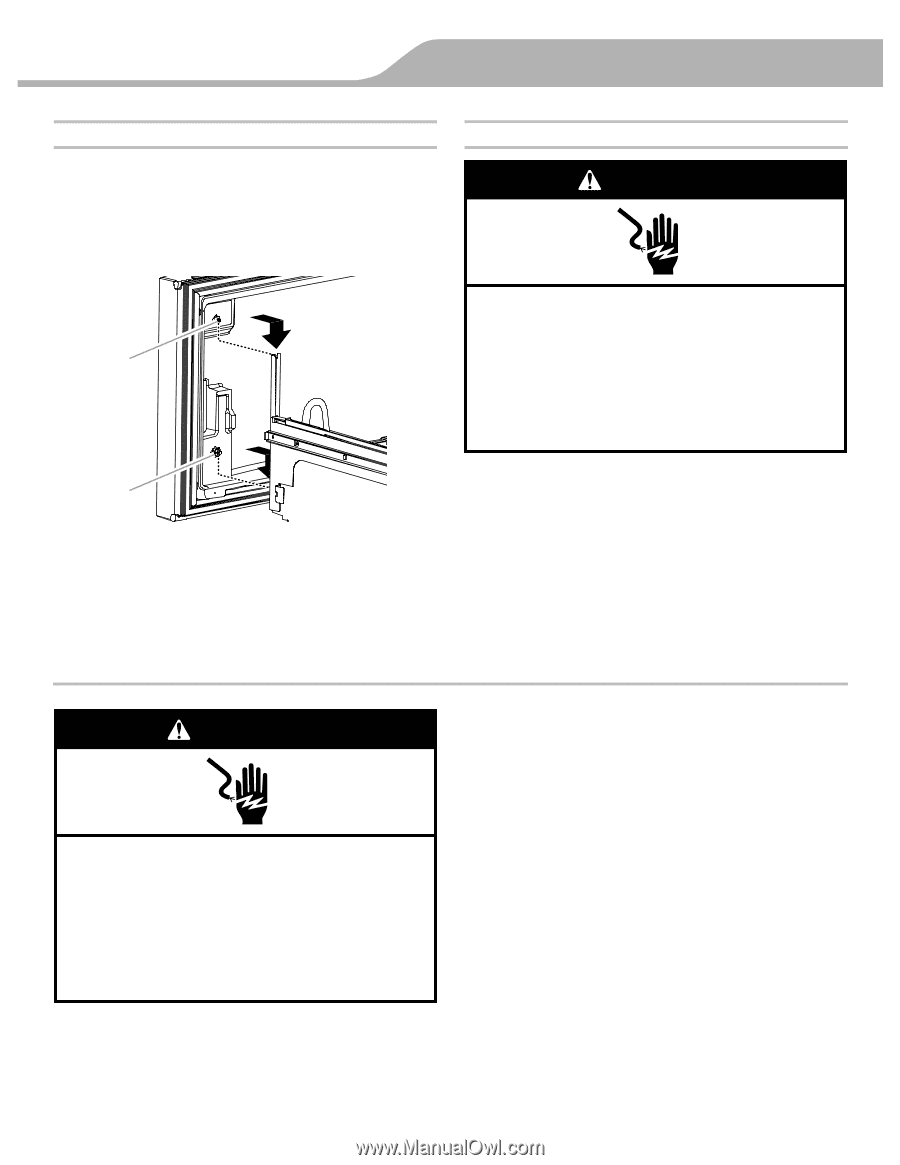
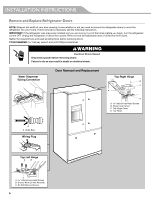
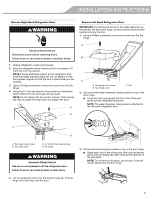
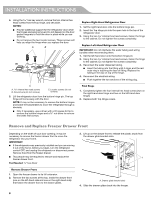
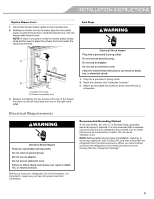
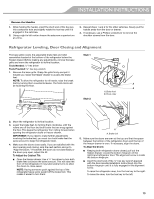
INSTALLATION INSTRUCTIONS Replace Drawer Front 1. Pull out the freezer drawer glides to their full extension. 2. Holding the drawer front by its sides, align the two plastic studs, located at the bottom, inside the drawer front, with the drawer glide bracket slots. NOTE: It helps if one person holds the drawer glides steady while another person aligns the drawer front and inserts the studs into the slots. Final Steps WARNING A B A. Drawer front screw B. Drawer front plastic stud 3. Replace and tighten the two screws at the top of the drawer front (one on the left-hand side and one on the right-hand side). Electrical Shock Hazard Plug into a grounded 3 prong outlet. Do not remove ground prong. Do not use an adapter. Do not use an extension cord. Failure to follow these instructions can result in death, fire, or electrical shock. 1. Plug into a grounded 3 prong outlet. 2. Reset the controls. See "Using the Controls." 3. Return all removable door parts to doors and the food to refrigerator. Electrical Requirements WARNING Electrical Shock Hazard Plug into a grounded 3 prong outlet. Do not remove ground prong. Do not use an adapter. Do not use an extension cord. Failure to follow these instructions can result in death, fire, or electrical shock. Before you move your refrigerator into its final location, it is important to make sure you have the proper electrical connection. Recommended Grounding Method A 115 volt, 60 Hz., AC only 15- or 20-amp fused, grounded electrical supply is required. It is recommended that a separate circuit serving only your refrigerator be provided. Use an outlet that cannot be turned off by a switch. Do not use an extension cord. NOTE: Before performing any type of installation, cleaning, or removing a light bulb, turn Cooling OFF, and then disconnect the refrigerator from the electrical source. When you have finished, reconnect the refrigerator to the electrical source and turn Cooling ON. See "Using the Control(s)." 9
-
 1
1 -
2
-
3
-
 4
4 -
 5
5 -
 6
6 -
 7
7 -
 8
8 -
 9
9 -
 10
10 -
 11
11 -
 12
12 -
 13
13 -
 14
14 -
15
-
16
-
17
-
18
-
19
-
20
-
21
-
22
-
23
-
24
-
25
-
26
-
27
-
28
-
29
-
30
-
31
-
32
-
33
-
34
-
35
-
36
-
37
-
38
-
39
-
40
-
41
-
42
-
43
-
44
-
45
-
46
-
47
-
48
-
49
-
50
-
51
-
52
-
53
-
54
-
55
-
56
-
57
-
58
-
59
-
60
-
61
-
62
-
63
-
64
-
65
-
66
-
67
-
68
-
69
-
70
-
71
-
72
-
73
-
74
-
75
-
76
-
77
-
78
-
79
-
80
-
81
-
82
-
83
-
84
-
85
-
86
-
87
-
88
-
89
-
90
-
91
-
92
-
93
-
94
-
95
-
96
-
97
-
98
-
99
-
100
-
101
-
102
-
103
-
104
-
105
-
106
-
107
-
108
-
109
-
110
-
111
-
112
-
113
-
114
-
115
-
116
-
117
-
118
-
119
-
120
-
121
-
122
 |
 |