KitchenAid KPCG100OB Use & Care Guide - Page 30
Replacing the Cutting Burrs
 |
UPC - 883049061917
View all KitchenAid KPCG100OB manuals
Add to My Manuals
Save this manual to your list of manuals |
Page 30 highlights
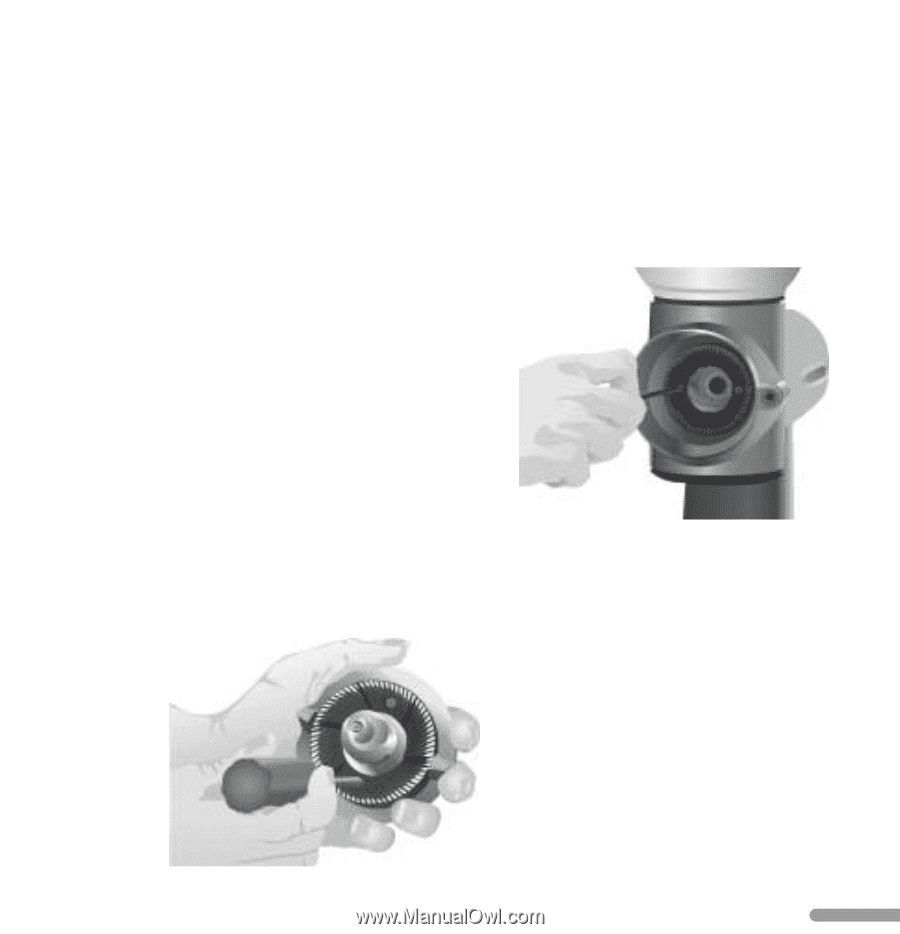
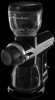
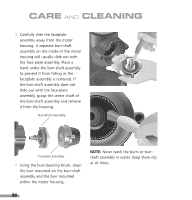
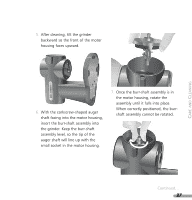
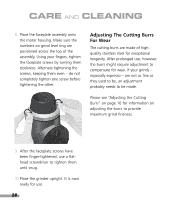
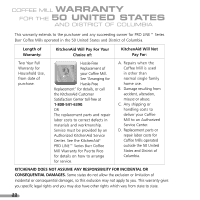
Replacing the Cutting Burrs If the cutting burrs are damaged, or have reached the end of their life (usually after grinding 600-800 lbs. of coffee), they can be replaced easily. Contact KitchenAid at 1-800-541-6390 to order a set of replacement burrs. 3. Remove the burr from the motor housing by turning the two burrmounting screws counter-clockwise until free. CARE AND CLEANING To replace the burrs: 1. Remove the faceplate and burr-shaft assemblies. For instructions, see "Cleaning the Cutting Burrs" steps 1, 2, and 3 on pages 25 and 26. 2. With a Phillips screwdriver, remove the burr from the burr-shaft assembly by turning the two burr-mounting screws counter-clockwise until free. 4. Attach the replacement burrs to the burr-shaft assembly and motor housing using the burr-mounting screws. Make certain the cutting surfaces of the burrs face outward, and the burr-mounting screws are tight. 5. Insert the burr-shaft assembly into the motor housing and attach the faceplate assembly. For instructions, see "Cleaning the Cutting Burrs" steps 5 - 10 on pages 27 and 28. 29
-
 1
1 -
2
-
3
-
4
-
5
-
6
-
7
-
8
-
9
-
10
-
11
-
12
-
13
-
14
-
15
-
16
-
17
-
18
-
19
-
20
-
21
-
22
-
23
-
24
-
 25
25 -
 26
26 -
 27
27 -
 28
28 -
 29
29 -
 30
30 -
 31
31 -
 32
32 -
 33
33 -
 34
34 -
 35
35 -
36
-
37
-
38
 |
 |