Kodak Kodak Theatre Extended User Guide - Page 44
Creating a slideshow, New Slideshow button - new name
 |
UPC - 041778032183
View all Kodak Kodak Theatre manuals
Add to My Manuals
Save this manual to your list of manuals |
Page 44 highlights
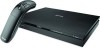
Using the HD player Creating a slideshow 1 In any picture view, click the Add to Slideshow button . NOTE: If you previously created a slideshow, it may appear in the Slideshow tray. Click the New Slideshow button to clear it and begin a new slideshow. Add to Slideshow button Play button Slideshow tray New Slideshow button Remove last picture in tray 2 In the dialog window that appears, click OK to accept the default slideshow name, or click Rename to enter a name using the on-screen keyboard, then click Done. 3 Browse through your pictures/videos (you can switch to different views and folders while the Slideshow tray is open) and click the ones you want in the slideshow. They appear in the Slideshow tray. To remove the last picture added to the Slideshow tray, click the Remove button . (Click the Remove button multiple times to remove more than one picture in the tray, one at a time.) NOTE: At least one picture must be in a slideshow before it can be saved. 44 www.kodak.com/go/easysharecenter
-
 1
1 -
2
-
3
-
4
-
5
-
6
-
7
-
8
-
9
-
10
-
11
-
12
-
13
-
14
-
15
-
16
-
17
-
18
-
19
-
20
-
21
-
22
-
23
-
24
-
25
-
26
-
27
-
28
-
29
-
30
-
31
-
32
-
33
-
34
-
35
-
36
-
37
-
38
-
 39
39 -
 40
40 -
 41
41 -
 42
42 -
 43
43 -
 44
44 -
 45
45 -
 46
46 -
 47
47 -
 48
48 -
 49
49 -
50
-
51
-
52
-
53
-
54
-
55
-
56
-
57
-
58
-
59
-
60
-
61
-
62
-
63
-
64
-
65
-
66
-
67
-
68
-
69
-
70
-
71
-
72
-
73
-
74
-
75
-
76
-
77
-
78
-
79
-
80
-
81
-
82
-
83
-
84
-
85
-
86
-
87
-
88
-
89
-
90
-
91
 |
 |
