Konica Minolta Kodak i1840 User Guide - Page 65
Moving the printer carrier and cable from the front to the rear or vice versa
 |
View all Konica Minolta Kodak i1840 manuals
Add to My Manuals
Save this manual to your list of manuals |
Page 65 highlights
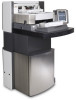
Moving the printer carrier and cable from the front to the rear or vice versa The scanner comes with the printer carrier and ribbon cable installed for front pre-scan printing. If your application requires rear post-scan printing, the printer carrier and cable must be moved from the front to the rear position. Printing can only be done on the front or the rear. If you alternate between front and rear printing frequently, you may want to purchase a second printer carrier, then you only need to move the ink cartridge from the front to the back or vice versa. Otherwise, you need to move the printer carrier and cable from the front to rear or rear to front as well as the ink cartridge. NOTE: After you move the printer carrier and cable you must restart the scanner. Moving the printer carrier and cable from front position to the rear position NOTE: Remove the ink cartridge before you begin. See the next section "Replacing the ink cartridge" for procedures. 1. Access the front printer by removing the output tray and lifting the printer access cover. 2. Disconnect the ribbon cable by pulling it straight out from the holder. 3. Lift the printer carrier out of position. 4. Close the printer access cover and reinstall the output tray. 5. Access the rear printer by lifting the top access cover. 6. Install the printer carrier in the desired position. 7. Connect the ribbon cable. 8. Install the ink cartridge. See the next section, "Replacing the ink cartridge" for procedures. 9. Close the top access cover. 10. Restart the scanner. 11. Run a test print. A-61555 May 2010 4-5
-
 1
1 -
2
-
3
-
4
-
5
-
6
-
7
-
8
-
9
-
10
-
11
-
12
-
13
-
14
-
15
-
16
-
17
-
18
-
19
-
20
-
21
-
22
-
23
-
24
-
25
-
26
-
27
-
28
-
29
-
30
-
31
-
32
-
33
-
34
-
35
-
36
-
37
-
38
-
39
-
40
-
41
-
42
-
43
-
44
-
45
-
46
-
47
-
48
-
49
-
50
-
51
-
52
-
53
-
54
-
55
-
56
-
57
-
58
-
59
-
 60
60 -
 61
61 -
 62
62 -
 63
63 -
 64
64 -
 65
65 -
 66
66 -
 67
67 -
 68
68 -
 69
69 -
 70
70 -
71
-
72
-
73
-
74
-
75
-
76
-
77
-
78
-
79
-
80
-
81
-
82
-
83
-
84
-
85
-
86
-
87
-
88
-
89
-
90
-
91
-
92
-
93
-
94
-
95
-
96
-
97
-
98
-
99
-
100
-
101
-
102
-
103
-
104
-
105
-
106
-
107
-
108
-
109
-
110
 |
 |
