Konica Minolta bizhub 215 bizhub 215 Fax Operations User Guide - Page 83
Automatic installation using the installer, Operating environment of installer, Installation USB - konica
 |
View all Konica Minolta bizhub 215 manuals
Add to My Manuals
Save this manual to your list of manuals |
Page 83 highlights
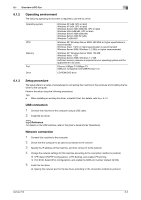
6.2 Installing the fax driver 6 6.2.2 Automatic installation using the installer The installer automatically detects the printer on the same TCP/IP network as your computer or the machine connected via USB to your computer, and allows you to install the required fax driver. Tips - If you do not agree to the terms in the [License Agreement] displayed during the installation process, the process will not continue. Operating environment of installer Operating system CPU Memory Windows XP (x86/x64, SP2 or later) Windows Server 2003 (x86/x64) Windows Vista (x86/x64) Windows Server 2008 (x86/x64) Windows Server 2008 R2(x64) Windows 7 (x86/x64) Any processor of the same or higher specifications as recommended for your operating system Memory capacity as recommended for your operating system Sufficient memory resource is required for your operating system and the applications to be used. Tips - Administrator authority is required for installation. - If a wizard screen is displayed to add a new hardware product at USB connection, click [Cancel]. Installation (USB connection) 1 Check that this machine is not connected to a computer using a USB cable. % Do not connect a USB cable to this machine until a connection instruction message appears in the screen. 2 Insert the fax driver CD-ROM into the CD-ROM drive of the computer. 3 Open the [PCFAX_driver] folder on the CD-ROM, and double-click [Setup.exe]. % If a wizard screen is displayed to add a new hardware product, click [Cancel]. % If the [User Account Control] screen appears, click [Allow] or [Continue]. 4 Select a desired language, and click [OK]. The fax driver installer starts. 5 Click [Next]. 6 To agree to all terms in the license agreement, click [I accept the terms of the License Agreement] and click [Next]. 7 Select the model of this machine, select [USB], and click [Next]. % Select [KONICA MINOLTA XXX PCL(FAX)] if the optional Image Controller IC-209 is already installed. % In Windows Vista/Server 2008/7, when the Verify the publisher dialog box of [Windows Security] appears, click [Install this driver software anyway]. % In Windows XP/Server 2003, when the [Windows logo testing] or [Digital Signature] screen appears, click [Continue Anyway] or [Yes]. Installation starts. 8 If the message [Please plug USB to connect PC and device.] appears, connect this machine and the computer using a USB cable. Installation is continued. 9 In the completion dialog box, click [finish]. bizhub 215 6-6
-
 1
1 -
2
-
3
-
4
-
5
-
6
-
7
-
8
-
9
-
10
-
11
-
12
-
13
-
14
-
15
-
16
-
17
-
18
-
19
-
20
-
21
-
22
-
23
-
24
-
25
-
26
-
27
-
28
-
29
-
30
-
31
-
32
-
33
-
34
-
35
-
36
-
37
-
38
-
39
-
40
-
41
-
42
-
43
-
44
-
45
-
46
-
47
-
48
-
49
-
50
-
51
-
52
-
53
-
54
-
55
-
56
-
57
-
58
-
59
-
60
-
61
-
62
-
63
-
64
-
65
-
66
-
67
-
68
-
69
-
70
-
71
-
72
-
73
-
74
-
75
-
76
-
77
-
 78
78 -
 79
79 -
 80
80 -
 81
81 -
 82
82 -
 83
83 -
 84
84 -
 85
85 -
 86
86 -
 87
87 -
 88
88 -
89
-
90
-
91
-
92
-
93
-
94
-
95
-
96
-
97
-
98
-
99
-
100
-
101
-
102
-
103
-
104
-
105
-
106
-
107
-
108
-
109
-
110
-
111
-
112
-
113
-
114
-
115
-
116
-
117
-
118
-
119
-
120
-
121
-
122
-
123
-
124
-
125
-
126
-
127
-
128
-
129
-
130
-
131
-
132
-
133
-
134
-
135
-
136
-
137
-
138
-
139
-
140
-
141
-
142
-
143
-
144
-
145
-
146
-
147
-
148
-
149
-
150
-
151
-
152
-
153
-
154
-
155
-
156
-
157
-
158
-
159
-
160
-
161
-
162
-
163
-
164
-
165
-
166
 |
 |
