Konica Minolta bizhub 215 bizhub 215 Network Administration User Guide - Page 22
Network Settings, 3.4.1 Setting the IP address., subnet mask and gateway - printer driver
 |
View all Konica Minolta bizhub 215 manuals
Add to My Manuals
Save this manual to your list of manuals |
Page 22 highlights
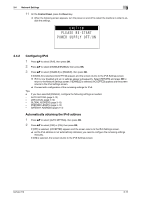
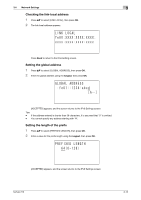
3.4 Network Settings 3 3.4 Network Settings Configure Network Settings in the Administrator Settings screen under Utility. This section describes how to configure the following functions. - IP address - Subnet mask - Gateway - IPv6 - DNS Setting - Web Setting - LPD Setting - SLP Setting - SNMP Setting - Auto Get Time Tips - Before configuring Network Settings, contact your network administrator for confirmation of necessary information. - If you have entered an incorrect character during the configuration process, press Clear/Stop to erase the incorrectly entered character and re-enter. 3.4.1 Setting the IP address., subnet mask and gateway Sequentially specify items from the IP address to the gateway. 1 On the Control Panel, press the Utility key. 2 Press +, to select [ADMIN. MANAGEMENT], then press OK. 3 Enter the administrator number, then press OK. % The factory default is [000000]. 4 Press +, to select [NETWORK SETTING], then press OK. 5 Press +, to select [IP ADDRESS SETTING], then press OK. 6 Press +, to select [AUTO] or [SPECIFY], then press OK. If [AUTO] is selected, the IP address is automatically supplied from the DHCP server. [ACCEPTED] appears, and the screen returns to the Network Settings screen. If [SPECIFY] is selected, the screen for entering the IP address appears. Go to Step 7. % [AUTO] is only enabled when a DHCP server resides on the network. If you select [AUTO], no setting is needed for the subnet mask or gateway. % When specifying the port for the printer driver on the computer connected to this machine, you need to specify the IP address of this machine. To cope with such situation, configure the DHCP server so that the same IP address is always assigned whenever the IP address is obtained via the DHCP server. 7 Enter the IP address on the keypad, then press OK. 8 Enter the subnet mask using the keypad, then press OK. The screen for entering the gateway address appears. 9 Enter the gateway address on the keypad. 10 Press OK. [ACCEPTED] appears, and the screen returns to the Network Settings screen. bizhub 215 3-11
-
 1
1 -
2
-
3
-
4
-
5
-
6
-
7
-
8
-
9
-
10
-
11
-
12
-
13
-
14
-
15
-
16
-
 17
17 -
 18
18 -
 19
19 -
 20
20 -
 21
21 -
 22
22 -
 23
23 -
 24
24 -
 25
25 -
 26
26 -
 27
27 -
28
-
29
-
30
-
31
-
32
-
33
-
34
-
35
-
36
-
37
-
38
-
39
-
40
-
41
-
42
-
43
-
44
-
45
-
46
-
47
-
48
-
49
-
50
-
51
-
52
-
53
-
54
-
55
-
56
-
57
-
58
-
59
-
60
-
61
-
62
-
63
-
64
-
65
-
66
-
67
-
68
-
69
-
70
-
71
-
72
-
73
-
74
-
75
-
76
-
77
-
78
-
79
-
80
-
81
-
82
-
83
-
84
-
85
-
86
-
87
-
88
-
89
-
90
-
91
-
92
-
93
 |
 |