Konica Minolta magicolor plus magicolor plus Captureboard C-12 Series Tool Box - Page 20
Hardware Setup
 |
View all Konica Minolta magicolor plus manuals
Add to My Manuals
Save this manual to your list of manuals |
Page 20 highlights
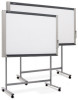
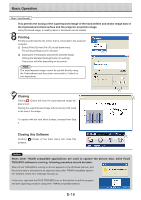
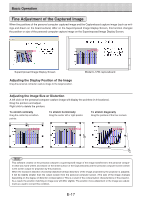
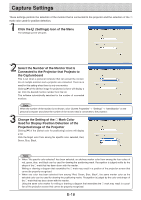
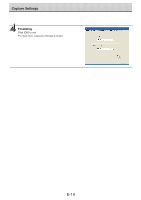
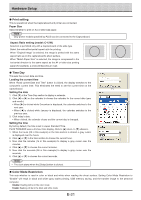
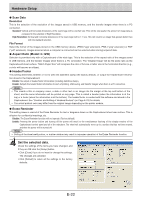
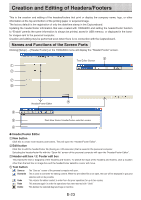
Hardware Setup Use this procedure to set the captureboard's operating environment from the computer. The factory defaults are shown below. Setting item Color Mode Density Date/time setting File Format Paper Size Aspect Ratio Erase Reminder Restrict color mode Resolution Header/footer (date/ time stamp) Description Color mode for scanning, Color/Black & White Density for scanning, Standard/Dark Set of the date and time for the time stamp Sets the format of the images stored on the USB memory device. JPEG/PNG/PDF A4/Letter Sets the aspect ratio for printed images. Original Image/Match Paper Size Sheet rear surface erase reminder function: Disable/Enable Setting for disabling printing/storing in the color mode Selection of resolution for images stored in the memory and images transferred to the computer : Standard Standard : 1/2 the vertical/horizontal size of the scanned image High : 1/1 the vertical/horizontal size of the scanned image Upon shipment from factory : Writing of date/time when printing/storing : Enabled/Disabled Original editing : Header/footer data output * Factory default Black & White Standard Japan Standard Time PNG A4 Match Paper Size Disable Disable Standard Enabled * The date/time stamp can be displayed at the user's discretion as part of the header/footer data. Upon shipment from the factory, only the time stamp is displayed. Turn on the captureboard's power, start up the computer, then make the USB connections. The "PLUS TOOLBOX" main menu appears on the computer. Click the [Setup] button. The [Hardware Setup] screen appears. Click the desired item to select it. For the radio buttons, when is clicked, it switches to (only one radio button can be selected within each item). ● Output setting Color Mode This sets the color of the output image. Color: Four colors (red, green, blue and black) Black & White: Black only Density This sets the density of the output image. If the output image is too light with the standard setting, set to "Dark". E-20
-
 1
1 -
2
-
3
-
4
-
5
-
6
-
7
-
8
-
9
-
10
-
11
-
12
-
13
-
14
-
 15
15 -
 16
16 -
 17
17 -
 18
18 -
 19
19 -
 20
20 -
 21
21 -
 22
22 -
 23
23 -
 24
24 -
 25
25 -
26
-
27
-
28
-
29
-
30
-
31
-
32
 |
 |