Kyocera ECOSYS P3260dn P3260dn Operation Guide
Kyocera ECOSYS P3260dn Manual
 |
View all Kyocera ECOSYS P3260dn manuals
Add to My Manuals
Save this manual to your list of manuals |
Kyocera ECOSYS P3260dn manual content summary:
- Kyocera ECOSYS P3260dn | P3260dn Operation Guide - Page 1
kyoceradocumentsolutions.com Operation Guide ECOSYS P3260dn - Kyocera ECOSYS P3260dn | P3260dn Operation Guide - Page 2
routine maintenance, and take simple troubleshooting measures as needed so that the machine can always be used in the optimum condition. Please read this Operation Guide before using the machine. To maintain quality, we recommend using genuine Kyocera toner containers, which must pass numerous - Kyocera ECOSYS P3260dn | P3260dn Operation Guide - Page 3
This Guide 1-2 Environment ...1-3 Precautions for Use 1-4 Laser Safety (Europe 1-5 SAFETY OF LASER BEAM (USA 1-6 Safety Instructions Regarding 2-11 Help Screen ...2-12 Login/Logout ...2-13 Login ...2-13 Logout ...2-14 Default Settings of the Machine 2-15 Setting Date and Time 2-15 Network Setup - Kyocera ECOSYS P3260dn | P3260dn Operation Guide - Page 4
PC 4-1 Printing from PC ...4-2 Printing on Non-standard Sized Paper 4-4 Banner printing ...4-5 Printer Driver Print Settings Screen 4-9 Printer Driver Help 4-10 Changing the Default Printer Driver Settings (Windows 10 4-10 Canceling Printing from a Computer 4-10 Printing by AirPrint ...4-11 - Kyocera ECOSYS P3260dn | P3260dn Operation Guide - Page 5
Quiet Mode ...6-5 Del. after Print (Delete after Printed 6-5 Encrypted PDF ...6-5 TIFF/JPEG Size ...6-6 XPS FitTo Page ...6-6 7 Status/Job Cancel Log History 7-4 Device/Communication ...7-5 Checking the Remaining Amount of Toner and Paper (Paper/Supplies 7-6 8 Setup and Registration (System - Kyocera ECOSYS P3260dn | P3260dn Operation Guide - Page 6
Troubleshooting 10-1 Regular Maintenance ...10-2 Cleaning ...10-2 Toner Container Replacement 10-4 Waste Toner Box Replacement 10-9 Troubleshooting -14 Special Paper ...11-17 Specifications ...11-21 Machine ...11-21 Printer Functions 11-23 Paper Feeder (500-sheet) (Option 11-23 Bulk Paper - Kyocera ECOSYS P3260dn | P3260dn Operation Guide - Page 7
Save energy and cost Save energy as needed (Energy Saver function) Use less toner for printing (EcoPrint) Off You can save the frequently used document in SSD. Data Security (page 8-37) You can temporarily save a printer document in the machine. By printing the document from the machine prevents someone - Kyocera ECOSYS P3260dn | P3260dn Operation Guide - Page 8
ID card. You don't need to enter your user name and password. Card Authentication Kit(B) "Card Authentication Kit" (page 11-3) Various without concerning the network cables. In addition, Wi-Fi Direct, etc. are supported. Configuring the Wireless Network (page 2-19) Setting Wi-Fi Direct (page 2-23 - Kyocera ECOSYS P3260dn | P3260dn Operation Guide - Page 9
maintenance, and what to do when problems occur. Safety Guide Provides safety and cautionary information for installation environment and use of the machine. Be sure to read this guide before using the machine. Safety Guide (ECOSYS P3260dn) Indicates the space required for machine installation - Kyocera ECOSYS P3260dn | P3260dn Operation Guide - Page 10
to check and change settings. Print data from a computer Printer Driver User Guide Explains how to install the printer driver and use the printer function. Directly print a PDF file KYOCERA Net Direct Print Operation Guide Explains how to print PDF files without launching Adobe Acrobat or Reader - Kyocera ECOSYS P3260dn | P3260dn Operation Guide - Page 11
About the Operation Guide (this Guide) About the Operation Guide (this Guide) Structure of the guide The Operation Guide contains the following job accounting. 10 Troubleshooting Explains what to do when toner runs out, an error is displayed, or a paper jam or other problem occurs. 11 Appendix - Kyocera ECOSYS P3260dn | P3260dn Operation Guide - Page 12
how it is used. If the Table of Contents or tools do not appear, refer to Adobe Reader Help. Certain items are indicated in this guide by the conventions described below. Convention [Bold] "Regular" Indicates keys and buttons. Indicates a message or setting. Description xi - Kyocera ECOSYS P3260dn | P3260dn Operation Guide - Page 13
in procedures for operating the machine In this Operation Guide, continuous operation is as follows: Actual procedure Select the [Menu] key. Select the [▲] or [] key to select [Device Common]. Select the [OK] key. Procedure indicated in this guide [Menu] key key > [Device Common] > [OK] key - Kyocera ECOSYS P3260dn | P3260dn Operation Guide - Page 14
> Menu Map Menu Map This is a list of menus displayed on the message display. Depending on the settings, some menus may not be displayed. Some menu names may differ from their reference titles. Custom Box Job Box (Box Selection) (File Selection) Quick Copy (page 4-17) Private/Stored (page 4-13 - Kyocera ECOSYS P3260dn | P3260dn Operation Guide - Page 15
> Menu Map Report USB Drive Counter (page 2-37) Report Print Menu Map (page 8-4) Config. List (page 8-4) Status Page (page 8-4) Font List (page 8-5) RAM File List (page 8-5) SSD File List (page 8-5) SD Card FileList (page 8-5) DataSanitization (page 8-5) Job Log History Auto Sending ( - Kyocera ECOSYS P3260dn | P3260dn Operation Guide - Page 16
> Menu Map Paper Settings Paper Settings MP Tray Set. Bulk Feeder Set. Cassette 1 Set. Cassette 2 Set. Cassette 3 Set. Cassette 4 Set. Cassette 5 Set. Media Type Set. (page 8-6) Reset Type Adj. (page 8-6) Paper Setup Msg Paper Size (page 8-6) Media Type (page 8-6) Paper Size (page 8-7) Media Type - Kyocera ECOSYS P3260dn | P3260dn Operation Guide - Page 17
> Menu Map Print Settings Network Paper Source (page 8-10) Auto Cass.Change (page 8-10) MP Tray Priority (page 8-10) Paper Feed Mode (page 8-10) Duplex (page 8-10) Paper Output (page 8-10) Override A4/LTR (page 8-10) Emulation Set. (page 8-11) Font (page 8-11) Code Set (page 8-11) Print - Kyocera ECOSYS P3260dn | P3260dn Operation Guide - Page 18
> Menu Map Network Optional Network Device Common Wired Netwk. Set TCP/IP Settings (page 8-18) LAN Interface (page 8-18) ProtocolSettings (page 8-18) Primary Network (page 8-25) Ping (page 8-25) Restart Network (page 8-26) Remote Serv.Set. (page 8-26) Remote Operation (page 8-26) Wireless - Kyocera ECOSYS P3260dn | P3260dn Operation Guide - Page 19
(page 8-34) KeyboardType (page 8-35) Bluetooth Set. (page 8-35) Low Toner Alert (page 8-35) Msg Banner Print (page 8-35) Network Security (page Unknown ID Job (page 9-27) Quiet Mode (page 8-38) Restart (page 8-39) Service Setting (page 8-39) Auto Panel Reset (page 8-33) PanelReset Timer (page 8-33) - Kyocera ECOSYS P3260dn | P3260dn Operation Guide - Page 20
information on the following topics. Notice ...1-2 Safety Conventions in This Guide ...1-2 Environment ...1-3 Precautions for Use ...1-4 Laser Safety (Europe) ...1-5 SAFETY OF LASER BEAM (USA) ...1-6 Safety Instructions Regarding the Disconnection of Power 1-7 Compliance and Conformity ...1-7 Other - Kyocera ECOSYS P3260dn | P3260dn Operation Guide - Page 21
] ... [Remove the power plug from the outlet] ... [Always connect the machine to an outlet with a ground connection] Please contact your service representative to order a replacement if the safety warnings in this Operation Guide are illegible or if the guide itself is missing (fee required). 1-2 - Kyocera ECOSYS P3260dn | P3260dn Operation Guide - Page 22
Legal and Safety Information > Notice Environment The service environmental conditions are as follows: Temperature 50 to 90.5 °F (10 to 32.5 °C) Humidity 15 to 80% Avoid the following locations when selecting a site for the - Kyocera ECOSYS P3260dn | P3260dn Operation Guide - Page 23
. Do not attempt to force open or destroy parts which contain toner. Other precautions Return the exhausted toner container and waste toner box to your dealer or service representative. The collected toner container and waste toner box will be recycled or disposed in accordance with the relevant - Kyocera ECOSYS P3260dn | P3260dn Operation Guide - Page 24
Legal and Safety Information > Notice Laser Safety (Europe) Laser radiation could be hazardous to the human body. For this reason, laser radiation emitted inside this machine is hermetically sealed within the protective housing and external cover. In the normal operation of the product by user, no - Kyocera ECOSYS P3260dn | P3260dn Operation Guide - Page 25
products marketed in the United States. On this machine, the label is on the rear. ECOSYS xxxxxxxx 3. Maintenance For safety of the service personnel, follow the maintenance instructions in the other section of this manual. 4. Safety switch The power to the laser unit is cut off when the front cover - Kyocera ECOSYS P3260dn | P3260dn Operation Guide - Page 26
KYOCERA Document Solutions Inc. declares that the radio equipment type ECOSYS P3260dn is in compliance with Directive 2014/53/EU. The full text of the EU declaration of conformity is available at the following internet address: https://www.kyoceradocumentsolutions.eu/index/service tested instructions - Kyocera ECOSYS P3260dn | P3260dn Operation Guide - Page 27
area in which radio waves can be transmitted. On the other hand, the following problems may occur if security settings are not configured, because radio waves can pass through contents. • Personal information including ID, passwords, and credit card numbers • Contents of email messages 1-8 - Kyocera ECOSYS P3260dn | P3260dn Operation Guide - Page 28
security settings and that they ensure that they fully understand the problems that can occur when the product is used without configuring the instructions and precautions provided on the automatic control equipment. • If this product is used in devices that are directly related to service - Kyocera ECOSYS P3260dn | P3260dn Operation Guide - Page 29
of all or part of this guide without the prior written consent of KYOCERA Document Solutions Inc. is prohibited. Regarding Trade Names • PRESCRIBE and ECOSYS are registered trademark of Kyocera Corporation. • KPDL is a trademark of Kyocera Corporation. • Microsoft, Windows, Windows Server and - Kyocera ECOSYS P3260dn | P3260dn Operation Guide - Page 30
LIABLE FOR ANY DIRECT, INDIRECT, INCIDENTAL, SPECIAL, EXEMPLARY, OR CONSEQUENTIAL DAMAGES (INCLUDING, BUT NOT LIMITED TO, PROCUREMENT OF SUBSTITUTE GOODS OR SERVICES; LOSS OF USE, DATA, OR PROFITS; OR BUSINESS INTERRUPTION) HOWEVER CAUSED AND ON ANY THEORY OF LIABILITY, WHETHER IN CONTRACT, STRICT - Kyocera ECOSYS P3260dn | P3260dn Operation Guide - Page 31
DAMAGES (INCLUDING, BUT NOT LIMITED TO, PROCUREMENT OF SUBSTITUTE GOODS OR SERVICES; LOSS OF USE, DATA, OR PROFITS; OR BUSINESS INTERRUPTION) HOWEVER to use the Fonts on up to three printers. If you need to have access to the fonts on more than three printers, you need to acquire a multiuser license - Kyocera ECOSYS P3260dn | P3260dn Operation Guide - Page 32
Legal and Safety Information > Notice 10 You shall not sublicense, sell, lease, or otherwise transfer the Software and/or Typefaces without the prior written consent of Monotype Imaging. 11 Use, duplication or disclosure by the Government is subject to restrictions as set forth in the Rights in - Kyocera ECOSYS P3260dn | P3260dn Operation Guide - Page 33
equipped with a Sleep where printer functions remain in a waiting be used. This machine also supports printing on 64 g/m2 paper. for dry toner imaging processes" Your sales or service representative can time for energy-saving mode set to the default setting. Energy Star (ENERGY STAR®) Program We - Kyocera ECOSYS P3260dn | P3260dn Operation Guide - Page 34
Using the Operation Panel 2-10 Operation Panel Keys 2-10 Operation Method 2-11 Help Screen 2-12 Login/Logout 2-13 Login 2-13 Logout 2-14 Default Settings of the Machine 2-15 Setting Date and Time 2-15 Network Setup 2-16 Configuring the Wired Network ......... 2-16 Configuring the Wireless - Kyocera ECOSYS P3260dn | P3260dn Operation Guide - Page 35
Installing and Setting up the Machine > Part Names Part Names Machine Exterior 1 2 7 9 3 6 5 8 4 1 Top Tray 2 Paper Stopper 3 Cassette 1 4 Power Switch 5 Handles 6 USB Drive Slot 7 Operation Panel 8 Anti-theft Lock Slot 9 Rear Cover 2-2 - Kyocera ECOSYS P3260dn | P3260dn Operation Guide - Page 36
Connectors/Interior 1 2 3 4 5 6 7 8 9 10 10 11 12 1 Option Interface 2 USB Port 3 USB Interface Connector 4 Network Interface Connector 5 Fuser Cover 6 Paper Width Guides 7 Tray Extension 8 Multi Purpose Tray 9 Paper Length Guide 10 Paper Width Guides 11 Size Dial 12 Duplex Cover 2-3 - Kyocera ECOSYS P3260dn | P3260dn Operation Guide - Page 37
Installing and Setting up the Machine > Part Names 14 15 13 13 Toner Container 14 Toner Container Lock Lever 15 Registration Roller 16 Left Cover 17 Waste Toner Box 16 17 2-4 - Kyocera ECOSYS P3260dn | P3260dn Operation Guide - Page 38
Installing and Setting up the Machine > Part Names With Optional Equipments Attached 1 2 3 4 5 1 Cassette 2 2 Cassette 3 3 Cassette 4 4 Cassette 5 5 Castor kit 8 7 6 6 Bulk Paper Feeder 7 Paper Stopper 8 Rear Tray Optional Equipment (page 11-2) 2-5 - Kyocera ECOSYS P3260dn | P3260dn Operation Guide - Page 39
2-19) Cables that Can Be Used Connection Environment Connect a LAN cable to the machine. Connect a USB cable to the machine. Printer Printer Function Necessary Cable LAN cable (10BASE-T, 100BASE-TX, 1000BASE-T) USB 2.0 compatible cable (Hi-Speed USB compliant, max. 5.0 m, shielded) IMPORTANT - Kyocera ECOSYS P3260dn | P3260dn Operation Guide - Page 40
Installing and Setting up the Machine > Connecting Cables Connecting Cables Connecting LAN Cable IMPORTANT If the power is on, turn the power switch off. Power Off (page 2-9) 1 Connect the cable to the machine. 1 Connect the LAN cable to the network interface connector. 2 Connect the other end of - Kyocera ECOSYS P3260dn | P3260dn Operation Guide - Page 41
Installing and Setting up the Machine > Connecting Cables Connecting USB Cable IMPORTANT If the power is on, turn the power switch off. Power Off (page 2-9) 1 Connect the cable to the machine. 1 Connect the USB cable to the USB interface connector located on the left side of the body. 2 Connect the - Kyocera ECOSYS P3260dn | P3260dn Operation Guide - Page 42
Installing and Setting up the Machine > Power On/Off Power On/Off Power On 1 Turn the power switch on. IMPORTANT When turning off the power switch, do not turn on the power switch again immediately. Wait more than 5 seconds, and then turn on the power switch. Power Off 1 Turn the power switch off. - Kyocera ECOSYS P3260dn | P3260dn Operation Guide - Page 43
Installing and Setting up the Machine > Using the Operation Panel Using the Operation Panel Operation Panel Keys Displays the Menu screen. Increments or decrements numbers, or selects menu in the message display. In addition, moves the cursor when entering the characters. Finalizes a function or - Kyocera ECOSYS P3260dn | P3260dn Operation Guide - Page 44
the [▲] key, [▼] key, [◄] key, [►] key, [OK] key, or [Back] key to select a menu, and perform settings. Ready to print. A4 ST Status A6 A4 LT Toner Normal screen Setting menus Menu 01 Report 02 USB Drive 03 Counter Exit Menu 06 Network 07 Optional Network 08 Device Common Exit Select the - Kyocera ECOSYS P3260dn | P3260dn Operation Guide - Page 45
Installing and Setting up the Machine > Using the Operation Panel Help Screen If you have difficulty operating the machine, you can check how to operate it using the operation panel. When [Help] is displayed on the message display, select [Help] to display the Help screen. The Help screen shows - Kyocera ECOSYS P3260dn | P3260dn Operation Guide - Page 46
, or if user login administration is enabled, you must enter your login user name and login password. NOTE The factory default login user name and login password are set as shown below. Login User Name: 6000 Login Password: 6000 You will be unable to login if you forget your login user name or login - Kyocera ECOSYS P3260dn | P3260dn Operation Guide - Page 47
and Setting up the Machine > Login/Logout Logout To logout from the machine, select the [Logout] key to return to the login user name/login password entry screen. Users are automatically logged out in the following circumstances: • When the machine enters the sleep state. • When the auto panel reset - Kyocera ECOSYS P3260dn | P3260dn Operation Guide - Page 48
is disabled, the user authentication screen appears. Enter a login user name and password, and select [Login]. • The factory default login user name and login password are set as shown below. Login User Name: 6000 Login Password: 6000 • Be sure to set the time difference before setting the date and - Kyocera ECOSYS P3260dn | P3260dn Operation Guide - Page 49
Operation Guide NOTE If user login administration is enabled, you can only change the settings by logging in with administrator privileges. If user login administration is disabled, the user authentication screen appears. Enter a login user name and password, and select [Login]. The factory default - Kyocera ECOSYS P3260dn | P3260dn Operation Guide - Page 50
enter a number. Select the [◄] or [►] key to move the position being entered, which is shown highlighted. 7 Select the [OK] key. 8 key > [Default Gateway] > [OK] key 9 Set the default gateway. NOTE You can set any value between 000 and 255. Use the numeric keys or select the [▲] or [▼] key to enter - Kyocera ECOSYS P3260dn | P3260dn Operation Guide - Page 51
DHCP automatically. 1 key > [DNS Server] > [OK] key 2 key > [Auto (DHCP)] or [Manual] > [OK] key When [Manual] is selected. You can enter static DNS server information in the Primary and Secondary fields provided. NOTE You the DNS Server, refer to the following: Command Center RX User Guide 2-18 - Kyocera ECOSYS P3260dn | P3260dn Operation Guide - Page 52
connection according to the instructions provided by the wizard. Guide can use it on both Windows and Mac OS. NOTE When you want to switch to the network interface other than Wired (default default settings. • Configure the settings on the operation panel if your computer supports WPS. Wi-Fi Settings - Kyocera ECOSYS P3260dn | P3260dn Operation Guide - Page 53
Installing and Setting up the Machine > Network Setup Wired Connection by Using LAN Cable 1 Connect the machine with a computer 1 Connect the machine with a computer via LAN cable when the machine is powered on. 2 Turn on the computer. IP address (link local address) of the machine and computer is - Kyocera ECOSYS P3260dn | P3260dn Operation Guide - Page 54
4 Select the machine > [Next] 5 Select [Use the device settings.] on [Authentication mode], and enter the login user name and password. Login user name and Password are both Admin. 6 Configure the communication settings > [Next] 7 Change the settings of access point as necessary > [Next] The network - Kyocera ECOSYS P3260dn | P3260dn Operation Guide - Page 55
4 Select the machine > [Next] 5 Select [Use the device settings.] on [Authentication mode], and enter the login user name and password. Login user name and Password are both Admin. 6 Configure the communication settings > [Next] 7 Change the settings of access point as necessary > [Next] The network - Kyocera ECOSYS P3260dn | P3260dn Operation Guide - Page 56
from the Operation Panel on This Machine Connecting to Computers or Handheld Devices that Support Wi-Fi Direct 1 Display the screen. [Menu] key key > [Network] [Detail Info] > [OK] key 6 Check the network name (SSID), password, and IP address with the keys, and make a note this information. 2-23 - Kyocera ECOSYS P3260dn | P3260dn Operation Guide - Page 57
the network name (SSID) appeared in step 6 from the list. 3 Enter the password that was provided in step 6 > [Connect] The network between this machine and the same time using Wi-Fi Direct setting. When the devices that support Wi-Fi Direct are connected, if you want to connect other User Guide 2-24 - Kyocera ECOSYS P3260dn | P3260dn Operation Guide - Page 58
disabled, the user authentication screen appears. Enter a login user name and password, and select [Login]. The factory default login user name and login password are set as shown below. Login User Name: 6000 Login Password: 6000 Auto Sleep Auto Sleep automatically switches the machine into Sleep if - Kyocera ECOSYS P3260dn | P3260dn Operation Guide - Page 59
Recovery) (models except for Europe) For sleep level, you can toggle between the following two modes: Energy Saver mode and Quick Recovery mode. The default setting is Energy Saver mode. Energy Saver mode reduces power consumption even more than Quick Recovery mode, and allows Sleep Mode to be set - Kyocera ECOSYS P3260dn | P3260dn Operation Guide - Page 60
page description languages (PCL XL, KPDL, etc.) are supported by a single driver. This printer driver allows you to take full advantage of the features of the machine. Use this driver to create PDF files. This printer driver supports the XPS (XML Paper Specification) format developed by Microsoft - Kyocera ECOSYS P3260dn | P3260dn Operation Guide - Page 61
Installing and Setting up the Machine > Installing Software Installing Software in Windows Express Install The following procedure is an example for installing the software in Windows 10 using [Express Install]. For details on Custom Installation, refer to the following: Custom Install (page 2-30) 1 - Kyocera ECOSYS P3260dn | P3260dn Operation Guide - Page 62
via a network or USB cable and that it is turned on and click (Reload). • If the Windows security window appears, click [Install this driver software anyway]. • To install Status Monitor on Windows versions preceding Windows 8, it is necessary to install Microsoft .NET Framework 4.0 beforehand. 2-29 - Kyocera ECOSYS P3260dn | P3260dn Operation Guide - Page 63
the software. To print a test page, click the "Print a test page" checkbox and select the machine. Click [Finish] to exit the wizard. If a system restart message appears, restart the computer by following the screen prompts. This completes the printer driver installation procedure. Custom Install - Kyocera ECOSYS P3260dn | P3260dn Operation Guide - Page 64
it is turned on and click (Reload). • If the desired device does not appear, select [Add custom device] to directly select the device. 2 Select the driver to be installed. 1 2 3 2-31 - Kyocera ECOSYS P3260dn | P3260dn Operation Guide - Page 65
Installing and Setting up the Machine > Installing Software 3 Click [Utilities] tab and select the utility to be installed. 1 2 3 4 Click [Install]. When you click [Install], a screen asking for your cooperation with data collection will be displayed. Select one of the answer choices and click - Kyocera ECOSYS P3260dn | P3260dn Operation Guide - Page 66
Installing Software 5 Finish the installation. When "Your software is ready to use" appears, you can use the software. To print a test page, click the "Print a test page" checkbox and select the machine. Click [Finish] to exit the wizard. If a system restart message appears, restart the computer by - Kyocera ECOSYS P3260dn | P3260dn Operation Guide - Page 67
In Windows 7, click [Start] button on the Windows and then select [All Programs], [Kyocera], and [Uninstall Kyocera Product Library] to display the Uninstall Wizard. 2 Uninstall the software. Place a check in , click [Uninstall], and follow the on-screen instructions to uninstall the software. 2-34 - Kyocera ECOSYS P3260dn | P3260dn Operation Guide - Page 68
] icon. 2 Display the screen. 1 2 Double-click [Kyocera OS X x.x] depending on your Mac OS version. 3 Install the Printer Driver. Install the printer driver as directed by the instructions in the installation software. This completes the printer driver installation. If a USB connection is used, the - Kyocera ECOSYS P3260dn | P3260dn Operation Guide - Page 69
Installing and Setting up the Machine > Installing Software 4 Configure the printer. 1 Open System Preferences and add the printer. 1 2 2 Select [Default] and click the item that appears in "Name" and then select the driver in "Use". 1 2 3 4 3 The selected machine is added. NOTE When using an IP - Kyocera ECOSYS P3260dn | P3260dn Operation Guide - Page 70
Installing and Setting up the Machine > Checking the Counter Checking the Counter Check the number of sheets printed. 1 Display the screen. [Menu] key key > [Counter] > [OK] key 2 Check the counter. Select the item you want to check, and select the [OK] key. 2-37 - Kyocera ECOSYS P3260dn | P3260dn Operation Guide - Page 71
the Security This machine is shipped with two default users registered one with Machine Administrator rights, settings; therefore, please change the login user name and password. In addition, this machine is equipped with user authentication GUIDE page 8-38 page 8-21 page 8-21 Command Center RX User - Kyocera ECOSYS P3260dn | P3260dn Operation Guide - Page 72
RX User Guide NOTE To fully access the features of the Command Center RX pages, enter the User Name and Password and click [Login]. Entering the predefined administrator password allows the user to access all pages, including Document Box. The factory default setting for the default user with - Kyocera ECOSYS P3260dn | P3260dn Operation Guide - Page 73
problem with this website's security certificate." is displayed, configure the certificate. Command Center RX User Guide Password and click [Login]. Entering the predefined administrator password allows the user to access all pages, including Document Box. The factory default setting for the default - Kyocera ECOSYS P3260dn | P3260dn Operation Guide - Page 74
key key > [Report Print] > [OK] key key > [Status Page] > [OK] key > [Yes] 3 Log in with administrator privileges. The factory default setting for the default user with administrator privileges is shown below. (Upper case and lower case letters are distinguished (case sensitive).) Login User Name - Kyocera ECOSYS P3260dn | P3260dn Operation Guide - Page 75
Installing and Setting up the Machine > Command Center RX 2 Configure the Security Settings. From the [Security Settings] menu, select the setting you want to configure. NOTE For details on settings related to certificates, refer to the following: Command Center RX User Guide 2-42 - Kyocera ECOSYS P3260dn | P3260dn Operation Guide - Page 76
key key > [Report Print] > [OK] key key > [Status Page] > [OK] key > [Yes] 3 Log in with administrator privileges. The factory default setting for the default user with administrator privileges is shown below. (Upper case and lower case letters are distinguished (case sensitive).) Login User Name - Kyocera ECOSYS P3260dn | P3260dn Operation Guide - Page 77
Installing and Setting up the Machine > Command Center RX 2 Specify the host name. Enter the device information, and then click [Submit]. IMPORTANT After changing the setting, restart the network or turn the machine OFF and then ON. To restart the network interface card, click [Reset] in the [ - Kyocera ECOSYS P3260dn | P3260dn Operation Guide - Page 78
key key > [Report Print] > [OK] key key > [Status Page] > [OK] key > [Yes] 3 Log in with administrator privileges. The factory default setting for the default user with administrator privileges is shown below. (Upper case and lower case letters are distinguished (case sensitive).) Login User Name - Kyocera ECOSYS P3260dn | P3260dn Operation Guide - Page 79
Installing and Setting up the Machine > Command Center RX 4 From the [Network Settings] menu, click [Protocol]. 1 2 2 Configure the settings. Set "SMTP (E-mail TX)" to [On] in the "Send Protocols". 2-46 - Kyocera ECOSYS P3260dn | P3260dn Operation Guide - Page 80
Installing and Setting up the Machine > Command Center RX 3 Display the screen. Display the E-mail Settings screen. From the [Function Settings] menu, click [E-mail]. 1 2 2-47 - Kyocera ECOSYS P3260dn | P3260dn Operation Guide - Page 81
to be used for SMTP. Use the SMTP default port 25. SMTP Server Timeout Set the amount on the [Protocol Settings] page. Connection Test Tests to confirm that the settings are correct. e-mail on the machine. Command Center RX User Guide POP3 User Settings E-mail Send Settings E-mail Size - Kyocera ECOSYS P3260dn | P3260dn Operation Guide - Page 82
the information for the custom box you want to register. For details on the fields to populate, refer to the following: Command Center RX User Guide 2 Click [Submit]. 2-49 - Kyocera ECOSYS P3260dn | P3260dn Operation Guide - Page 83
Installing and Setting up the Machine > Command Center RX Printing a document stored in a Custom Box 1 Display the screen. 1 Launch your Web browser. 2 In the address or location bar, enter the machine's IP address or the host name. Print the status page to check the machine's IP address and the - Kyocera ECOSYS P3260dn | P3260dn Operation Guide - Page 84
Installing and Setting up the Machine > Command Center RX 2 Print the document. 2 1 1 Select the document you wish to print. Select the checkbox of the document to be printed. 2 Click [Print]. 3 Configure settings for printing, click [Print]. 2-51 - Kyocera ECOSYS P3260dn | P3260dn Operation Guide - Page 85
3 Preparation before Use This chapter explains the following operations. Loading Paper ...3-2 Precaution for Loading Paper ...3-3 Loading in the Cassettes ...3-4 Loading Statement in the Cassettes (For inch model 3-8 Loading Paper in the Multi Purpose Tray 3-11 Specifying Paper Size and Media Type - Kyocera ECOSYS P3260dn | P3260dn Operation Guide - Page 86
3-4 page 3-4 page 3-4 page 3-4 NOTE • The number of sheets that can be held varies depending on your environment and paper type. • You should not use inkjet printer paper or any paper with a special surface coating. (Such paper may cause paper jams or other faults.) 3-2 - Kyocera ECOSYS P3260dn | P3260dn Operation Guide - Page 87
. Paper that is curled or folded may cause a jam. • Avoid exposing opened paper to high temperatures and high humidity as dampness can be a cause of problems. Seal any remaining paper after loading in the multi purpose tray or cassettes back in the paper storage bag. • If the machine will not be - Kyocera ECOSYS P3260dn | P3260dn Operation Guide - Page 88
that can be loaded in each cassette is shown below. Cassette Cassettes 1 to 5 No. Sheets 500 sheets (Plain paper: 80 g/m2) For details of the supported paper sizes, refer to the following: Choosing the Appropriate Paper (page 11-14) NOTE A6 can only be used in Cassette 1. For the paper type - Kyocera ECOSYS P3260dn | P3260dn Operation Guide - Page 89
before Use > Loading Paper 2 Adjust the cassette size. 1 Adjust the position of the paper width guides located on the left and right sides of the cassette. Press the paper width adjusting tab and slide the guides to the paper size required. Paper sizes are marked on the cassette. 2 Adjust the paper - Kyocera ECOSYS P3260dn | P3260dn Operation Guide - Page 90
paper jams. • Ensure that the loaded paper does not exceed the level indicator (see illustration above). • If paper is loaded without adjusting the paper length guide and paper width guide, the paper may skew or become jammed. 3-6 - Kyocera ECOSYS P3260dn | P3260dn Operation Guide - Page 91
Preparation before Use > Loading Paper 4 Gently push the cassette back in. 5 Specify the type of paper loaded in the cassette using the operation panel. Specifying Paper Size and Media Type (page 3-15) 3-7 - Kyocera ECOSYS P3260dn | P3260dn Operation Guide - Page 92
completely out of the machine. NOTE When pulling the cassette out of the machine, ensure it is supported and does not fall out. 2 Adjust the cassette size. 1 Adjust the position of the paper width guides located on the left and right sides of the cassette. Press the paper width adjusting tab and - Kyocera ECOSYS P3260dn | P3260dn Operation Guide - Page 93
Preparation before Use > Loading Paper 3 Attach the auxiliary guide to the paper length guide as shown in the illustration. 4 Turn the size dial so that "Other" appears in the paper size window. 3 Load paper. 1 Fan the paper, then tap - Kyocera ECOSYS P3260dn | P3260dn Operation Guide - Page 94
the type of paper loaded in the cassette using the operation panel. Specifying Paper Size and Media Type (page 3-15) NOTE When removing the auxiliary guide, hold down the paper length adjusting tab and removing the auxiliary - Kyocera ECOSYS P3260dn | P3260dn Operation Guide - Page 95
Paper in the Multi Purpose Tray The multi purpose tray will hold up to 100 sheets of plain paper (80 g/m2). For details of the supported paper sizes, refer to the following: Choosing the Appropriate Paper (page 11-14) For the paper type setting, refer to the following: Media Type Setting - Kyocera ECOSYS P3260dn | P3260dn Operation Guide - Page 96
Preparation before Use > Loading Paper 2 Pull out the support tray section of the MP tray. 3 Adjust the multi purpose tray size. Paper sizes are marked on the multi purpose tray. 4 Load paper. Insert the paper along the paper width guides into the tray until it stops. After removing new paper from - Kyocera ECOSYS P3260dn | P3260dn Operation Guide - Page 97
it with the new paper before loading the paper back into the tray. • If there is a gap between the paper and the paper width guides, readjust the guides to fit the paper in order to prevent skewed feeding and paper jams. • Ensure that the loaded paper does not exceed the level indicator - Kyocera ECOSYS P3260dn | P3260dn Operation Guide - Page 98
in the multi purpose tray Load the paper with the print side facing up. For the procedure for printing, refer to the following: Printer Driver User Guide Example: When printing the address. Close the flap. Oufuku hagaki (Return postcard) Hagaki (Cardstocks) Portrait form envelopes Open the flap - Kyocera ECOSYS P3260dn | P3260dn Operation Guide - Page 99
setting for cassette 1, for the multi purpose tray, for the optional paper feeder (cassettes 2 to 5) and optional bulk feeder is "A4" or "Letter", and the default media type setting is "Plain". To change the type of paper to be used in cassettes, specify the paper size and media type setting. Paper - Kyocera ECOSYS P3260dn | P3260dn Operation Guide - Page 100
Preparation before Use > Loading Paper Paper Size and Media Type for the Cassettes: If the size dial is set to one of the sizes below, set the media type. "A4", "A5", "B5", "Letter", "Legal" or "A6" (Cassette 1 only) If the size dial is set to "Other", configure the settings for the paper size and - Kyocera ECOSYS P3260dn | P3260dn Operation Guide - Page 101
Preparation before Use > Loading Paper Paper Size and Media Type for the Multi Purpose Tray (MP Tray Setting or the Bulk Feeder (Bulk Feeder Setting)) Specify the paper size and media type of paper to be used in the multi purpose tray. Item Description Paper Size Media Type*1 Available options - Kyocera ECOSYS P3260dn | P3260dn Operation Guide - Page 102
Preparation before Use > Paper Stopper Paper Stopper When using paper A4/Letter or larger, open the paper stopper shown in the figure. 3-18 - Kyocera ECOSYS P3260dn | P3260dn Operation Guide - Page 103
topics: Printing from PC ...4-2 Printing on Non-standard Sized Paper ...4-4 Banner printing ...4-5 Printer Driver Print Settings Screen ...4-9 Printer Driver Help ...4-10 Changing the Default Printer Driver Settings (Windows 10 4-10 Canceling Printing from a Computer ...4-10 Printing by AirPrint - Kyocera ECOSYS P3260dn | P3260dn Operation Guide - Page 104
from PC Printing from PC Follow the steps below to print documents from applications. NOTE • To print the document from applications, install the printer driver on your computer from the supplied DVD (Product Library). • In some environments, the current settings are displayed at the bottom of the - Kyocera ECOSYS P3260dn | P3260dn Operation Guide - Page 105
Printing from PC > Printing from PC 2 Select the [Basic] tab. 3 Click "Print size" menu and select the paper size to use for printing. To load the paper of size that is not included in print sizes of the machine such as cardstock or envelopes, the paper size needs to be registered. Printing on Non- - Kyocera ECOSYS P3260dn | P3260dn Operation Guide - Page 106
is not included in the print sizes of the machine, register the paper size in the [Basic] tab of the print settings screen of the printer driver. The registered size can be selected from the "Print size" menu. NOTE To execute printing at the machine, set the paper size and type in - Kyocera ECOSYS P3260dn | P3260dn Operation Guide - Page 107
(36.03") is specified for printing, the print job is treated as banner printing. Follow the steps below to set banner paper in the printer driver. 1 Display the screen. Click [File] and select [Print] in the application. 2 Configure the settings. 1 Select the machine from the "Name" menu and click - Kyocera ECOSYS P3260dn | P3260dn Operation Guide - Page 108
Printing from PC > Printing from PC 3 Register the paper size. 21 3 4 5 1 Click the [New] button. 2 Enter the length (470.1 mm (18.52") or longer), and width of the custom paper size being registered. 3 Enter the name of the paper. 4 Click the [Save] button. 5 Click the [OK] button. 4 Configure the - Kyocera ECOSYS P3260dn | P3260dn Operation Guide - Page 109
Printing from PC > Printing from PC 5 Load paper. 1 Open the multi purpose tray and extend the support tray section of the multi purpose tray. 2 Load paper. 4-7 - Kyocera ECOSYS P3260dn | P3260dn Operation Guide - Page 110
button. When you execute printing in this case, a message appears on the machine's operation panel. Place the paper in the Multi Purpose tray, continue to support it so that it does not fall, and select [Continue]. To cancel printing, select [Cancel]. Use MP tray to print on this paper. Custom Plain - Kyocera ECOSYS P3260dn | P3260dn Operation Guide - Page 111
Printing from PC > Printing from PC Printer Driver Print Settings Screen The printer driver print settings screen allows you to configure a variety of print-related settings. Printer Driver User Guide 1 3 2 No. Description 1 [Quick Print] tab Provides icons that can be used to easily configure - Kyocera ECOSYS P3260dn | P3260dn Operation Guide - Page 112
following: Printer Driver User Guide 1 Click [Start] button on the Windows and then select [Windows System], [Control Panel], and [View devices and printers]. 2 Right-click the printer driver icon of the machine, and click the [Print Setup] menu of the printer driver. 3 Select the default settings - Kyocera ECOSYS P3260dn | P3260dn Operation Guide - Page 113
set machine location information in Command Center RX. Command Center RX User Guide Printing by Google Cloud Print Google Cloud Print is a printing service provided by Google and does not require a printer driver. This service enables a user with a Google account to print from a machine connected to - Kyocera ECOSYS P3260dn | P3260dn Operation Guide - Page 114
• To use Stored Job Box and Quick Copy Box, an optional SSD must be installed in the machine. • For information on how to use the printer driver software, refer to the following: Printer Driver User Guide 4-12 - Kyocera ECOSYS P3260dn | P3260dn Operation Guide - Page 115
, specify a 4-digit access code in the printer driver. The job is released for printing by entering [Document Box] key key > [Private/Stored] > [OK] key NOTE If the default screen of the box is set to a Custom Box, display the Job Box screen. [ password entry screen will be displayed. Enter the - Kyocera ECOSYS P3260dn | P3260dn Operation Guide - Page 116
Printer Deleting the Documents Delete the documents stored in a Private Print box. The procedure is as follows. 1 Display the screen. 1 [Document Box] key key > [Private/Stored] > [OK] key NOTE If the default is protected by an access code, the password entry screen will be displayed. Enter the - Kyocera ECOSYS P3260dn | P3260dn Operation Guide - Page 117
Data Saved on the Printer Printing Document from Display the screen. 1 [Document Box] key key > [Private/Stored] > [OK] key NOTE If the default screen of the box is set to a Custom Box, display the Job Box screen. [Document Box] key > code, the password entry screen will be displayed. Enter the - Kyocera ECOSYS P3260dn | P3260dn Operation Guide - Page 118
Printer Deleting the Documents Delete the documents stored in a Stored Job box. The procedure is as follows. 1 Display the screen. 1 [Document Box] key key > [Private/Stored] > [OK] key NOTE If the default is protected by an access code, the password entry screen will be displayed. Enter the - Kyocera ECOSYS P3260dn | P3260dn Operation Guide - Page 119
printed. Activating Quick Copy and printing a document using the printer driver allow the print data to be stored in the Quick the screen. 1 [Document Box] key key > [Quick Copy] > [OK] key NOTE If the default screen of the box is set to a Custom Box, display the Job Box screen. [Document Box] key - Kyocera ECOSYS P3260dn | P3260dn Operation Guide - Page 120
Printing from PC > Printing Data Saved on the Printer Deleting the Documents You can delete the documents stored in the Quick Copy box. The procedure is as follows. 1 Display the screen. 1 [Document Box] key key > [Quick Copy] > [OK] key NOTE If the default screen of the box is set to a Custom Box, - Kyocera ECOSYS P3260dn | P3260dn Operation Guide - Page 121
Printing a multiple-print job in Proof and Hold using the printer driver allows only a single copy to be printed while maintaining the screen. 1 [Document Box] key key > [Quick Copy] > [OK] key NOTE If the default screen of the box is set to a Custom Box, display the Job Box screen. [Document Box] - Kyocera ECOSYS P3260dn | P3260dn Operation Guide - Page 122
Printing from PC > Printing Data Saved on the Printer Deleting the Documents You can delete the documents stored in the Proof and Hold box. The procedure is as follows. 1 Display the screen. 1 [Document Box] key key > [Quick Copy] > [OK] key NOTE If the default screen of the box is set to a Custom - Kyocera ECOSYS P3260dn | P3260dn Operation Guide - Page 123
Box Setting Job Box Setting Configures settings for Job Box. 1 Display the screen. [Document Box] key key > [Job Box Setting] > [OK] key NOTE If the default screen of the box is set to a Custom Box, display the Job Box screen. [Document Box] key > [Back] key key > [Job Box] > [OK] key - Kyocera ECOSYS P3260dn | P3260dn Operation Guide - Page 124
printer status and provides an ongoing reporting function. NOTE When you activate Status Monitor, check the status below. • KX DRIVER below to exit the Status Monitor. • Exit manually: Click the settings icon and select Exit in The status of the printer is displayed using icons. Detailed information is displayed - Kyocera ECOSYS P3260dn | P3260dn Operation Guide - Page 125
list and it can be canceled using the menu displayed with a right-click. Paper Tray Status Tab Information is displayed about the paper in the printer and about the amount of paper remaining. Toner Status Tab The amount of toner remaining is displayed. 4-23 - Kyocera ECOSYS P3260dn | P3260dn Operation Guide - Page 126
menu is displayed when the settings icon is clicked. • Command Center RX If the printer is connected to a TCP/IP network and has its own IP address, use a is not displayed when using USB connection. Command Center RX User Guide • Notification... This sets the display of the Status Monitor. Status - Kyocera ECOSYS P3260dn | P3260dn Operation Guide - Page 127
Printing from PC > Status Monitor Status Monitor Notification Settings The Status Monitor settings and event list details are displayed. Select whether notification is performed when an error in the event list occurs. 1 Select Enable event notification. If this setting is set to Off, then the Status - Kyocera ECOSYS P3260dn | P3260dn Operation Guide - Page 128
5 Operation on the Machine This chapter explains the following topics: Canceling Jobs ...5-2 What is Document Box? ...5-3 Using a Custom Box ...5-5 Creating a New Custom Box ...5-5 Editing and Deleting Custom Box ...5-7 Storing Documents ...5-7 Printing Documents ...5-8 Editing Documents ...5-9 - Kyocera ECOSYS P3260dn | P3260dn Operation Guide - Page 129
Operation on the Machine > Canceling Jobs Canceling Jobs You can also cancel jobs by selecting the [Cancel] key. 1 While the printer displays "Processing.", select [Cancel] key. The "Job Cancel List" appears, showing the list of current print jobs. 2 Cancel a job. 1 Select the job to cancel, and - Kyocera ECOSYS P3260dn | P3260dn Operation Guide - Page 130
job from the application software, specify a 4-digit access code in the printer driver. The job is released for printing by entering the access code on the you can reprint the required number of copies from the operation panel. By default, up to 32 documents can be stored. When power is turned off, - Kyocera ECOSYS P3260dn | P3260dn Operation Guide - Page 131
Operation on the Machine > What is Document Box? USB Drive Box (page 5-11) A USB drive stick can be connected to the USB drive slot on the machine to print a saved file. You can print data directly from the USB drive without a PC. 5-4 - Kyocera ECOSYS P3260dn | P3260dn Operation Guide - Page 132
from operation panel can also be made using Command Center RX. Command Center RX User Guide Creating a New Custom Box NOTE • To use Custom Box, an optional SSD must privileges. The factory default login user name and login password are set as shown below. Login User Name: 6000 Login Password: 6000 • - Kyocera ECOSYS P3260dn | P3260dn Operation Guide - Page 133
the owner from the user list that appears. Select whether to share the box. Box Password User access to the box can be restricted by specifying a password to protect the box. Entering a password is not mandatory. Enter a password of up to 16 characters and select the [OK] key. Reenter the same - Kyocera ECOSYS P3260dn | P3260dn Operation Guide - Page 134
. Select the [Document Box] key. NOTE If the default screen of the box is set to a Job Box password, enter the correct password. Storing Documents Custom box stores the print data which is sent from a PC. For the operation of the printing from the PC, refer to the following: Printer Driver User Guide - Kyocera ECOSYS P3260dn | P3260dn Operation Guide - Page 135
below. 1 Display the screen. 1 Select the [Document Box] key. NOTE If the default screen of the box is set to a Job Box, display the Custom Box screen. ] key. NOTE • If a custom box is protected by a password, enter the correct password. • Select [Select] to perform the following operations. - [Sort - Kyocera ECOSYS P3260dn | P3260dn Operation Guide - Page 136
below. 1 Display the screen. 1 Select the [Document Box] key. NOTE If the default screen of the box is set to a Job Box, display the Custom Box screen. OK] key. NOTE • If a custom box is protected by a password, enter the correct password. • Select [Menu] to perform the following operations. - [Sort - Kyocera ECOSYS P3260dn | P3260dn Operation Guide - Page 137
below. 1 Display the screen. 1 Select the [Document Box] key. NOTE If the default screen of the box is set to a Job Box, display the Custom Box screen. OK] key. NOTE • If a custom box is protected by a password, enter the correct password. • Select [Menu] to perform the following operations. - [Sort - Kyocera ECOSYS P3260dn | P3260dn Operation Guide - Page 138
file (Version 1.7 or older) TIFF file (TIFF V6/TTN2 format) JPEG file XPS file OpenXPS file Encrypted PDF file • PDF files you wish to print should have an extension (.pdf). • Files to be printed should be saved no further down than the top 3 folder levels, including the root folder. • Plug the USB - Kyocera ECOSYS P3260dn | P3260dn Operation Guide - Page 139
Operation on the Machine > Printing Documents Stored in Removable USB Drive 4 Change the number of copies, duplex printing, etc. as desired. For the features that can be selected, refer to the following: USB Drive (Printing Documents) (page 6-3) 5 Select the [OK] key. Printing of the selected file - Kyocera ECOSYS P3260dn | P3260dn Operation Guide - Page 140
Operation on the Machine > Removing USB Drive Removing USB Drive Follow the steps below to remove the USB drive. IMPORTANT Be sure to follow the proper procedure to avoid damaging the data or USB drive. 1 Display the screen. [Menu] key key > [USB Drive] > [OK] key 2 Select [Remove USB Drive key > - Kyocera ECOSYS P3260dn | P3260dn Operation Guide - Page 141
Custom Box (Printing) ...6-2 USB Drive (Printing Documents) ...6-3 Functions ...6-4 EcoPrint ...6-4 Duplex ...6-4 Job Finish Notice ...6-4 File Name Entry ...6-5 Quiet Mode ...6-5 Del. after Print (Delete after Printed) ...6-5 Encrypted PDF ...6-5 TIFF/JPEG Size ...6-6 XPS FitTo Page ...6-6 6-1 - Kyocera ECOSYS P3260dn | P3260dn Operation Guide - Page 142
Finish Notice Del. after Print Description Lower print speed for quiet processing. Print a document on both sides of the paper. EcoPrint saves toner when printing. Adds a file name. Sends E-mail notice when a job is complete. Automatically deletes a document from the box once printing is complete - Kyocera ECOSYS P3260dn | P3260dn Operation Guide - Page 143
speed for quiet processing. Print a document on both sides of the paper. EcoPrint saves toner when printing. Adds a file name. Sends E-mail notice when a job is complete. Enter the preassigned password to print the PDF data. Select the image size when printing JPEG or TIFF files. Reduces or enlarges - Kyocera ECOSYS P3260dn | P3260dn Operation Guide - Page 144
Using Various Functions > Functions Functions EcoPrint EcoPrint saves toner when printing. Use this function for test prints or any other occasion when high quality print is not required. (Value: [Off] / [On]) Duplex Print a document on both sides of the paper. The - Kyocera ECOSYS P3260dn | P3260dn Operation Guide - Page 145
deletes a document from the box once printing is complete. (Value: [Off] / [On]) Encrypted PDF Enter the preassigned password to print the PDF data. Enter the Password, and select [OK]. NOTE For details on entering the password, refer to the following: Character Entry Method (page 11-9) 6-5 - Kyocera ECOSYS P3260dn | P3260dn Operation Guide - Page 146
Using Various Functions > Functions TIFF/JPEG Size Select the image size when printing JPEG or TIFF files. (Value: [Paper Size] / [Image Resolution] / [Print Resolution]) Item Paper Size Image Resolution Print Resolution Description Fits the image size to the selected paper size. Prints at - Kyocera ECOSYS P3260dn | P3260dn Operation Guide - Page 147
7 Status/Job Cancel This chapter explains the following topics: Checking Job Status ...7-2 Checking Job History ...7-3 Sending the Log History ...7-4 Device/Communication ...7-5 Checking the Remaining Amount of Toner and Paper (Paper/Supplies 7-6 7-1 - Kyocera ECOSYS P3260dn | P3260dn Operation Guide - Page 148
This setting can also be changed from Command Center RX. Command Center RX User Guide 3 Check the status. Select the [►] key to view the next screen. Select ]: Waiting Printing [-----]: The job is finished. [Printer]: [Report]: [USB]: [Box]: Printer job Report/List Data from USB drive Job from - Kyocera ECOSYS P3260dn | P3260dn Operation Guide - Page 149
the history of completed jobs. NOTE Job history is also available by Command Center RX or KYOCERA Net Viewer from the computer. Command Center RX User Guide KYOCERA Net Viewer User Guide Displaying Job History Screen 1 Display the screen. 1 While the machine is printing or awaiting printing, select - Kyocera ECOSYS P3260dn | P3260dn Operation Guide - Page 150
has occurred. [Cancel]: The job has been canceled. [Printer]: [Report]: [USB]: [Box]: Printer job Report/List Data from USB drive Job from Document Box 2-13) The factory default login user name and login password are set as shown below. Login User Name: 6000 Login Password: 6000 Sending the Log - Kyocera ECOSYS P3260dn | P3260dn Operation Guide - Page 151
Status/Job Cancel > Device/Communication Device/Communication Configure the devices/lines installed or connected to this machine or check their status. 1 Display the screen. Select [Status], while the machine is printing or awaiting printing. 2 Check the status. Select the items you want to check. - Kyocera ECOSYS P3260dn | P3260dn Operation Guide - Page 152
. If you select [Paper], you will return to the paper status screen. 2 Check the status. The items you can check are described below. "Toner Status" The amount of toner remaining is shown in levels. "Paper Status" You can check the paper size and amount of paper remaining in the paper source. The - Kyocera ECOSYS P3260dn | P3260dn Operation Guide - Page 153
8 Setup and Registration (System Menu) This chapter explains the following topics: System Menu ...8-2 Menu Settings ...8-3 Report ...8-4 Paper Settings ...8-6 Print Settings ...8-10 Network ...8-13 Optional Network ...8-27 Device Common ...8-30 Security ...8-36 User/Job Account ...8-38 Adjust/Maint - Kyocera ECOSYS P3260dn | P3260dn Operation Guide - Page 154
that require administer privileges, you must log in with administrator privileges. The factory default login user name and login password are set as shown below. Login User Name: 6000 Login Password: 6000 • If function default settings have been changed, the [Reset] key can be selected in each - Kyocera ECOSYS P3260dn | P3260dn Operation Guide - Page 155
8-35 Set the Bluetooth keyboard. page 8-35 Set the amount of remaining toner to notify the administrator when to order a toner when the toner is running low. page 8-35 The security functions can be set up to protect printer operation and the print data. page 8-36 This allows you to protect - Kyocera ECOSYS P3260dn | P3260dn Operation Guide - Page 156
. page 8-39 Check the machine's system and engine software versions. page 8-39 Report Print reports to check the machine settings and status. Default settings for printing the result reports can also be configured. Report Print [Menu] key key > [Report] > [OK] key key > [Report Print] > [OK - Kyocera ECOSYS P3260dn | P3260dn Operation Guide - Page 157
is 1 to 100. This setting is displayed when [Off/On] is set to [On]. You can also send the log history to the specified destinations manually. Set and check the destination to which log histories are sent. Value Confirmation: Check the destination to which log histories are sent. Address Entry: Set - Kyocera ECOSYS P3260dn | P3260dn Operation Guide - Page 158
Setup and Registration (System Menu) > System Menu Paper Settings [Menu] key key > [Paper Settings] > [OK] key Configure settings for paper. Item MP Tray Set. Bulk Feeder Set. Cassette 1 (to 5) Set. Media Type Set. Reset Type Adj. Paper Setup Msg MP Tray Bulk Feeder Cassette 1 (to 5) Description - Kyocera ECOSYS P3260dn | P3260dn Operation Guide - Page 159
Setup and Registration (System Menu) > System Menu Bulk Feeder Set. [Menu] key key > [Paper Settings] > [OK] key key > [Bulk Feeder Set.] > [OK] key Select paper size and media type for Bulk Feeder. Item Description Paper Size Media Type*1 Available options are as follows: Values Envelope - Kyocera ECOSYS P3260dn | P3260dn Operation Guide - Page 160
Setup and Registration (System Menu) > System Menu Cassette 1 (to 5) Set. [Menu] key key > [Paper Settings] > [OK] key key > [Cassette 1 (to 5) Set.] > [OK] key Select paper size and media type for Cassettes 1 to 5. Item Media Type*1 Other Paper Size Custom PaperSize*3 Description Select the - Kyocera ECOSYS P3260dn | P3260dn Operation Guide - Page 161
to 74 g/m² Heavy 2 Normal 2 75 g/m² to 90 g/m² Heavy 3 Normal 3 91 g/m² to 105 g/m² Extra Heavy Each media type's default weight is indicated. Media Type Default Media Type Plain Transparency Rough Vellum Labels Recycled Preprinted Bond Normal 2 Extra Heavy Normal 2 Light Heavy 1 Normal - Kyocera ECOSYS P3260dn | P3260dn Operation Guide - Page 162
Paper Feed Mode Duplex Paper Output Override A4/LTR Description Select the default paper source from Cassette 1-5 and multi purpose tray. Values: MP Tray will be from the MP tray regardless of what is set in the printer driver. While printing from the computer, select how to feed paper when the - Kyocera ECOSYS P3260dn | P3260dn Operation Guide - Page 163
-850, Line Printer You can select the default font. The default font can be one of the internal fonts or a font that is downloaded to the printer memory or stored can be set. Values: Regular, Dark You can change the size of the default font. Values: 4.00 to 999.75 characters per inch (in 0.25-point - Kyocera ECOSYS P3260dn | P3260dn Operation Guide - Page 164
recommended for test copies where faded printing is not a problem. Values: Off, On Select the default EcoPrint SaveLvl. Values: 1 (Lower), 2, 3, 4, 5 (Higher) Set the resolution used for printing. Values: Fine1200, Fast1200, 600dpi, 300dpi NOTE Settings that are received from the printer driver have - Kyocera ECOSYS P3260dn | P3260dn Operation Guide - Page 165
Menu) > System Menu Item User Name Job Name Job Terminator Description Set whether the user name set in the printer driver is displayed. Value: Off, On Set whether the job name set in the printer driver is displayed. Value: Off, Job Name, Job No.+Job Name, Job Name+Job No. You can select the - Kyocera ECOSYS P3260dn | P3260dn Operation Guide - Page 166
Description Select whether to use Wi-Fi. Value: Off, On - Check the wireless LAN status. If the machine will connect to an access point that supports the automatic wireless network setup, connection settings can be configured by Quick Setup. NOTE If you are connecting to an access point that has WEP - Kyocera ECOSYS P3260dn | P3260dn Operation Guide - Page 167
Item Custom Setup Network Name (SSID) Netwk Authentic. Encryption Description The detailed settings for wireless LAN can be changed. Set the SSID (Service Set Identifier) of the wireless LAN to which the machine connects. NOTE Up to 32 characters can be entered. Select network authentication - Kyocera ECOSYS P3260dn | P3260dn Operation Guide - Page 168
IP Settings TCP/IP IPv4 Setting DHCP Auto-IP IP Address Subnet Mask Default Gateway DNS Server Description - Select whether to use TCP/IP Protocol. Value be entered. Set DNS server (IPv4). Value: Auto (DHCP), Manual NOTE When [Manual] is selected, you can enter static DNS server information in the - Kyocera ECOSYS P3260dn | P3260dn Operation Guide - Page 169
Selecting [On] displays IP address in [Link Local] after restarting the network. Manually specify the IP address, prefix length, and gateway address of TCP/IP ( is displayed when [IPv6 Setting] is set to [On]. To enter "Default Gateway", set [RA (Stateless)] to [Off]. Select whether to use RA - Kyocera ECOSYS P3260dn | P3260dn Operation Guide - Page 170
Setup and Registration (System Menu) > System Menu Wired Netwk. Set [Menu] key key > [Network] > [OK] key key > [Wired Netwk. Set] > [OK] key Configure wired network settings. Item TCP/IP Settings LAN Interface Description For details on setting value. TCP/IP Settings (page 8-16) Specify the - Kyocera ECOSYS P3260dn | P3260dn Operation Guide - Page 171
Setup and Registration (System Menu) > System Menu NetBEUI Off/On Item Available Net. Wi-Fi Direct*2 Wi-Fi*2 Wired Network SNMPv3 Off/On Available Net. Wi-Fi Direct*2 Wi-Fi*2 Wired Network FTP(Server) Off/On Available Net. Wi-Fi Direct*2 Wi-Fi*2 Wired Network SNMP Off/On Available Net. Wi- - Kyocera ECOSYS P3260dn | P3260dn Operation Guide - Page 172
, select [Not Secure (IPP&IPPS)] on IPP Security under Security Settings from the Command Center RX.*1 Value: Off, On Specifies the port number used. The default port number is 631.*1 Value: 1 to 32767 NOTE This function is displayed when [Off/On] is set to [On]. Set whether to enable this function - Kyocera ECOSYS P3260dn | P3260dn Operation Guide - Page 173
by SSL.*1, *3 Value: Off, On NOTE When selecting [On], it also requires a certificate for SSL. the default certificate is the selfcertificate of the machine. Command Center RX User Guide - Set whether to enable this function for each network. Value: Disable, Enable NOTE This function is displayed - Kyocera ECOSYS P3260dn | P3260dn Operation Guide - Page 174
requires a certificate for SSL. The default certificate is the self- certificate of the machine. Command Center RX User Guide - Set whether to enable this Off/On] is set to [On]. Set whether to use our proprietary web services.*1 Value: Off, On - Set whether to enable this function for each network - Kyocera ECOSYS P3260dn | P3260dn Operation Guide - Page 175
Wi-Fi*2 Wired Network Description Set whether to use our proprietary web services over SSL.*1, *3 Value: Off, On - Set whether to enable for SSL. the default certificate is the self- certificate of the machine. Command Center RX User Guide Specifies the port number used. The default port number is - Kyocera ECOSYS P3260dn | P3260dn Operation Guide - Page 176
is set to [On]. • When selecting [On], it also requires a certificate for SSL. the default certificate is the self- certificate of the machine. Command Center RX User Guide Specifies the port number used. The default port number is 9063.*1 Value: 1 to 32767 NOTE This function is displayed when [Off - Kyocera ECOSYS P3260dn | P3260dn Operation Guide - Page 177
is set to [On]. • When selecting [On], it also requires a certificate for SSL. the default certificate is the self- certificate of the machine. Command Center RX User Guide Specifies the port number used. The default port number is 9061.*1 Value: 1 to 32767 NOTE This function is displayed when [Off - Kyocera ECOSYS P3260dn | P3260dn Operation Guide - Page 178
> [OK] key When the trouble occurs on this product, it is possible to explain the operational procedure and the troubleshooting method through the internet from our administrator privileges can also execute remote operation. [Use Password]: Enter the password, then re-enter it to confirm. [Admin - Kyocera ECOSYS P3260dn | P3260dn Operation Guide - Page 179
the push button on the access point. NOTE The push button method supports only the WPS. Starts connection using the machine's PIN code. Enter the connection with a wireless network by selecting [Connect]. Set the SSID (Service Set Identifier) of the wireless LAN to which the machine connects. NOTE - Kyocera ECOSYS P3260dn | P3260dn Operation Guide - Page 180
Setup and Registration (System Menu) > System Menu Item Description Encryption Select encryption settings. The setting values vary depending on the "Netwk Authentic." setting. Data Encryption Set the encryption method. When "Netwk Authentic." is set to [Open] or [Shared]: Value: Disable, WEP - Kyocera ECOSYS P3260dn | P3260dn Operation Guide - Page 181
NOTE This function is displayed when the optional Network Interface Kit is installed. MACAddressFilter Select whether to use MAC Address Filter. Operation Guide for the optional Network Interface Kit Value: Off, On Restart Network Restarts the network card of the device. *1 The setting will be - Kyocera ECOSYS P3260dn | P3260dn Operation Guide - Page 182
Setup and Registration (System Menu) > System Menu Device Common Configures overall machine operation. Language [Menu] key key > [Device Common] > [OK] key key > [Language] > [OK] key Language Item Description Select the language displayed on the message display. Def. Screen(Box) [Menu] key - Kyocera ECOSYS P3260dn | P3260dn Operation Guide - Page 183
] key key > [Device Common] > [OK] key key > [Format SSD] > [OK] key Format an optional SSD. When an optional SSD is inserted into the printer for the first time, it must be formatted before use. IMPORTANT Formatting will destroy any existing data on a storage device including a used SSD. 8-31 - Kyocera ECOSYS P3260dn | P3260dn Operation Guide - Page 184
: Message to cancel printing is displayed. Turn this setting to [On] if you want the error displayed when the MP tray is configured as the default paper source, and there is no paper in the MP tray, or turn it to [Off] not to have the error displayed. Value: Off, On - Kyocera ECOSYS P3260dn | P3260dn Operation Guide - Page 185
Timer Power Off Rule (models for Europe) Description If no jobs are run for a certain period of time, automatically reset settings and return to the default setting. Select to use Auto Panel Reset or not. Value: Off, On NOTE The time allowed to elapse before the panel is reset is set - Kyocera ECOSYS P3260dn | P3260dn Operation Guide - Page 186
Setup and Registration (System Menu) > System Menu Item Description Power Off Timer (models for Europe) Select whether to turn off the power automatically after a period of inactivity. Value: 1 hour, 2 hours, 3 hours, 4 hours, 5 hours, 6 hours, 9 hours, 12 hours, 1 day, 2 days, 3 days, 4 days, 5 - Kyocera ECOSYS P3260dn | P3260dn Operation Guide - Page 187
setting range is 5 to 100% (in 5% increments). Displayed when [Off/On] is set to [On]. NOTE Selecting [Off] alerts you low toner when the amount of remaining toner becomes 5%. Msg Banner Print [Menu] key key > [Device Common] > [OK] key key > [Msg Banner Print] > [OK] key Item Msg Banner Print - Kyocera ECOSYS P3260dn | P3260dn Operation Guide - Page 188
Setup and Registration (System Menu) > System Menu Security The security functions can be set up to protect printer operation and the print data. Network Security [Menu] key key > [Security] > [OK] key key > [Network Security] > [OK] key SSL Setting Item SSL Select the SSL - Kyocera ECOSYS P3260dn | P3260dn Operation Guide - Page 189
that uses six to 16 alphanumeric characters and symbols. You will need to enter the password again for confirmation. IMPORTANT Avoid any easy-to-guess numbers for the security password (e.g. 11111111 or 12345678). This can be used to delete all the data stored in the SSD. Overwrite all the data - Kyocera ECOSYS P3260dn | P3260dn Operation Guide - Page 190
) > System Menu Item DataSanitization Run Immediately Schedule Device Use Description Return the following information registered in the machine to the factory defaults. • System settings • Data saved in Custom Box • Optional applications IMPORTANT Data saved in an application or SD card cannot be - Kyocera ECOSYS P3260dn | P3260dn Operation Guide - Page 191
any unstable operation by the machine. (Same as the computer restart.) Settings for machine maintenance and inspection. This menu is primarily used by service technicians to perform maintenance. Op Functions [Menu] key key > [Op Functions] > [OK] key Item Op Functions Description You can use the - Kyocera ECOSYS P3260dn | P3260dn Operation Guide - Page 192
9 User Authentication and Accounting (User Login, Job Accounting) This chapter explains the following topics: Overview of User Login Administration ...9-2 Enabling User Login Administration ...9-3 Setting User Login Administration ...9-5 Adding a User (Local User List) ...9-5 Changing User - Kyocera ECOSYS P3260dn | P3260dn Operation Guide - Page 193
is administered on this machine. Enter a correct login user name and password for user authentication to login. 1 Enable User Login Administration (page from PC. To Manage the Users to Print from PCs Printer driver settings are necessary to manage the users that print on the machine from PCs - Kyocera ECOSYS P3260dn | P3260dn Operation Guide - Page 194
, and select [Login]. For this, you need to login with administrator privileges. The factory default login user name and login password are set as shown below. Login User Name: 6000 Login Password: 6000 2 key > [User Login Set.] > [OK] key 2 Configure the settings. 1 key > [User Login] > [OK - Kyocera ECOSYS P3260dn | P3260dn Operation Guide - Page 195
Accounting) > Enabling User Login Administration 6 Enter the port number and select the [OK] key. NOTE If the login user name and password are rejected, check the following settings. • Network Authentication setting of the machine • User property of the Authentication Server • Date and time setting - Kyocera ECOSYS P3260dn | P3260dn Operation Guide - Page 196
new users. KYOCERA Net Manager Install Manual NOTE By default, one of each default user with machine administrator rights and administrator privileges is already stored. Each user's properties are: Machine Administrator User Name: DeviceAdmin Login User Name: 6000 Login Password: Access Level - Kyocera ECOSYS P3260dn | P3260dn Operation Guide - Page 197
authority. You can only view user information if you log in as a regular user. The factory default login user name and login password are set as shown below. Login User Name: 6000 Login Password: 6000 1 Display the screen. 1 [Menu] key key > [User/Job Account] > [OK] key NOTE If the login - Kyocera ECOSYS P3260dn | P3260dn Operation Guide - Page 198
authority, only the information of that user can be changed. 3 Select the [OK] key. The user information is changed. Deleting a user To delete a user, use KYOCERA Net Manager. KYOCERA Net Manager Install Manual 9-7 - Kyocera ECOSYS P3260dn | P3260dn Operation Guide - Page 199
a PC, the following settings are necessary in the printer driver. Instructions are based on interface elements as they appear in password for each print job. [Prompt for name]: A screen for entering the user name and password will be displayed when attempting a printing. The user name and password - Kyocera ECOSYS P3260dn | P3260dn Operation Guide - Page 200
User Authentication and Accounting (User Login, Job Accounting) > Setting User Login Administration 3 Click [OK]. NOTE For other settings of job accounting, refer to the following: Printer Driver User Guide 9-9 - Kyocera ECOSYS P3260dn | P3260dn Operation Guide - Page 201
be obtained should be set with Command Center RX. Command Center RX User Guide 1 Display the screen. 1 [Menu] key key > [User/Job with administrator privileges. The factory default login user name and login password are set as shown below. Login User Name: 6000 Login Password: 6000 2 key > [User - Kyocera ECOSYS P3260dn | P3260dn Operation Guide - Page 202
, and select [Login]. For this, you need to login with administrator privileges. The factory default login user name and login password are set as shown below. Login User Name: 6000 Login Password: 6000 2 key > [User Login Set.] > [OK] key 2 Configure the settings key > [ID Card Settings] > [OK - Kyocera ECOSYS P3260dn | P3260dn Operation Guide - Page 203
, and select [Login]. For this, you need to login with administrator privileges. The factory default login user name and login password are set as shown below. Login User Name: 6000 Login Password: 6000 2 key > [User Login Set.] > [OK] key 2 Configure the settings key > [PIN Login] > [OK] key - Kyocera ECOSYS P3260dn | P3260dn Operation Guide - Page 204
Administration This section explains procedures while setting job accounting. Login/Logout If user login administration is enabled, the login user name and login password entry screen appears each time you use this machine. Use the procedure below to login and logout. Login If the login user name - Kyocera ECOSYS P3260dn | P3260dn Operation Guide - Page 205
be printed from the PC on the network, you need to configure settings by using the printer driver on the PC. 1 Set Job Accounting for the PC on the network by using the printer driver. (Refer to page 9-21.) 2 Execute printing. 3 Count the number of pages printed. A: 00000001 B: 00000002 100 400 - Kyocera ECOSYS P3260dn | P3260dn Operation Guide - Page 206
, and select [Login]. For this, you need to login with administrator privileges. The factory default login user name and login password are set as shown below. Login User Name: 6000 Login Password: 6000 2 key > [Job Account.Set.] > [OK] key 2 Configure the settings key > [Job Accounting] > [OK - Kyocera ECOSYS P3260dn | P3260dn Operation Guide - Page 207
, and select [Login]. For this, you need to login with administrator privileges. The factory default login user name and login password are set as shown below. Login User Name: 6000 Login Password: 6000 2 key > [Job Account.Set.] > [OK] key 2 Configure the settings key > [AccountingAccess] > [OK - Kyocera ECOSYS P3260dn | P3260dn Operation Guide - Page 208
, and select [Login]. For this, you need to login with administrator privileges. The factory default login user name and login password are set as shown below. Login User Name: 6000 Login Password: 6000 2 key > [Job Account.Set.] > [OK] key key > [Account. (Local)] > [OK] key key > [Account - Kyocera ECOSYS P3260dn | P3260dn Operation Guide - Page 209
User Authentication and Accounting (User Login, Job Accounting) > Setting an Account Restricting the Use of the Machine This section explains how to restrict the use of the machine by account or the number of sheets available. Restriction Items Item Print Restrict. Descriptions Limits the total - Kyocera ECOSYS P3260dn | P3260dn Operation Guide - Page 210
, and select [Login]. For this, you need to login with administrator privileges. The factory default login user name and login password are set as shown below. Login User Name: 6000 Login Password: 6000 2 key > [Job Account.Set.] > [OK] key key > [Account. (Local)] > [OK] key key > [Account - Kyocera ECOSYS P3260dn | P3260dn Operation Guide - Page 211
, and select [Login]. For this, you need to login with administrator privileges. The factory default login user name and login password are set as shown below. Login User Name: 6000 Login Password: 6000 2 key > [Job Account.Set.] > [OK] key key > [Account. (Local)] > [OK] key key > [Account - Kyocera ECOSYS P3260dn | P3260dn Operation Guide - Page 212
manage the number of jobs to be printed from the PC on the network, you need configure the following settings by using the printer driver on the PC. Instructions are based on interface elements as they appear in Windows 10. 1 Display the screen. 1 Click [Start] button on the Windows and then select - Kyocera ECOSYS P3260dn | P3260dn Operation Guide - Page 213
, the printing will be canceled for users with only user authority. If the user has administrator privileges, the screen to enter the user name and password will appear. 3 Click [OK]. NOTE For other settings of job accounting, refer to the following: Printer Driver User Guide 9-22 - Kyocera ECOSYS P3260dn | P3260dn Operation Guide - Page 214
User Authentication and Accounting (User Login, Job Accounting) > Configuring Job Accounting Configuring Job Accounting Apply Limit Use this to specify the action taken when a department exceeds its printing limits. [Menu] key key > [User/Job Account] > [OK] key key > [Job Account.Set.] > [OK] - Kyocera ECOSYS P3260dn | P3260dn Operation Guide - Page 215
User Authentication and Accounting (User Login, Job Accounting) > Configuring Job Accounting Counting the Number of Pages Printed This counts the number of pages printed. Counts are classified into Total Job Accounting and Each Job Accounting. A new count can also be started after resetting the - Kyocera ECOSYS P3260dn | P3260dn Operation Guide - Page 216
, and select [Login]. For this, you need to login with administrator privileges. The factory default login user name and login password are set as shown below. Login User Name: 6000 Login Password: 6000 2 key > [Job Account.Set.] > [OK] key key > [Account. (Local)] > [OK] key 3 Print the report - Kyocera ECOSYS P3260dn | P3260dn Operation Guide - Page 217
appears If user login administration is enabled, the screen to enter the login user name and password appears. Enter a login user name and password to login. Adding a User (Local User List) (page 9-5) 2 Proceed to complete the rest of the steps. Logout When the operations are complete, select - Kyocera ECOSYS P3260dn | P3260dn Operation Guide - Page 218
, and select [Login]. For this, you need to login with administrator privileges. The factory default login user name and login password are set as shown below. Login User Name: 6000 Login Password: 6000 2 Configure the settings key > [Unknown ID Job] > [OK] key key > [Reject] or [Permit] > [OK - Kyocera ECOSYS P3260dn | P3260dn Operation Guide - Page 219
10 Troubleshooting This chapter explains the following topics: Regular Maintenance ...10-2 Cleaning ...10-2 Toner Container Replacement ...10-4 Waste Toner Box Replacement ...10-9 Troubleshooting ...10-11 Solving Malfunctions ...10-11 Responding to Messages ...10-15 Clearing Paper Jams ...10-24 10-1 - Kyocera ECOSYS P3260dn | P3260dn Operation Guide - Page 220
Troubleshooting > Regular Maintenance Regular Maintenance Cleaning Clean the machine regularly to ensure optimum printing quality. CAUTION For safety, always unplug the power cord before cleaning the machine. Registration Roller 1 2 10-2 - Kyocera ECOSYS P3260dn | P3260dn Operation Guide - Page 221
Troubleshooting > Regular Maintenance 3 Use a lint free cloth to clean dust and dirt away from the registration roller (metal). Transfer roller (Black) IMPORTANT Be careful not to - Kyocera ECOSYS P3260dn | P3260dn Operation Guide - Page 222
is assumed): ECOSYS P3260dn Models Life of the Toner Container (Printable pages) 40,000 images NOTE • The average number of pages that can be printed by the toner containers included with the machine is 11,000 images. • To maintain quality, we recommend using genuine Kyocera toner containers - Kyocera ECOSYS P3260dn | P3260dn Operation Guide - Page 223
Troubleshooting > Regular Maintenance Replacing the Toner Container 1 2 10-5 - Kyocera ECOSYS P3260dn | P3260dn Operation Guide - Page 224
Troubleshooting > Regular Maintenance 3 NOTE When removing the toner container from the machine, lift up the right hand side first. 4 10-6 - Kyocera ECOSYS P3260dn | P3260dn Operation Guide - Page 225
Troubleshooting > Regular Maintenance 5 IMPORTANT Do not touch the points shown below. 6 7 10-7 - Kyocera ECOSYS P3260dn | P3260dn Operation Guide - Page 226
Troubleshooting > Regular Maintenance 8 9 NOTE • If the Upper Tray does not close, check that the new toner container is installed correctly (in step 6). • Return the exhausted toner container to your dealer or service representative. The collected toner container will be recycled or disposed in - Kyocera ECOSYS P3260dn | P3260dn Operation Guide - Page 227
Troubleshooting > Regular Maintenance Waste Toner Box Replacement When the waste toner box becomes full, immediately replace the waste toner box. CAUTION Do not attempt to incinerate parts which contain toner. Dangerous sparks may cause burns. 1 2 3 10-9 - Kyocera ECOSYS P3260dn | P3260dn Operation Guide - Page 228
Troubleshooting > Regular Maintenance 4 5 NOTE Return the exhausted waste toner box to your dealer or service representative. The collected waste toner box will be recycled or disposed in accordance with the relevant regulations. 10-10 - Kyocera ECOSYS P3260dn | P3260dn Operation Guide - Page 229
Troubleshooting Troubleshooting Solving Malfunctions The table below provides general guidelines for problem solving. If a problem occurs with your machine, look into the checkpoints and perform procedures indicated on the following pages. If the problem persists, contact your Service supported - Kyocera ECOSYS P3260dn | P3260dn Operation Guide - Page 230
Troubleshooting > Troubleshooting the paper with new paper. page 3-2 Printer driver cannot be installed. Is the driver installed with the host name Specify the IP and the steam emitted may look like smoke. This is not a problem, and you can continue printing. If the steam concerns you, raise - Kyocera ECOSYS P3260dn | P3260dn Operation Guide - Page 231
Troubleshooting > Troubleshooting Printed Image Trouble When the following printed image trouble occurs, implement appropriate procedures. Symptom Checkpoints Corrective Actions Reference Page Printed images are totally too light. Is the paper damp? Have you changed the density? - Kyocera ECOSYS P3260dn | P3260dn Operation Guide - Page 232
Troubleshooting > Troubleshooting Symptom The altitude is 1000 m or ― higher and irregular horizontal white lines appear in the image. Checkpoints Corrective Actions Select [Menu] > [Adjust/Maint.] > [Service Setting] > [Altitude Adj.] > [2001 - 3000m] or [3001 - 3500m], and select [OK] > [ - Kyocera ECOSYS P3260dn | P3260dn Operation Guide - Page 233
Troubleshooting > Troubleshooting Responding to Messages If the message display or the computer displays any of these messages, follow the corresponding procedure. NOTE When contacting us, the serial - Kyocera ECOSYS P3260dn | P3260dn Operation Guide - Page 234
Troubleshooting > Troubleshooting C Message Canceling... Cannot connect. Checkpoints ― ― Cannot connect to ― [OK] and check the following items: • Registration to Authentication Server • Password and computer address for Authentication Server • Connection of Network page 9-3 Unable - Kyocera ECOSYS P3260dn | P3260dn Operation Guide - Page 235
Troubleshooting > Troubleshooting Message Checkpoints Corrective Actions Reference Page Check cassette #. ― If this message still remains, press the power switch to turn off, and contact your service representative. F Message Failed to get the network - user information. File was deleted. - Kyocera ECOSYS P3260dn | P3260dn Operation Guide - Page 236
Troubleshooting > Troubleshooting Message Checkpoints Corrective Actions Reference Page Incorrect ID. ― The user ID entered for a private job is not correct. Check the user ID that you specified on the printer driver. page 4-13 page 4-15 Incorrect password. ― The password does not match - Kyocera ECOSYS P3260dn | P3260dn Operation Guide - Page 237
Troubleshooting > Troubleshooting L Message Checkpoints Limit exceeded. You cannot add any more. Load paper in cassette #. A4 ↑↓ (Displayed alternately) Different paper size is set. Check paper size. Load - Kyocera ECOSYS P3260dn | P3260dn Operation Guide - Page 238
Troubleshooting > Troubleshooting M Message Checkpoints Corrective Actions Reference Page Machine failure. ― Call service. An error has occurred in the - machine. Make a note of the error code displayed on the message display, and contact your service • Select [Printer Priority] of - Kyocera ECOSYS P3260dn | P3260dn Operation Guide - Page 239
toner. ― Corrective Actions If a paper jam occurs, the machine will stop and the location of the jam will be indicated on the screen. Leave the machine on and select [Help]. Follow the instruction to remove the jammed paper. Reference Page page 10-24 There is no paper cassette in the - printer - Kyocera ECOSYS P3260dn | P3260dn Operation Guide - Page 240
Troubleshooting > Troubleshooting S Message SD card error. ― Press [OK]. Checkpoints SSD error. ― is not registered. Check the login user name. page 9-3 Replace the waste toner box. page 10-9 The waste toner box is not installed page 10-9 correctly. Set it correctly. The account ID - Kyocera ECOSYS P3260dn | P3260dn Operation Guide - Page 241
Troubleshooting > Troubleshooting Message Toner is low. Checkpoints ― Top tray is full of paper. ― Remove the paper. U Corrective Actions Reference Page It is almost time to replace the toner - container. Obtain a new toner container. Remove paper from the top tray. - Printing then resumes. - Kyocera ECOSYS P3260dn | P3260dn Operation Guide - Page 242
Troubleshooting > Troubleshooting Clearing Paper Jams If a paper jam occurs, the message display paper jam occurs, the location of the jam will be displayed on the message display as well as the clearing instructions. Paper jammed in A Cassette 1. D E F Help B C G B B B B Paper Jam - Kyocera ECOSYS P3260dn | P3260dn Operation Guide - Page 243
Troubleshooting > Troubleshooting Precautions with Paper Jams • Do not reuse jammed papers. • If the paper tears during removal, be sure to remove any loose scraps of paper from - Kyocera ECOSYS P3260dn | P3260dn Operation Guide - Page 244
Troubleshooting > Troubleshooting Cassettes 1 to 5 Procedures for handling a paper jam in Cassettes 1 to 5 are all the same. This section explains procedures using Cassette 1 as an example. 1 2 10-26 - Kyocera ECOSYS P3260dn | P3260dn Operation Guide - Page 245
Troubleshooting > Troubleshooting Duplex Unit 1 2 3 10-27 - Kyocera ECOSYS P3260dn | P3260dn Operation Guide - Page 246
Troubleshooting > Troubleshooting Inside the Machine 1 2 3 If the jammed paper appears to be pinched by rollers, pull it along the normal running direction of the paper. If you cannot find a paper jam, try checking inside the rear of the printer. Inner Tray / Inside Rear Cover (page 10-29) 10-28 - Kyocera ECOSYS P3260dn | P3260dn Operation Guide - Page 247
Troubleshooting > Troubleshooting 4 Inner Tray / Inside Rear Cover 1 2 10-29 - Kyocera ECOSYS P3260dn | P3260dn Operation Guide - Page 248
Troubleshooting > Troubleshooting 3 If you cannot find a paper jam, try checking inside the rear of the machine. CAUTION The fixing unit is extremely hot. Take sufficient care when working in this area, as there is a danger of getting burned. 4 10-30 - Kyocera ECOSYS P3260dn | P3260dn Operation Guide - Page 249
Troubleshooting > Troubleshooting Bulk Feeder 1 2 3 10-31 - Kyocera ECOSYS P3260dn | P3260dn Operation Guide - Page 250
Troubleshooting > Troubleshooting 4 Duplex unit (when Bulk Feeder is installed) 1 2 3 10-32 - Kyocera ECOSYS P3260dn | P3260dn Operation Guide - Page 251
Troubleshooting > Troubleshooting 4 5 6 10-33 - Kyocera ECOSYS P3260dn | P3260dn Operation Guide - Page 252
-11 Paper ...11-13 Basic Paper Specifications ...11-13 Choosing the Appropriate Paper ...11-14 Special Paper ...11-17 Specifications ...11-21 Machine ...11-21 Printer Functions ...11-23 Paper Feeder (500-sheet) (Option) ...11-23 Bulk Paper Feeder (2000-sheet) (Option 11-24 Glossary ...11-25 11-1 - Kyocera ECOSYS P3260dn | P3260dn Operation Guide - Page 253
Appendix > Optional Equipment Optional Equipment Overview of Optional Equipment The following optional equipment is available for the machine. (1) Card Authentication Kit(B) (2) PF3110 (12) PF-3100 (11) IB-36 (3) CA-3100 (10) PT-320 (4) Expansion Memory (5) SD Memory Card SDHC Memory Card - Kyocera ECOSYS P3260dn | P3260dn Operation Guide - Page 254
this information, refer to the following: Card Authentication Kit(B) Operation Guide (2) PF-3110 "Paper Feeder (500-sheet x1)" Up to -3100 "Castor kit" If you are attaching Paper Feeder (500-sheet x1) to the printer and installing it on the floor, you can use the castor kit to maintain the machine - Kyocera ECOSYS P3260dn | P3260dn Operation Guide - Page 255
Appendix > Optional Equipment (5) "SD/SDHC Memory Card" An SD/SDHC memory card is useful for storing fonts, macros, and overlays. The machine is equipped with a slot for an SDHC memory card with a maximum size of 32 GB, and an SD memory card with a maximum size of 2 GB. Reading the SD/SDHC Memory - Kyocera ECOSYS P3260dn | P3260dn Operation Guide - Page 256
the SSD. Data Security (page 8-37) Data Encryption/Overwrite OPERATION GUIDE (7) IB-50 "Network Interface Kit" The Network Interface Kit provides . IB-50 User's Manual (8) IB-51 "Wireless Network Interface Kit" This is a wireless LAN interface card which supports the wireless LAN specifications - Kyocera ECOSYS P3260dn | P3260dn Operation Guide - Page 257
supports communications speeds up to 2 Mbps. Use a parallel printer cable when this option is used. IB-32B User's Manual application allows print data to be printed directly without a print driver. (14) USB Keyboard "USB Keyboard" A USB keyboard dealer or service representative for information on keyboards that - Kyocera ECOSYS P3260dn | P3260dn Operation Guide - Page 258
, and select [Login]. For this, you need to login with administrator privileges. The factory default login user name and login password are set as shown below. Login User Name: 6000 Login Password: 6000 2 Select the desired application, and select the [OK] key. 3 key > [License On] > [OK] key - Kyocera ECOSYS P3260dn | P3260dn Operation Guide - Page 259
, and select [Login]. For this, you need to login with administrator privileges. The factory default login user name and login password are set as shown below. Login User Name: 6000 Login Password: 6000 2 Select the desired application, and select the [OK] key. 3 key > [Detail] > [OK] key You - Kyocera ECOSYS P3260dn | P3260dn Operation Guide - Page 260
Appendix > Character Entry Method Character Entry Method Using the Keys Use the following keys to enter characters. 1 Account Name: 7 6 ABC Text 2 58 3 4 No. Display/Key 1 Message Display 2 Arrow keys 3 Numeric keys 4 [Clear] key 5 [OK] key 6 Right Select key 7 Left Select key 8 Cursor - Kyocera ECOSYS P3260dn | P3260dn Operation Guide - Page 261
Appendix > Character Entry Method Selecting Type of Characters To enter characters, the following three types are available: Types ABC 123 Symbols Description To enter alphabets. To enter numerals. To enter symbols. In a character entry screen, select [Text] to select the type of characters you - Kyocera ECOSYS P3260dn | P3260dn Operation Guide - Page 262
Appendix > Character Entry Method Keys Characters (Each press of a key changes the character in the order from left to right.) w x y z W X Y Z 9 (Repeats from the first character on the left) 9 (During number entry) . , -_' 0 (During number entry) ! ? (space) 0 (Repeats from the first character - Kyocera ECOSYS P3260dn | P3260dn Operation Guide - Page 263
Appendix > Character Entry Method 3 Select the [►] key. The cursor moves to the right. Account Name: R ABC Text 4 Select the [#] key. Displays the symbol list. Symbols Text 5 Select the [▲] or [▼] key to move the cursor and select [&]. Symbols Text 6 Select the [OK] key. [&] is entered. Account - Kyocera ECOSYS P3260dn | P3260dn Operation Guide - Page 264
dry') copiers and page printers such as laser printers. It also supports a variety of other types be wrinkled. Supported Paper Use standard copy paper for regular copiers or laser printers. The small amount of recycled paper as a sample for testing prior to use. Choose recycled paper that gives the - Kyocera ECOSYS P3260dn | P3260dn Operation Guide - Page 265
at least 80% pulp, i.e., not more than 20% of the total paper content consists of cotton or other fibers. Supported Paper Sizes Paper of the following sizes is supported by the machine. Measurements in the table take into account a ±0.7 mm dimensional accuracy for length and width. Corner angles - Kyocera ECOSYS P3260dn | P3260dn Operation Guide - Page 266
paper weight (i.e., thickness) may cause several sheets to be supplied at once accidentally and may also cause blurring or other printing problems if the toner fails to adhere correctly. Moisture Content Paper moisture content is the ratio of moisture to dryness expressed as a percentage. Moisture - Kyocera ECOSYS P3260dn | P3260dn Operation Guide - Page 267
, paper is electrostatically charged so that the toner adheres. Choose paper that can be discharged quickly edges or corners are crushed. In order to prevent these problems, be especially careful when you cut the paper yourself. sample to test. • Glossy paper • Watermarked paper • Paper with an uneven - Kyocera ECOSYS P3260dn | P3260dn Operation Guide - Page 268
those that are designed specifically for copiers or page printers (such as laser printers). Use the multi purpose tray for transparencies, thick paper likely than regular paper to cause printing problems. Before purchasing special paper in volume, try testing a sample to ensure the print quality - Kyocera ECOSYS P3260dn | P3260dn Operation Guide - Page 269
labels, you must be liable for the print quality and possible trouble. Top sheet Adhesive layer Carrier sheet Labels consist of three layers sheet until the label is used. This composition of labels may cause more problems. The label surface must be covered completely with the top sheet. Gaps - Kyocera ECOSYS P3260dn | P3260dn Operation Guide - Page 270
Do not load paper above the load limits located on the paper width guide of the optional paper feeder. Due to the structure of envelopes, printing some cases as they pass through. Before purchasing envelopes in volume, try testing a sample to ensure the print quality. Storing envelopes for a long - Kyocera ECOSYS P3260dn | P3260dn Operation Guide - Page 271
conform to the specifications; however, its whiteness may be considered separately. Basic Paper Specifications (page 11-13) NOTE Before purchasing recycled paper in volume, try testing a sample to ensure satisfactory print quality. 11-20 - Kyocera ECOSYS P3260dn | P3260dn Operation Guide - Page 272
Appendix > Specifications Specifications IMPORTANT Specifications are subject to change without notice. Machine Item Description Type Printing Method Paper Weight Cassette Multi Purpose Tray Paper Type Cassette Paper Size Multi Purpose Tray Cassette Multi Purpose Tray Warm-up Time (22 - Kyocera ECOSYS P3260dn | P3260dn Operation Guide - Page 273
Image Write System Memory Interface Standard Option Operating Environment Temperature Humidity Altitude Brightness Dimension (W × D × H) Weight (without toner container) Space Required (W × D) (Using multi purpose tray) Power Source The power consumption of the product in networked - Kyocera ECOSYS P3260dn | P3260dn Operation Guide - Page 274
Appendix > Specifications Printer Functions Item Printing Speed First Print Time ( IBM Proprinter, LQ-850, LinePrint Paper Feeder (500-sheet) (Option) Item Paper Supply Method Paper Size Supported Paper Dimensions (W) × (D) × (H) Weight Description Friction roller feeder (No. Sheets: 500, 80 - Kyocera ECOSYS P3260dn | P3260dn Operation Guide - Page 275
× 420 × 371 mm 13 37/64 × 13 17/32 × 14 39/64" 7.5 kg or less (16.54 lbs or less) NOTE Consult your dealer or service representative for recommended paper types. 11-24 - Kyocera ECOSYS P3260dn | P3260dn Operation Guide - Page 276
also known as zero-configuration networking, is a service that automatically detects computers, devices and services on an IP network. Bonjour, because an or multiple copies of the stored data later using the printer's operation panel. Default Gateway This indicates the device, such as a computer or - Kyocera ECOSYS P3260dn | P3260dn Operation Guide - Page 277
helps save toner. Copies made in this mode are thus lighter than normal. Emulation The function to interpret and execute other printers' page enables printing to be carried out via routers on printers in remote locations. It also supports the HTTP authentication mechanisms along with SSL server and - Kyocera ECOSYS P3260dn | P3260dn Operation Guide - Page 278
Kyocera Page Description Language) Kyocera for file sharing and printing services. Outline font With outline fonts PDF format as well as gradual improvements in implementation technologies. PPM (prints per minute) This indicates the number of A4 size printouts made in one minute. Printer Driver - Kyocera ECOSYS P3260dn | P3260dn Operation Guide - Page 279
set any amount of memory from overall printer memory as a RAM disk in order the available address space, which resolves the problem of the lack of addresses under IPv4 WIA (Windows Imaging Acquisition) A function to import images supported after Windows Me/XP from digital cameras and other peripheral - Kyocera ECOSYS P3260dn | P3260dn Operation Guide - Page 280
Method 2-6 Conventions Used in This Guide xi Counting the Number of Pages 8-30 Time Zone 8-30 Def. Screen(Box) 8-30 Default Gateway 11-25 Settings 8-16 Del. after Print 6-5 8-32 Format SSD 8-31 Language 8-30 Low Toner Alert 8-35 RAM Disk Setting 8-31 Timer PDF 6-5 Energy Saving Control Function 1-14 Energy - Kyocera ECOSYS P3260dn | P3260dn Operation Guide - Page 281
GPL/LGPL 1-11 Grayscale 11-26 Group Authorization Set. Group Authorization 9-10 Guides Provided with the Machine viii H Handles 2-2 Help 11-26 Help Screen 2- 1-9 Login 2-13 Logout 2-14 Low Toner Alert 8-35 LPD Protocol Settings 8-20 M Management 9-1 Manual Settings (IPv6) 8-17 Media Type Setting - Kyocera ECOSYS P3260dn | P3260dn Operation Guide - Page 282
Settings 8-6 Cassette 1 (to 4) Set. 8-6 Media Type Set. 8-6 MP Tray Set. 8-6 Reset Type Adj. 8-6 Paper Stopper 2-2, 2-5, 3-18 Paper Width Guides 2-3, 3-5, 3-8 Part Names 2-2 PDF/A 11-27 Ping 8-25 POP3 11-27 Protocol Settings 8-19 PostScript 11-27 Power Cable Connecting 2-8 Power Management 1-14 - Kyocera ECOSYS P3260dn | P3260dn Operation Guide - Page 283
12 User Name 8-13 Printer Print setting 4-9 Printer Driver 11-27 Help 4-10 10-2 Toner Container Replacement 10-4 Waste Toner Box 8-26 S Safety Conventions in This Guide 1-2 SD Card 11-4 Format 8-32 37 Security Precautions when Using Wireless LAN 1-8 Service Setting 8-39 Setting Date and Time 2-15 - Kyocera ECOSYS P3260dn | P3260dn Operation Guide - Page 284
Option 11-6 ThinPrintOverSSL Protocol Settings 8-22 TIFF/JPEG Size 6-6 Default 8-12 Time 8-30 Time Zone 8-30 Timer Setting Auto Error 8-33 WeeklyTimer Set. 8-34 Toner Container 2-4 Toner Container Lock Lever 2-4 Toner Container Replacement 10-4 Top Tray 2-2 Troubleshooting 10-11 TWAIN 11-28 - Kyocera ECOSYS P3260dn | P3260dn Operation Guide - Page 285
- Kyocera ECOSYS P3260dn | P3260dn Operation Guide - Page 286
. - Kyocera ECOSYS P3260dn | P3260dn Operation Guide - Page 287
. - Kyocera ECOSYS P3260dn | P3260dn Operation Guide - Page 288
2019.4 2WDKDEN000
-
 1
1 -
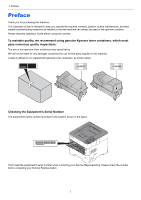 2
2 -
 3
3 -
 4
4 -
 5
5 -
 6
6 -
 7
7 -
8
-
9
-
10
-
11
-
12
-
13
-
14
-
15
-
16
-
17
-
18
-
19
-
20
-
21
-
22
-
23
-
24
-
25
-
26
-
27
-
28
-
29
-
30
-
31
-
32
-
33
-
34
-
35
-
36
-
37
-
38
-
39
-
40
-
41
-
42
-
43
-
44
-
45
-
46
-
47
-
48
-
49
-
50
-
51
-
52
-
53
-
54
-
55
-
56
-
57
-
58
-
59
-
60
-
61
-
62
-
63
-
64
-
65
-
66
-
67
-
68
-
69
-
70
-
71
-
72
-
73
-
74
-
75
-
76
-
77
-
78
-
79
-
80
-
81
-
82
-
83
-
84
-
85
-
86
-
87
-
88
-
89
-
90
-
91
-
92
-
93
-
94
-
95
-
96
-
97
-
98
-
99
-
100
-
101
-
102
-
103
-
104
-
105
-
106
-
107
-
108
-
109
-
110
-
111
-
112
-
113
-
114
-
115
-
116
-
117
-
118
-
119
-
120
-
121
-
122
-
123
-
124
-
125
-
126
-
127
-
128
-
129
-
130
-
131
-
132
-
133
-
134
-
135
-
136
-
137
-
138
-
139
-
140
-
141
-
142
-
143
-
144
-
145
-
146
-
147
-
148
-
149
-
150
-
151
-
152
-
153
-
154
-
155
-
156
-
157
-
158
-
159
-
160
-
161
-
162
-
163
-
164
-
165
-
166
-
167
-
168
-
169
-
170
-
171
-
172
-
173
-
174
-
175
-
176
-
177
-
178
-
179
-
180
-
181
-
182
-
183
-
184
-
185
-
186
-
187
-
188
-
189
-
190
-
191
-
192
-
193
-
194
-
195
-
196
-
197
-
198
-
199
-
200
-
201
-
202
-
203
-
204
-
205
-
206
-
207
-
208
-
209
-
210
-
211
-
212
-
213
-
214
-
215
-
216
-
217
-
218
-
219
-
220
-
221
-
222
-
223
-
224
-
225
-
226
-
227
-
228
-
229
-
230
-
231
-
232
-
233
-
234
-
235
-
236
-
237
-
238
-
239
-
240
-
241
-
242
-
243
-
244
-
245
-
246
-
247
-
248
-
249
-
250
-
251
-
252
-
253
-
254
-
255
-
256
-
257
-
258
-
259
-
260
-
261
-
262
-
263
-
264
-
265
-
266
-
267
-
268
-
269
-
270
-
271
-
272
-
273
-
274
-
275
-
276
-
277
-
278
-
279
-
280
-
281
-
282
-
283
-
284
-
285
-
286
-
287
-
288
 |
 |
kyoceradocumentsolutions.com
Operation Guide
ECOSYS P3260dn