Kyocera ECOSYS P7040cdn Kyocera Net Viewer Operation Guide Rev 5.4 2014.09 - Page 44
Manage Certificates, Importing a Certificate
 |
View all Kyocera ECOSYS P7040cdn manuals
Add to My Manuals
Save this manual to your list of manuals |
Page 44 highlights
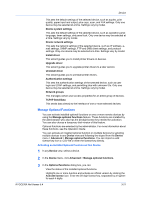
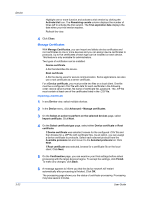
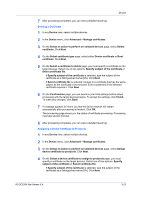
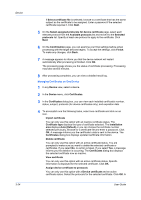
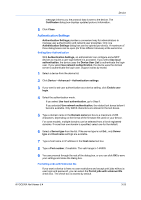
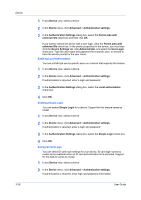
Device 3-22 Highlight one or more function and activate a trial version by clicking the Activate trial icon. The Remaining counts column displays the number of times left to activate the trial version. The Trial expiration date displays the date when your trial version expires. Refresh the view. 4 Click Close. Manage Certificates With Manage Certificates, you can import and delete device certificates and root certificates to one or more devices and you can assign device certificates to protocols. Up to five certificates of each type can be installed on each device. This feature is only available for administrators. Two types of certificates can be installed: Device certificate A file that identifies the device. Root certificate A file the device uses for secure communication. Some applications can also use a root certificate as a server certificate. For a Device certificate, you must provide two files on a local client. One file must be a configured .CSV file with data for each certificate in the following order: device serial number, file name of certificate file, password. The .ZIP file must contain at least one of the certificates listed in the .CSV file. Importing a Certificate 1 In any Device view, select multiple devices. 2 In the Device menu, click Advanced > Manage certificates. 3 On the Select an action to perform on the selected devices page, select Import certificate. Click Next. 4 On the Select certificate type page, select either Device certificate or Root certificate. If Device certificate was selected, browse for the configured .CSV file and then browse for a .ZIP file with certificate files. As an option, you can assign a device certificate to protocols. Select each relevant protocol from the Available protocols list and move it to the Selected protocols list. Click Next. If Root certificate was selected, browse for a certificate file on the local client. Click Next. 5 On the Confirmation page, you can examine your final settings before actual processing with the target devices begins. To accept the settings, click Finish. To make any changes, click Back. 6 A message appears to inform you that the device network will restart automatically after processing is finished. Click OK. The processing page shows you the status of certificate processing. Processing may take several minutes. User Guide
-
 1
1 -
2
-
3
-
4
-
5
-
6
-
7
-
8
-
9
-
10
-
11
-
12
-
13
-
14
-
15
-
16
-
17
-
18
-
19
-
20
-
21
-
22
-
23
-
24
-
25
-
26
-
27
-
28
-
29
-
30
-
31
-
32
-
33
-
34
-
35
-
36
-
37
-
38
-
 39
39 -
 40
40 -
 41
41 -
 42
42 -
 43
43 -
 44
44 -
 45
45 -
 46
46 -
 47
47 -
 48
48 -
 49
49 -
50
-
51
-
52
-
53
-
54
-
55
-
56
-
57
-
58
-
59
-
60
-
61
-
62
-
63
-
64
-
65
-
66
-
67
-
68
-
69
-
70
-
71
-
72
-
73
-
74
-
75
-
76
-
77
-
78
-
79
-
80
-
81
-
82
-
83
-
84
-
85
-
86
-
87
-
88
-
89
-
90
-
91
-
92
-
93
-
94
 |
 |
