Kyocera FS-C5300DN FS-C5100DN/C5200DN/C5300DN KX Driver User Guide Ver. 7.7 - Page 48
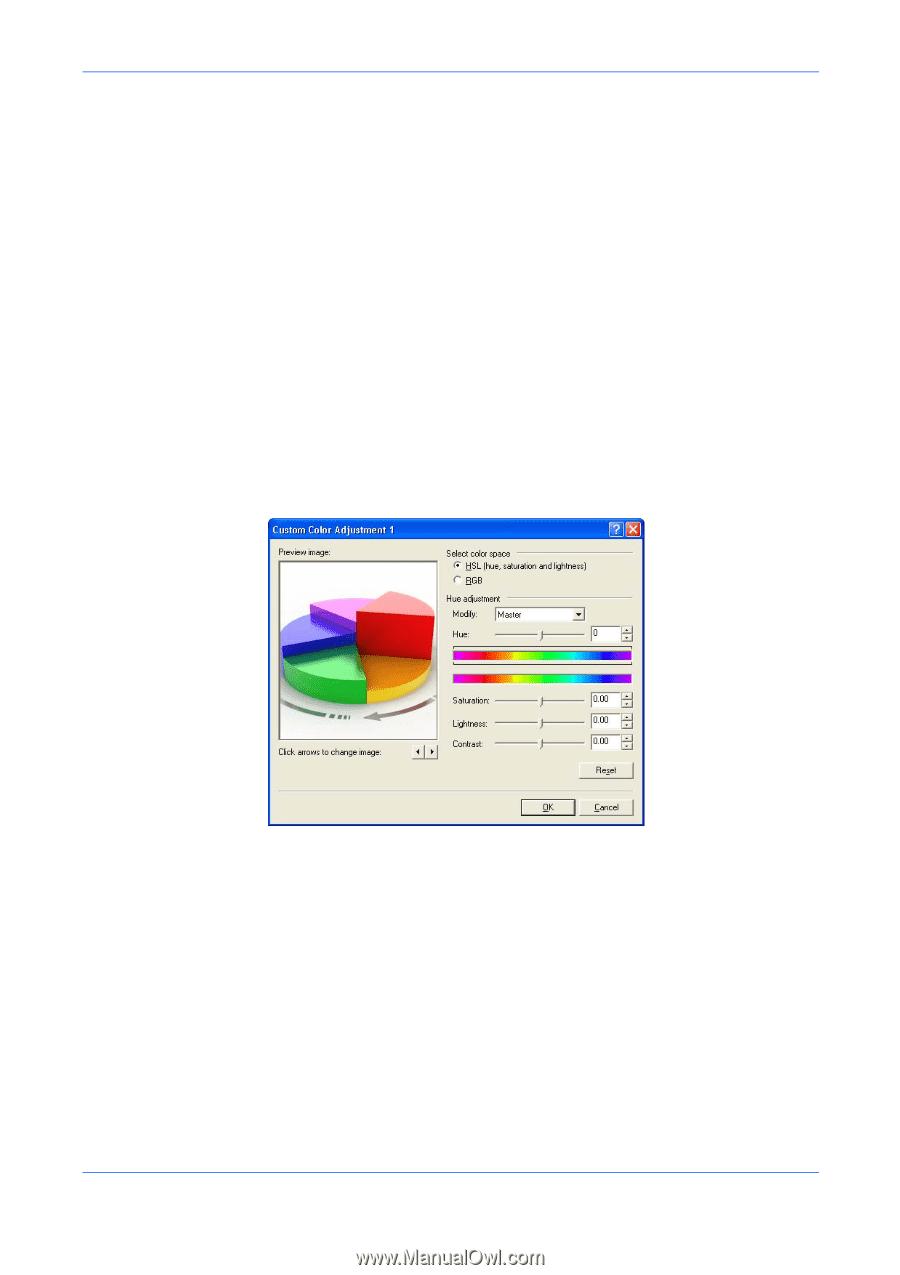
HSL (Hue, Saturation, Lightness), Custom Color Adjustment
 |
UPC - 632983010303
View all Kyocera FS-C5300DN manuals
Add to My Manuals
Save this manual to your list of manuals |
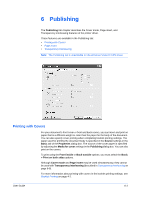
Page 48 highlights
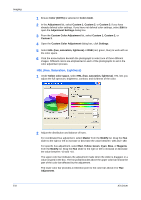
Imaging 1 Ensure Color (CMYK) is selected in Color mode. 1 2 In the Adjustment list, select Custom 1, Custom 2, or Custom 3, if you have already defined color settings. If you have not defined color settings, select Edit to open the Adjustment Settings dialog box. 2 3 From the Custom Color Adjustment list, select Custom 1, Custom 2, or Custom 3. 3 4 Open the Custom Color Adjustment dialog box, click Settings. 4 5 Select HSL (hue, saturation, lightness) or RGB (red, green, blue) to work with as the color space. 5 6 Click the arrow buttons beneath the photograph to select one of three different images. Different colors are emphasized in each of the photographs to aid in the color adjustment process. 6 HSL (Hue, Saturation, Lightness) 1 Under Select color space, select HSL (hue, saturation, lightness). HSL lets you adjust the full spectrum, brightness, contrast, and vividness of the color. 1 2 Adjust the distribution and balance of hues. 2 For coordinated hue adjustment, select Master from the Modify list. Drag the Hue slider to the right or left to increase or decrease the value between -180 and +180. For specific hue adjustment, select Red, Yellow, Green, Cyan, Blue, or Magenta from the Modify list. Drag the Hue slider to the right or left to increase or decrease the value between -10 and +10. The upper color bar indicates the adjustment made when the slider is dragged, or a value is typed in the box. The horizontal bracket above the upper color bar shows the part of the color bar affected by the adjustment. The lower color bar provides a reference point to the color bar above it for Hue Adjustment. 5-8 KX Driver
-
 1
1 -
2
-
3
-
4
-
5
-
6
-
7
-
8
-
9
-
10
-
11
-
12
-
13
-
14
-
15
-
16
-
17
-
18
-
19
-
20
-
21
-
22
-
23
-
24
-
25
-
26
-
27
-
28
-
29
-
30
-
31
-
32
-
33
-
34
-
35
-
36
-
37
-
38
-
39
-
40
-
41
-
42
-
 43
43 -
 44
44 -
 45
45 -
 46
46 -
 47
47 -
 48
48 -
 49
49 -
 50
50 -
 51
51 -
 52
52 -
 53
53 -
54
-
55
-
56
-
57
-
58
-
59
-
60
-
61
-
62
-
63
-
64
-
65
-
66
-
67
-
68
-
69
-
70
-
71
-
72
-
73
-
74
-
75
-
76
-
77
-
78
-
79
-
80
-
81
-
82
-
83
-
84
 |
 |