Kyocera FS-C5300DN FS-C5100DN/C5200DN/C5300DN KX Driver User Guide Ver. 7.7 - Page 61
Print the Remaining Copies of Proof and Hold Jobs, Private Print, Save a Private Print Job
 |
UPC - 632983010303
View all Kyocera FS-C5300DN manuals
Add to My Manuals
Save this manual to your list of manuals |
Page 61 highlights
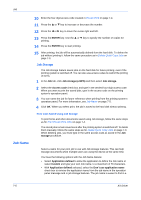
User Guide Job When printing a Proof and hold job of multiple copies, only the first copy is printed and the remaining copies are saved. Follow the steps below after proofing the first copy. Print the Remaining Copies of Proof and Hold Jobs You can print the remaining copies of Proof and hold jobs following the same steps as for Print Additional Copies of Quick Copy Jobs on page 7-3. Use the keys at the printing system's operation panel to proceed. When using the Proof and hold option, the number of copies shown is one less than the total due to the existing proof copy. The printed jobs remain saved on the hard disk, or RAM disk until the printing system is turned off. To delete jobs manually, use the same key sequences as explained in Delete Quick Copy Jobs on page 7-3. Private Print Private print jobs are saved to the hard disk for printing until a four-digit access code is entered. The saved jobs are deleted as soon as they are printed. Save a Private Print Job 1 In the Job tab, select the Job storage (e-MPS) check box. 1 2 Select Private print. 1 3 Type a four-digit number for the Access code. 2 4 You can name the job for later reference when printing from the printing system's operation panel. For more information, see Job Name on page 7-5. 3 5 Click OK. 4 Print Private Print Jobs 1 On the printing system's operation panel, press the Menu button. 1 2 Press the S or T key repeatedly until Job Box > appears. 2 3 Press the X key to open the submenu. 3 4 Press the S or T key repeatedly until >Private/Stored appears. 4 5 Press the ENTER key, the user name appears with a blinking question mark. 5 6 If the user name is correct, press the ENTER key. Otherwise, press the S or T key until the correct name appears. 6 7 The job name appears with a blinking question mark. Press the ENTER key. 7 8 The user name shown is specified following the instructions in Identification on page 2-8. If this is the correct job for printing, press the ENTER key. 8 9 Otherwise, press the S or T key until the correct job name appears, then press the ENTER key. 9 7-4
-
 1
1 -
2
-
3
-
4
-
5
-
6
-
7
-
8
-
9
-
10
-
11
-
12
-
13
-
14
-
15
-
16
-
17
-
18
-
19
-
20
-
21
-
22
-
23
-
24
-
25
-
26
-
27
-
28
-
29
-
30
-
31
-
32
-
33
-
34
-
35
-
36
-
37
-
38
-
39
-
40
-
41
-
42
-
43
-
44
-
45
-
46
-
47
-
48
-
49
-
50
-
51
-
52
-
53
-
54
-
55
-
 56
56 -
 57
57 -
 58
58 -
 59
59 -
 60
60 -
 61
61 -
 62
62 -
 63
63 -
 64
64 -
 65
65 -
 66
66 -
67
-
68
-
69
-
70
-
71
-
72
-
73
-
74
-
75
-
76
-
77
-
78
-
79
-
80
-
81
-
82
-
83
-
84
 |
 |
