Kyocera KM-3530 Fax System (F) Operation Guide - Page 47
Communication Using the Timer
 |
View all Kyocera KM-3530 manuals
Add to My Manuals
Save this manual to your list of manuals |
Page 47 highlights
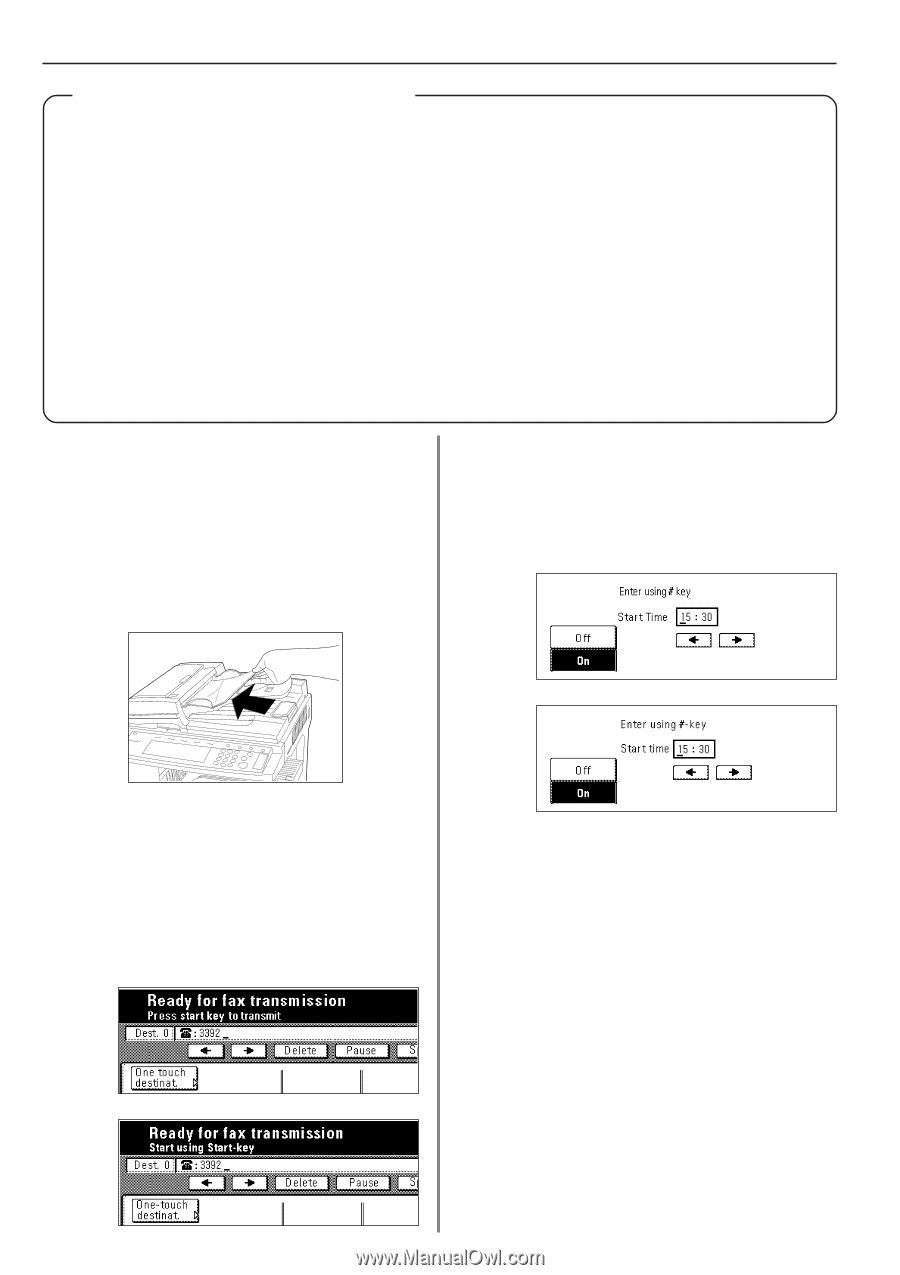
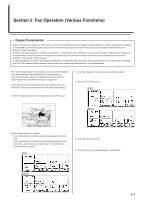
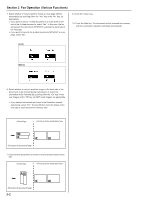
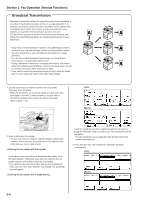
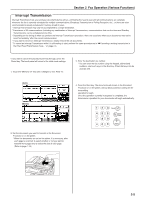
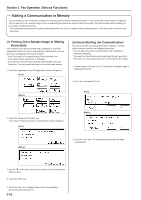
Section 2 Fax Operation (Various Functions) Communication Using the Timer If you designate in advance the time for a communication to begin, that communication will be carried out automatically once the appointed time is reached. You can designate a communication to be one that uses the timer during the operation procedure for each of various types of fax communication available in this fax such as Broadcast Transmission. The example in the procedure below is for the transmission of documents to a single destination using the timer function. Note: The time for the communication to begin is based on the time that is set in this machine. Make sure to check the time set in this machine in advance. * All transmissions that use the timer will be accomplished in the Memory Transmission mode even if the fax is currently in the Direct Feed Transmission mode. * Each communication that uses the timer can be set to begin at any minute between 00:00 - 23:59. * A maximum of 50 communications (including any combination of communications that use the timer, Interrupt Transmissions and Standby Transmissions) can be scheduled at one time. * When 2 or more communications that use the timer are scheduled to begin at the same time, fundamentally each communication will be accomplished in the order that they were registered. However, even if it has been registered later, any communication that scheduled with a single location will take priority over a communication to multiple locations. * It is possible to cancel or change the contents of a communication that is waiting for a start time, (Refer to "Editing a Communication in Memory", page 2-10.) * If you want to cancel the procedure part way through, press the Reset key. The touch panel will return to the initial mode settings. 1. Set the documents you want to transmit in the Document Processor or on the platen. * When the documents are set on the platen, it is necessary, after each page is scanned, to select whether or not you want to transmit more pages and to select the size of each page. (Refer to page 1-18.) 3. Touch the "Delayed TX" key. 4. Touch the "On" key and the Time Entry screen will appear. (Inch) (Metric) 2. Enter the destination fax number. * You can enter the fax number using the keypad, abbreviated numbers, one-touch keys or the address book. Chain dial keys can be used as well. * If you entered the destination fax number with a one-touch key or a chain dial key, touch the "TX setting" key after that. 5. Use the keypad to enter the desired time for the transmission to begin. * If you want to change the entered time, use the "r" and/or "R" keys to move the cursor to the desired location. (Inch) 6. Touch the "Close" key. (Metric) 2-6 7. Press the Start key. The documents will be scanned into memory, and the transmission operation will begin when the appointed time is reached. * If the Delayed Communication Report print out setting is turned "ON", a Delayed Communication Report will be printed out. (Refer to page 6-1.)
-
 1
1 -
2
-
3
-
4
-
5
-
6
-
7
-
8
-
9
-
10
-
11
-
12
-
13
-
14
-
15
-
16
-
17
-
18
-
19
-
20
-
21
-
22
-
23
-
24
-
25
-
26
-
27
-
28
-
29
-
30
-
31
-
32
-
33
-
34
-
35
-
36
-
37
-
38
-
39
-
40
-
41
-
 42
42 -
 43
43 -
 44
44 -
 45
45 -
 46
46 -
 47
47 -
 48
48 -
 49
49 -
 50
50 -
 51
51 -
 52
52 -
53
-
54
-
55
-
56
-
57
-
58
-
59
-
60
-
61
-
62
-
63
-
64
-
65
-
66
-
67
-
68
-
69
-
70
-
71
-
72
-
73
-
74
-
75
-
76
-
77
-
78
-
79
-
80
-
81
-
82
-
83
-
84
-
85
-
86
-
87
-
88
-
89
-
90
-
91
-
92
-
93
-
94
-
95
-
96
-
97
-
98
-
99
-
100
-
101
-
102
-
103
-
104
-
105
-
106
-
107
-
108
-
109
-
110
-
111
-
112
-
113
-
114
-
115
-
116
-
117
-
118
-
119
-
120
-
121
-
122
-
123
-
124
-
125
-
126
-
127
-
128
-
129
-
130
-
131
-
132
-
133
-
134
-
135
-
136
-
137
-
138
-
139
-
140
-
141
-
142
-
143
-
144
-
145
-
146
 |
 |