Kyocera TASKalfa 180 Operation Guide - Page 30
When loading paper into the cassette, set it with, the side which faced the top of its packaging
 |
View all Kyocera TASKalfa 180 manuals
Add to My Manuals
Save this manual to your list of manuals |
Page 30 highlights
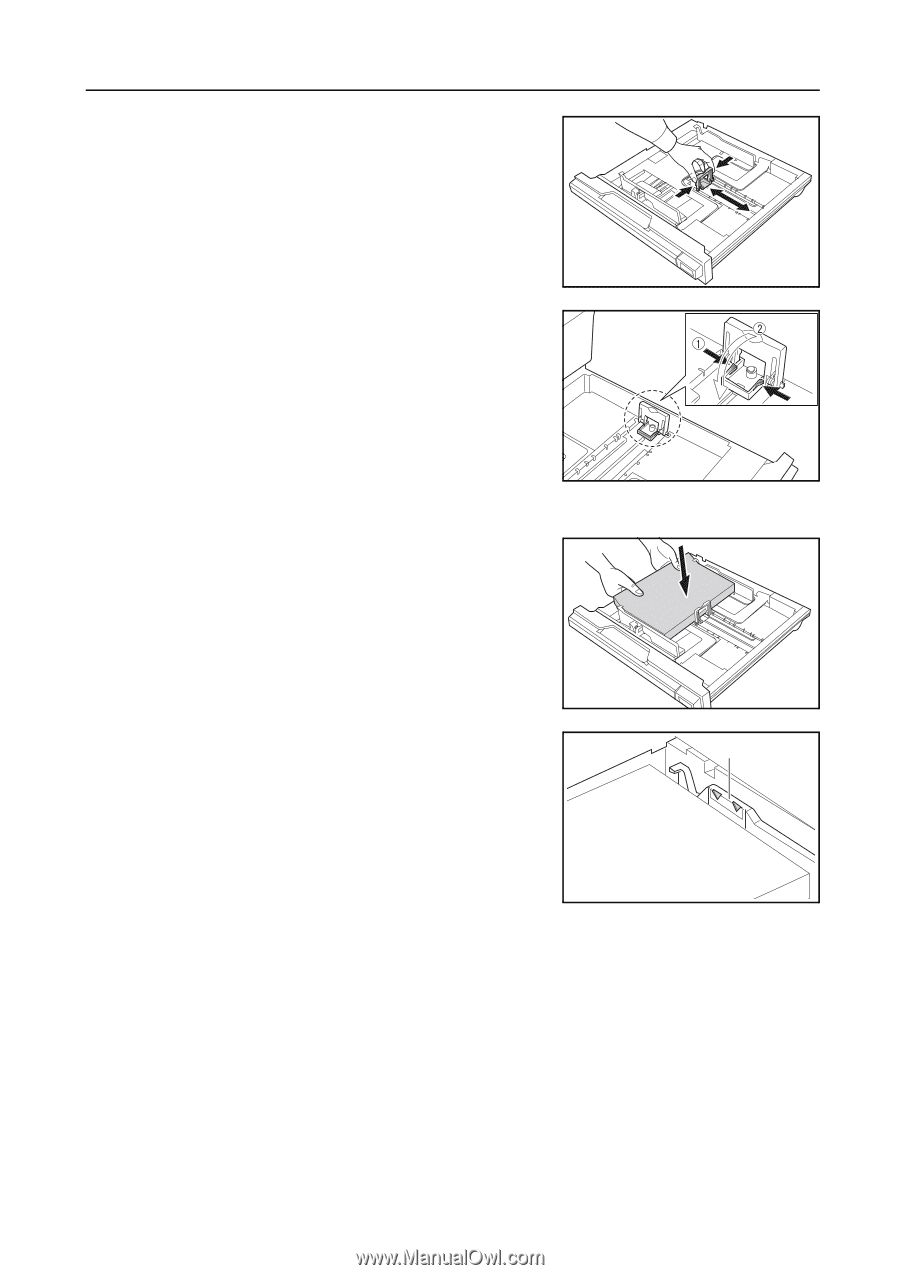
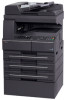
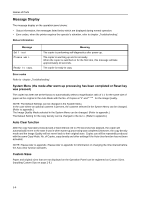
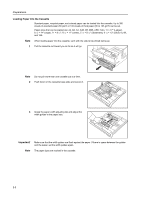
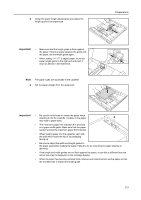
4 Grasp the paper length adjusting tab and adjust the length guide to the paper size. Important! • Make sure that the length guide is flush against the paper. If there is space between the guide and the paper, set the length guide again. • When setting 11 × 17" (Ledger) paper, move the paper length guide to the right end and push it down as shown in the illustration. Note 5 The paper sizes are impressed in the cassette. Set the paper straight from the upper part. Preparations Important! • Be careful not to bend or crease the paper when inserting it into the cassette. Creases in the paper A may lead to paper jams. • The maximum paper limit indicator A is provided on a paper width guide. Make sure that the paper loaded is below the maximum paper limit indicator. • When loading paper into the cassette, set it with the side which faced the top of its packaging facing up. • Be sure to adjust the width and length guides to the paper size before loading the paper. Failure to do so may result in paper skewing or jamming. • If the length and width guides are not flush against the paper, a size that is different from the actual size may be displayed on the message display. • When the paper has become wrinkled from moisture and cannot be fed, set the paper so that the wrinkled side is toward the length guide. 2-3
-
 1
1 -
2
-
3
-
4
-
5
-
6
-
7
-
8
-
9
-
10
-
11
-
12
-
13
-
14
-
15
-
16
-
17
-
18
-
19
-
20
-
21
-
22
-
23
-
24
-
 25
25 -
 26
26 -
 27
27 -
 28
28 -
 29
29 -
 30
30 -
 31
31 -
 32
32 -
 33
33 -
 34
34 -
 35
35 -
36
-
37
-
38
-
39
-
40
-
41
-
42
-
43
-
44
-
45
-
46
-
47
-
48
-
49
-
50
-
51
-
52
-
53
-
54
-
55
-
56
-
57
-
58
-
59
-
60
-
61
-
62
-
63
-
64
-
65
-
66
-
67
-
68
-
69
-
70
-
71
-
72
-
73
-
74
-
75
-
76
-
77
-
78
-
79
-
80
-
81
-
82
-
83
-
84
-
85
-
86
-
87
-
88
-
89
-
90
-
91
-
92
-
93
-
94
-
95
-
96
-
97
-
98
-
99
-
100
-
101
-
102
-
103
-
104
-
105
-
106
-
107
-
108
-
109
 |
 |