LG 70UL3E Owners Manual - Page 9
Network setup, External Devices, Wired network connection
 |
View all LG 70UL3E manuals
Add to My Manuals
Save this manual to your list of manuals |
Page 9 highlights
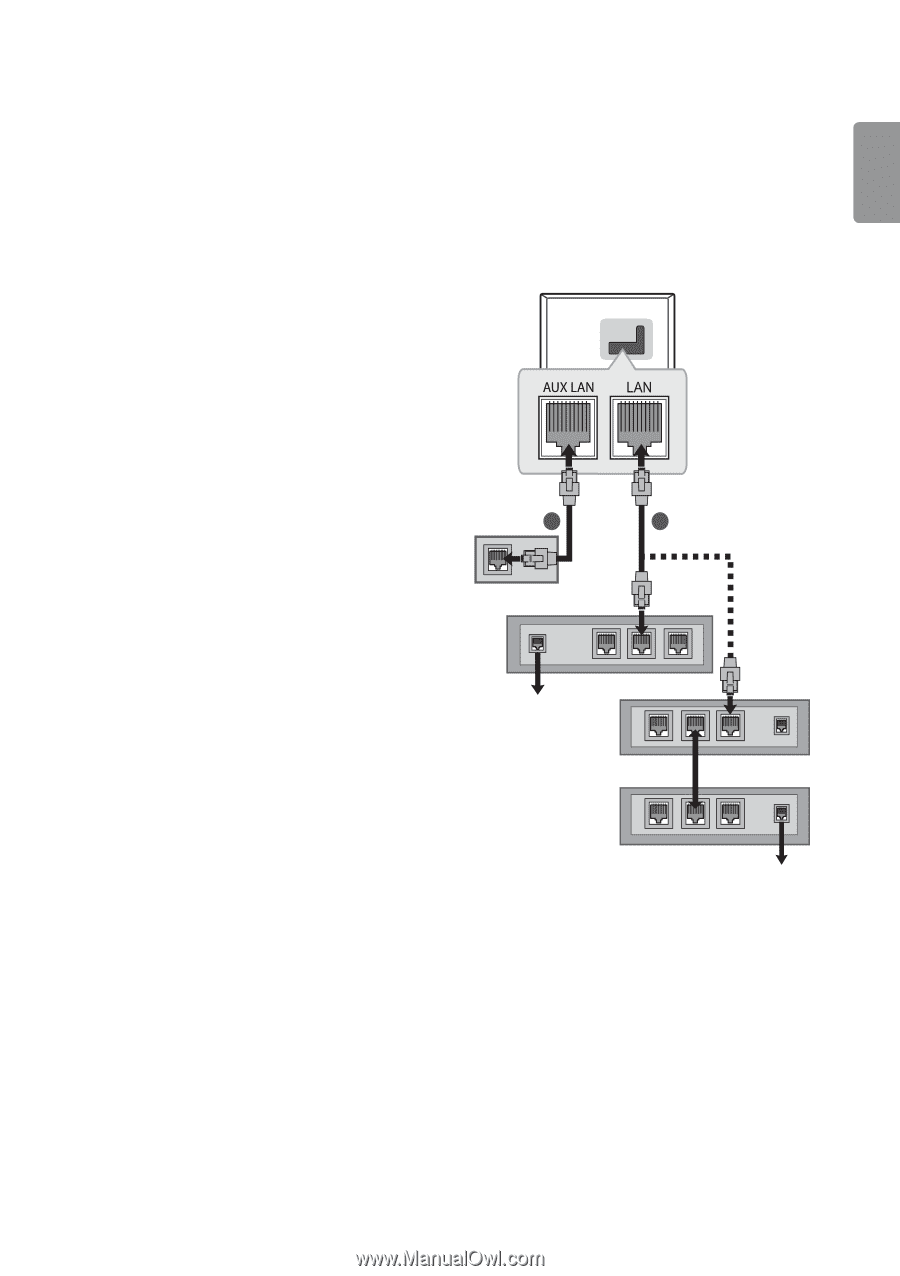
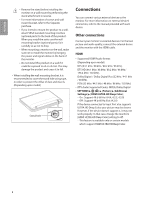
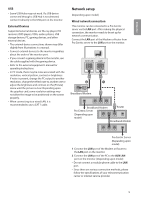
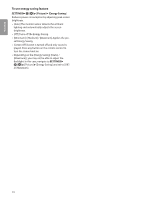
ENGLISH USB •• Some USB Hubs may not work. If a USB device connected through a USB Hub is not detected, connect it directly to the USB port on the monitor. External Devices Supported external devices are: Blu-ray player, HD receivers, DVD players, VCRs, audio systems, USB storage devices, PC, gaming devices, and other external devices. •• The external device connections shown may differ slightly from illustrations in a manual. •• Connect external devices to the monitor regardless about the order of the monitor port. •• If you connect a gaming device to the monitor, use the cable supplied with the gaming device. •• Refer to the external equipment's manual for operating instructions. •• In PC mode, there may be noise associated with the resolution, vertical pattern, contrast or brightness. If noise is present, change the PC output to another resolution, change the refresh rate to another rate or adjust the brightness and contrast on the [Picture] menu until the picture is clear. Depending upon the graphics card, some resolution settings may not allow the image to be positioned on the screen properly. •• When connecting via a wired LAN, it is recommended to use a CAT 7 cable. Network setup (Depending upon model) Wired network connection This monitor can be connected to a Pro:Centric server via the LAN port. After making the physical connection, the monitor needs to be set up for network communication. Connect the LAN port of the Modem or Router from Pro:Centric server to the LAN port on the monitor. 2 1 Broadband Modem Broadband Modem Pro:Centric Server (Depending upon model) Router Broadband Modem Pro:Centric Server (Depending upon model) 1 Connect the LAN port of the Modem or Router to the LAN port on the monitor. 2 Connect the LAN port of the PC to the AUX LAN port on the monitor. (Depending upon model) •• Do not connect a modular phone cable to the LAN port. •• Since there are various connection methods, please follow the specifications of your telecommunication carrier or internet service provider. 9
-
 1
1 -
2
-
3
-
 4
4 -
 5
5 -
 6
6 -
 7
7 -
 8
8 -
 9
9 -
 10
10 -
 11
11 -
 12
12 -
 13
13 -
 14
14 -
15
-
16
-
17
-
18
-
19
-
20
-
21
-
22
-
23
-
24
-
25
-
26
-
27
-
28
-
29
-
30
-
31
-
32
-
33
-
34
-
35
-
36
-
37
-
38
-
39
-
40
-
41
-
42
-
43
-
44
-
45
-
46
-
47
-
48
-
49
-
50
-
51
-
52
-
53
-
54
-
55
-
56
-
57
-
58
-
59
-
60
-
61
-
62
-
63
-
64
-
65
-
66
-
67
-
68
-
69
-
70
-
71
-
72
-
73
-
74
-
75
-
76
-
77
-
78
-
79
-
80
-
81
-
82
-
83
-
84
-
85
-
86
-
87
-
88
-
89
-
90
-
91
-
92
-
93
-
94
-
95
-
96
-
97
-
98
-
99
-
100
-
101
-
102
-
103
-
104
-
105
-
106
-
107
-
108
-
109
-
110
-
111
-
112
-
113
-
114
-
115
-
116
-
117
-
118
-
119
-
120
-
121
-
122
-
123
-
124
-
125
 |
 |