LG MHEC1737F INSTALLATION - Page 12
Drill Holes in Wall and Cabinet
 |
View all LG MHEC1737F manuals
Add to My Manuals
Save this manual to your list of manuals |
Page 12 highlights
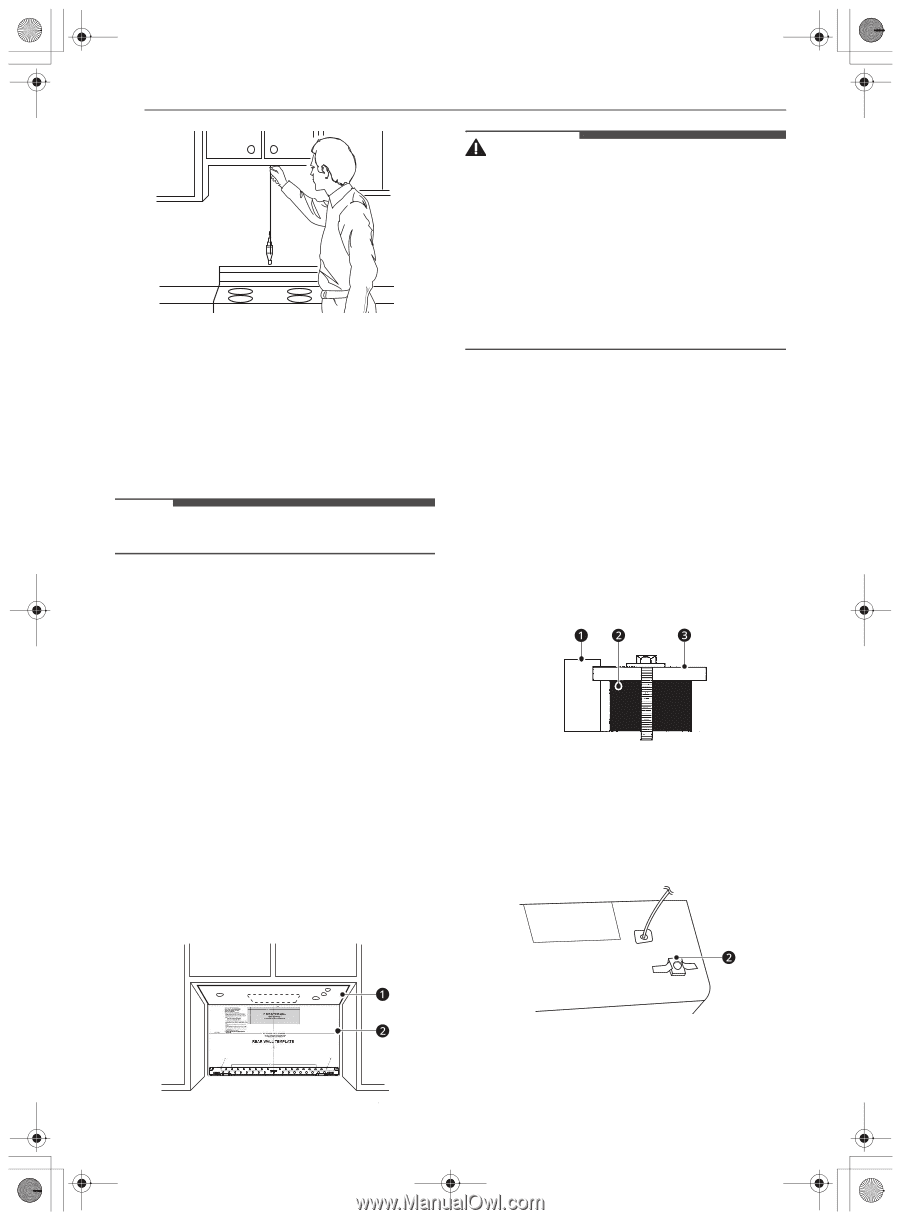
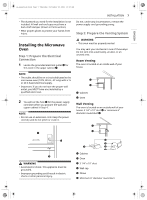
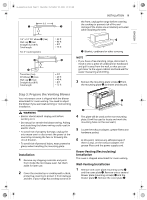
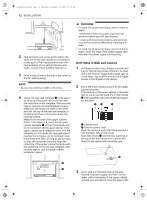
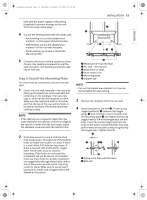
us_main.book.book Page 12 Thursday, November 25, 2021 10:15 AM 12 INSTALLATION 2 Find and mark one or two points where the studs are on the wall. (Studs are normally 16 inches apart.) Then measure and mark the stud locations. If you cannot find any wall studs, consult a local building contractor. 3 Draw a vertical line on the wall at the center of the 30″ wide opening. NOTE • Be sure the minimum width is 30 inches. 4 Center the rear wall template b in the space by lining up the plumb line on the wall with the centerline on the template. Then securely tape or tack the rear wall template in place. Make sure the minimum width is 30 inches and that the top of the rear wall template is located a minimum of 30 inches above the cooking surface. Measure the bottom of the upper cabinet frame. Trim edges A, B, and C on the upper cabinet template a so that the template will fit on the bottom of the upper cabinet. If the upper cabinet has a recessed frame, trim the template so it fits inside the recessed area. If needed, the template can be trimmed inside the printed trim lines, as long as you are able to align the centerline correctly. Align the centerline of the upper cabinet template with the centerline of the rear wall template, then securely tape or tack the upper cabinet template in place. WARNING • To avoid risk of personal injury, electric shock or death: - Note where electrical outlets and electrical wires are before you drill into the wall. - Locate and disconnect power to any electrical circuits that could be affected by installing this oven. • To avoid risk of personal injury, electric shock or death, cover the edge of the power supply cord hole with the power supply cord bushing. Drill Holes in Wall and Cabinet 1 Drill holes on the circles. If there is a stud, drill a 3/16" hole for lag screws. If there is no stud, drill a 3/4" hole for toggle bolts. Make sure to use at least 1 lag screw in a stud, and 2 toggle screws in the drywall or the plaster. 2 Drill a 3/8" hole at points J and K on the upper cabinet template. If the bottom of the upper cabinet is recessed 3/4" or more, you will need 2"x 2" filler blocks b (not included) to provide additional support for the bolts. a Cabinet front c Cabinet bottom shelf Mark the center of each filler block and drill a 3/8" diameter hole at the marks. Align filler blocks b over the two openings in the top of the microwave oven cabinet and attach to the cabinet with masking tape. 3 Cut or drill a 2" diameter hole at the area marked "M power supply cord hole" on the upper cabinet template. If the upper cabinet is metal, you will need to cover the edge of the
-
 1
1 -
2
-
3
-
4
-
5
-
6
-
 7
7 -
 8
8 -
 9
9 -
 10
10 -
 11
11 -
 12
12 -
 13
13 -
 14
14 -
 15
15 -
 16
16
 |
 |