Lantronix SISPM1040-3166-L Installation Guide Rev G - Page 31
Connecting the DI/DO Relay Wires, Digital output relay: 24VDC/1A
 |
View all Lantronix SISPM1040-3166-L manuals
Add to My Manuals
Save this manual to your list of manuals |
Page 31 highlights
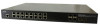
Lantronix Connecting the DI/DO Relay Wires SISPM1040-3xxx-L Install Guide 1. Insert the negative (ground)/positive DI/DO Relay wires into the +/- terminals, respectively. 2. To keep the DI/DO Relay wires from pulling loose, use a small flat-blade screwdriver to tighten the wire-clamp screws on the front of the terminal block connector. Note: • Digital output (relay): 24VDC/1A • Digital input: level 0(Low) -> 0V to 6V, level 1 (High) -> 10V to 24V FAULT: The two contacts of the terminal block connector are used to detect user-configured events. The two wires attached to the fault contacts form an open circuit when a user-configured event is triggered. If a user-configured event does not occur, the fault circuit remains closed. 33762 Rev. G https://www.lantronix.com/ Page 31 of 48
-
 1
1 -
2
-
3
-
4
-
5
-
6
-
7
-
8
-
9
-
10
-
11
-
12
-
13
-
14
-
15
-
16
-
17
-
18
-
19
-
20
-
21
-
22
-
23
-
24
-
25
-
 26
26 -
 27
27 -
 28
28 -
 29
29 -
 30
30 -
 31
31 -
 32
32 -
 33
33 -
 34
34 -
 35
35 -
 36
36 -
37
-
38
-
39
-
40
-
41
-
42
-
43
-
44
-
45
-
46
-
47
-
48
 |
 |
