Lantronix SISTP1040-551-LRT SISTP1040-551-LRT Install Guide Rev B - Page 10
DIN-Rail Mounting, Wall Mounting
 |
View all Lantronix SISTP1040-551-LRT manuals
Add to My Manuals
Save this manual to your list of manuals |
Page 10 highlights
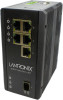
Lantronix SISTP1040-551-LRT Install Guide DIN-Rail Mounting 1. Screw the DIN-Rail bracket onto the switch with the provided bracket and screws. 2. Hook the unit over the DIN rail. 3. Push the bottom of the unit towards the DIN Rail until it snaps into place. Wall Mounting 1. Mark and prep holes in the wall surface for mounting. 2. Screw the wall-mount plate onto the switch with the M4 screws provided. 3. Screw the switch and wall mount plate onto the wall (screws not provided). 33841 Rev. B https://www.lantronix.com/ Page 10 of 26
-
 1
1 -
2
-
3
-
4
-
 5
5 -
 6
6 -
 7
7 -
 8
8 -
 9
9 -
 10
10 -
 11
11 -
 12
12 -
 13
13 -
 14
14 -
 15
15 -
16
-
17
-
18
-
19
-
20
-
21
-
22
-
23
-
24
-
25
-
26
 |
 |

Lantronix
SISTP1040-551-LRT Install Guide
33841 Rev. B
/
Page
10
of
26
DIN-Rail Mounting
1. Screw the DIN-Rail bracket onto the switch with the provided bracket and screws.
2. Hook the unit over the DIN rail.
3. Push the bottom of the unit towards the DIN Rail until it snaps into place.
Wall Mounting
1. Mark and prep holes in the wall surface for mounting.
2. Screw the wall-mount plate onto the switch with the M4 screws provided.
3. Screw the switch and wall mount plate onto the wall (screws not provided).