Lenovo IdeaCentre B500 Lenovo IdeaCentre B500 Hardware Maintenance Manual - Page 54
Replacing the camera
 |
View all Lenovo IdeaCentre B500 manuals
Add to My Manuals
Save this manual to your list of manuals |
Page 54 highlights
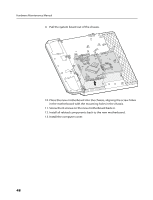
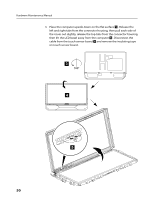
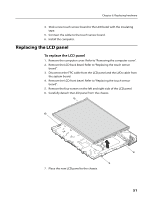
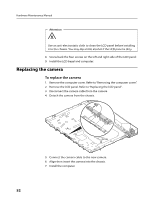
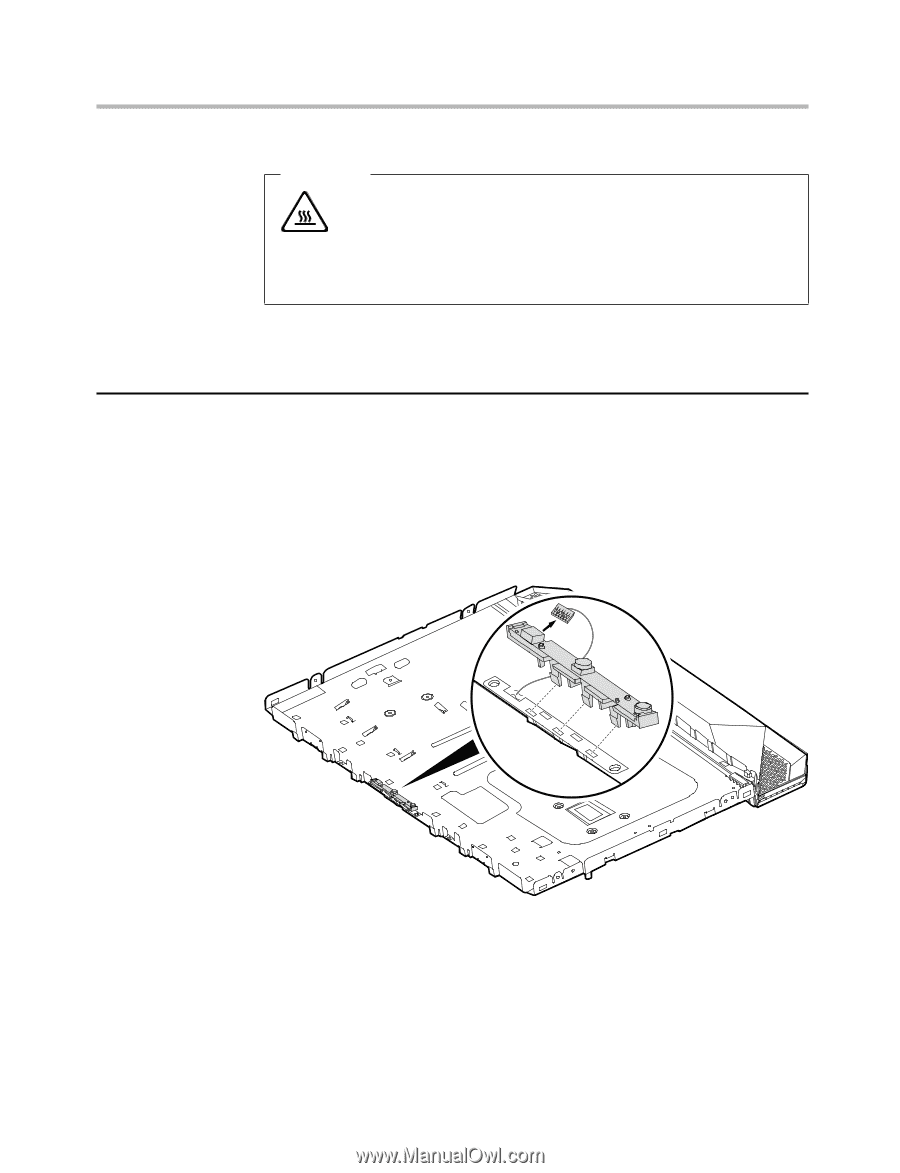
Hardware Maintenance Manual Attention Use an anti-electrostatic cloth to clean the LCD panel before installing it to the chassis. You may dip a little alcohol if the LCD panel is dirty. 8. Screw back the four screws on the left and right side of the LCD panel. 9. Install the LCD bezel and computer. Replacing the camera To replace the camera 1. Remove the computer cover. Refer to "Removing the computer cover". 2. Remove the LCD panel. Refer to "Replacing the LCD panel". 3. Disconnect the camera cable from the camera. 4. Detach the camera from the chassis. 5. Connect the camera cable to the new camera. 6. Align then insert the camera into the chassis. 7. Install the computer. 52
-
 1
1 -
2
-
3
-
4
-
5
-
6
-
7
-
8
-
9
-
10
-
11
-
12
-
13
-
14
-
15
-
16
-
17
-
18
-
19
-
20
-
21
-
22
-
23
-
24
-
25
-
26
-
27
-
28
-
29
-
30
-
31
-
32
-
33
-
34
-
35
-
36
-
37
-
38
-
39
-
40
-
41
-
42
-
43
-
44
-
45
-
46
-
47
-
48
-
 49
49 -
 50
50 -
 51
51 -
 52
52 -
 53
53 -
 54
54 -
 55
55 -
 56
56 -
 57
57 -
 58
58 -
 59
59 -
60
 |
 |
Hardware Maintenance Manual
52
Attention
Use an anti-electrostatic cloth to clean the LCD panel before installing
it to the chassis. You may dip a little alcohol if the LCD panel is dirty.
8.
Screw back the four screws on the left and right side of the LCD panel.
9.
Install the LCD bezel and computer.
Replacing the camera
To replace the camera
1.
Remove the computer cover. Refer to “Removing the computer cover”.
2.
Remove the LCD panel. Refer to “Replacing the LCD panel”.
3.
Disconnect the camera cable from the camera.
4.
Detach the camera from the chassis.
5.
Connect the camera cable to the new camera.
6.
Align then insert the camera into the chassis.
7. Install the computer.