Lenovo S50-30 Lenovo S50-30 All-In-One PC Hardware Maintenance Manual
Lenovo S50-30 Manual
 |
View all Lenovo S50-30 manuals
Add to My Manuals
Save this manual to your list of manuals |
Lenovo S50-30 manual content summary:
- Lenovo S50-30 | Lenovo S50-30 All-In-One PC Hardware Maintenance Manual - Page 1
Lenovo S50-30 All-In-One PC Hardware Maintenance Manual Machine Types: F0BA [S50-30] - Lenovo S50-30 | Lenovo S50-30 All-In-One PC Hardware Maintenance Manual - Page 2
- Lenovo S50-30 | Lenovo S50-30 All-In-One PC Hardware Maintenance Manual - Page 3
Lenovo S50-30 All-In-One PC Hardware Maintenance Manual Machine Types: F0BA [S50-30] - Lenovo S50-30 | Lenovo S50-30 All-In-One PC Hardware Maintenance Manual - Page 4
First Edition (March 2015)25th © Copyright Lenovo 2015, 2015. LIMITED AND RESTRICTED RIGHTS NOTICE: If data or software are delivered pursuant a General Services Administration "GSA" contract, use, reproduction, or disclosure is subject to restrictions set forth in Contract No. GS-35F-05925 - Lenovo S50-30 | Lenovo S50-30 All-In-One PC Hardware Maintenance Manual - Page 5
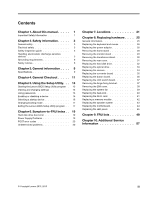
device 16 Changing booting mode 17 Exiting the Lenovo BIOS Setup Utility program . . 17 Chapter 6. Symptom-to-FRU Index . . 19 Hard disk drive boot error 19 Power Supply Problems 19 POST error codes 20 Undetermined problems 20 Chapter 7. Locations 21 Chapter 8. Replacing hardware . . . . 25 - Lenovo S50-30 | Lenovo S50-30 All-In-One PC Hardware Maintenance Manual - Page 6
iv Lenovo S50-30 All-In-One PC Hardware Maintenance Manual - Lenovo S50-30 | Lenovo S50-30 All-In-One PC Hardware Maintenance Manual - Page 7
manual This manual contains service and reference information for Lenovo S50-30 All-In-One computers listed on the cover. It is intended only for trained servicers who are familiar with Lenovo computer products. Before servicing a Lenovo this manual before following any of the instructions. Veuillez - Lenovo S50-30 | Lenovo S50-30 All-In-One PC Hardware Maintenance Manual - Page 8
2 Lenovo S50-30 All-In-One PC Hardware Maintenance Manual - Lenovo S50-30 | Lenovo S50-30 All-In-One PC Hardware Maintenance Manual - Page 9
removed covers and other parts in a safe place, away from all personnel, while you are servicing the computer. • Keep your tool case away from areas that people may walk through to covers, unless instructed otherwise in the installation and configuration procedures. © Copyright Lenovo 2015, 2015 3 - Lenovo S50-30 | Lenovo S50-30 All-In-One PC Hardware Maintenance Manual - Page 10
when you work with very high voltages; these instructions are in the safety sections of the maintenance cause personal injury and damage to the computer. • Do not service the following parts with the power on when they are removed yourself. 4 Lenovo S50-30 All-In-One PC Hardware Maintenance Manual - Lenovo S50-30 | Lenovo S50-30 All-In-One PC Hardware Maintenance Manual - Page 11
had required safety items installed to protect users and service personnel from injury. This guide addresses only those items. However, good judgment should could be and whether you can continue without first resolving the problem. Consider the following items and the safety hazards they present: - Lenovo S50-30 | Lenovo S50-30 All-In-One PC Hardware Maintenance Manual - Page 12
specific service instructed otherwise in the installation and configuration procedures. • Connect and disconnect cables as described in the following table when installing, moving, or opening covers on this product or attached devices. 6 Lenovo S50-30 All-In-One PC Hardware Maintenance Manual - Lenovo S50-30 | Lenovo S50-30 All-In-One PC Hardware Maintenance Manual - Page 13
: • Do not remove the covers. Removing the covers of the laser product could result in exposure to hazardous laser radiation. There are no serviceable parts inside the device. • Use of controls or adjustments or performance of procedures other than those specified herein might result in hazardous - Lenovo S50-30 | Lenovo S50-30 All-In-One PC Hardware Maintenance Manual - Page 14
are disconnected from the power source. 2 1 CAUTION: Do not place any object weighing more than 82 kg (180 lbs.) on top of rack-mounted devices. 8 Lenovo S50-30 All-In-One PC Hardware Maintenance Manual - Lenovo S50-30 | Lenovo S50-30 All-In-One PC Hardware Maintenance Manual - Page 15
that applies to all computer models covered by this manual. Specifications This section lists the physical specifications for your computer. This section lists the physical specifications for your computer. Type Lenovo S50-30 This section lists the physical specifications. Environment Air - Lenovo S50-30 | Lenovo S50-30 All-In-One PC Hardware Maintenance Manual - Page 16
10 Lenovo S50-30 All-In-One PC Hardware Maintenance Manual - Lenovo S50-30 | Lenovo S50-30 All-In-One PC Hardware Maintenance Manual - Page 17
servicing error messages appear if a problem or conflict is found by determine the cause of the problem: 1. Power-off the displayed error codes. • Look for readable instructions or a main menu on the display. If one of the following happens, follow the instruction given: • If the computer displays a - Lenovo S50-30 | Lenovo S50-30 All-In-One PC Hardware Maintenance Manual - Page 18
12 Lenovo S50-30 All-In-One PC Hardware Maintenance Manual - Lenovo S50-30 | Lenovo S50-30 All-In-One PC Hardware Maintenance Manual - Page 19
this procedure, shut down the operating system and turn off the computer. 2. Press and hold the F1 key then turn on the computer. When the Lenovo BIOS Setup Utility program is displayed, release the F1 key. Note: If a Power-On Password or an Administrator Password has been set, the Setup Utility - Lenovo S50-30 | Lenovo S50-30 All-In-One PC Hardware Maintenance Manual - Page 20
, then press the Enter key. A Setup Notice will be displayed confirming that your changes have been saved. 5. Return to the Lenovo BIOS Setup Utility program menu and select the Exit option. 6. Select Save Changes and Exit from the menu. 14 Lenovo S50-30 All-In-One PC Hardware Maintenance Manual - Lenovo S50-30 | Lenovo S50-30 All-In-One PC Hardware Maintenance Manual - Page 21
, then press the Enter key. 4. Retype the password to confirm. If you typed the password correctly, the password will be installed. 5. Return to the Lenovo BIOS Setup Utility program menu and select the Exit option. 6. Select Save Changes and Exit from the menu. To change a Power-On Password, do the - Lenovo S50-30 | Lenovo S50-30 All-In-One PC Hardware Maintenance Manual - Page 22
Boot Agent Select Disabled/IDE/AHCI mode. Device driver support is required for AHCI or RAID. Depending on Onboard Ethernet Support or LAN Boot Agent. 4. Select Disabled or Enabled and press the Enter key. 5. Return to the Lenovo BIOS Setup Lenovo S50-30 All-In-One PC Hardware Maintenance Manual - Lenovo S50-30 | Lenovo S50-30 All-In-One PC Hardware Maintenance Manual - Page 23
, you must change the boot mode to Legacy support. The legacy Windows operating system cannot be installed if you don't change the boot mode. To change the booting mode, do the following: 1. Start the Lenovo BIOS Setup Utility program (see "Starting the Lenovo BIOS Setup Utility program" on page 13 - Lenovo S50-30 | Lenovo S50-30 All-In-One PC Hardware Maintenance Manual - Page 24
18 Lenovo S50-30 All-In-One PC Hardware Maintenance Manual - Lenovo S50-30 | Lenovo S50-30 All-In-One PC Hardware Maintenance Manual - Page 25
used to help you decide which FRUs to have available when servicing a computer. If you are unable to correct the problem using this index, go to "Undetermined problems" on page 20. Notes: • If you have both an FRU/Action Reseat connectors Power Cord Power-on Switch © Copyright Lenovo 2015, 2015 19 - Lenovo S50-30 | Lenovo S50-30 All-In-One PC Hardware Maintenance Manual - Page 26
in Startup and set the option to Enabled. The BIOS then ignores the missing keyboard during POST. The BIOS was unable to find a suitable boot device. Make and components have been removed and the problem continues, replace the system board. 20 Lenovo S50-30 All-In-One PC Hardware Maintenance Manual - Lenovo S50-30 | Lenovo S50-30 All-In-One PC Hardware Maintenance Manual - Page 27
your computer is equipped with an infrared (IR) remote control, DO NOT put the USB IR receiver on the same plane as the screen. © Copyright Lenovo 2015, 2015 21 - Lenovo S50-30 | Lenovo S50-30 All-In-One PC Hardware Maintenance Manual - Page 28
connector 3. Microphone connector 4. Always On USB 3.0 connector 5. Memory card reader 6 2 3 5 7 8 9 6. Optical drive eject button 7. Volume control button 8. PC mode/HDMI-in switch 9. Power button 22 Lenovo S50-30 All-In-One PC Hardware Maintenance Manual - Lenovo S50-30 | Lenovo S50-30 All-In-One PC Hardware Maintenance Manual - Page 29
keyboard is connected to this USB port. Attention: Be sure not to block any air vents on the computer. Blocked air vents may cause thermal problems. Chapter 7. Locations 23 - Lenovo S50-30 | Lenovo S50-30 All-In-One PC Hardware Maintenance Manual - Page 30
cover 11. Motherboard 12. Hinge fixing bracket 13. Button board 14. LCD switch board 15. Wi-Fi card 16. Memory module 17. Speaker system 24 Lenovo S50-30 All-In-One PC Hardware Maintenance Manual - Lenovo S50-30 | Lenovo S50-30 All-In-One PC Hardware Maintenance Manual - Page 31
with your computer. To obtain copies of the Safety and Warranty Guide, go to the Support Web site at: http://support.lenovo.com. Note: Use only parts provided by Lenovo. General information Pre-disassembly instructions Before starting the disassembly procedure, make sure that you do the following - Lenovo S50-30 | Lenovo S50-30 All-In-One PC Hardware Maintenance Manual - Page 32
the operating system, and turn off the computer and all attached devices. Step 2. Locate the connector for the power cord. Refer to "Rear view". 26 Lenovo S50-30 All-In-One PC Hardware Maintenance Manual - Lenovo S50-30 | Lenovo S50-30 All-In-One PC Hardware Maintenance Manual - Page 33
Step 3. Disconnect the power adapter cable from the computer, then unplug the power cord from the electrical outlet. Step 4. To install the new power adapter: a. Connect the new power adapter to the same connector. Chapter 8. Replacing hardware 27 - Lenovo S50-30 | Lenovo S50-30 All-In-One PC Hardware Maintenance Manual - Page 34
It may be helpful to place the computer face-down on a soft flat surface for this procedure. Lenovo recommends that you use a blanket, towel, or other soft cloth to protect the computer screen from back into the hole to protect the screw. 1 28 Lenovo S50-30 All-In-One PC Hardware Maintenance Manual - Lenovo S50-30 | Lenovo S50-30 All-In-One PC Hardware Maintenance Manual - Page 35
it cool down before removing the cover. Note: It may be helpful to place the computer face-down on a soft flat surface for this procedure. Lenovo recommends that you use a blanket, towel, or other soft cloth to protect the computer screen from scratches or other damage. To remove the monitor stand - Lenovo S50-30 | Lenovo S50-30 All-In-One PC Hardware Maintenance Manual - Page 36
may be helpful to place the computer face-down on a soft flat surface for this procedure. Lenovo recommends that you use a blanket, towel, or other soft cloth to protect the computer screen from secure the transformer stand to the computer. 30 Lenovo S50-30 All-In-One PC Hardware Maintenance Manual - Lenovo S50-30 | Lenovo S50-30 All-In-One PC Hardware Maintenance Manual - Page 37
cool down before removing the rear cover. Note: It may be helpful to place the computer face-down on a soft flat surface for this procedure. Lenovo recommends that you use a blanket, towel, or other soft cloth to protect the touch screen from scratches or other damage. To remove the rear cover - Lenovo S50-30 | Lenovo S50-30 All-In-One PC Hardware Maintenance Manual - Page 38
to "Removing the rear cover". Remove the hard disk drive assembly as shown. 1 2 Disconnect the data and power cable from the hard disk drive. 3 32 Lenovo S50-30 All-In-One PC Hardware Maintenance Manual - Lenovo S50-30 | Lenovo S50-30 All-In-One PC Hardware Maintenance Manual - Page 39
Step 8. Remove the four screws that secure the hard disk drive to the bracket. Step 9. To install the new hard disk drive: a. Attach the bracket pieces to the new hard disk drive, and secure them with the four screws. b. Slide the new hard disk drive into the hard disk drive bay. c. Secure the new - Lenovo S50-30 | Lenovo S50-30 All-In-One PC Hardware Maintenance Manual - Page 40
to "Removing the frame stand", "Removing the monitor stand", or "Removing the transformer stand". Remove the rear cover. Refer to "Removing the rear cover". 34 Lenovo S50-30 All-In-One PC Hardware Maintenance Manual - Lenovo S50-30 | Lenovo S50-30 All-In-One PC Hardware Maintenance Manual - Page 41
Step 6. Remove the screw that secures the camera to the front bezel. 1 Step 7. Slide the camera out 2 and disconnect the data cable from the camera. 3 Step 8. To install the new camera: a. Connect the data cable to the new camera. b. Line up the holes in the new camera with the mounting holes on - Lenovo S50-30 | Lenovo S50-30 All-In-One PC Hardware Maintenance Manual - Page 42
may be helpful to place the computer face-down on a soft flat surface for this procedure. Lenovo recommends that you use a blanket, towel, or other soft cloth to protect the computer screen from for help with locating the various connectors. 36 Lenovo S50-30 All-In-One PC Hardware Maintenance Manual - Lenovo S50-30 | Lenovo S50-30 All-In-One PC Hardware Maintenance Manual - Page 43
it cool down before removing the cover. • It may be helpful to place the computer face-down on a soft flat surface for this procedure. Lenovo recommends that you use a blanket, towel, or other soft cloth to protect the computer screen from scratches or other damage. Replacing the LCD switch board - Lenovo S50-30 | Lenovo S50-30 All-In-One PC Hardware Maintenance Manual - Page 44
may be helpful to place the computer face-down on a soft flat surface for this procedure. Lenovo recommends that you use a blanket, towel, or other soft cloth to protect the computer screen from to let it cool down before removing the cover. 38 Lenovo S50-30 All-In-One PC Hardware Maintenance Manual - Lenovo S50-30 | Lenovo S50-30 All-In-One PC Hardware Maintenance Manual - Page 45
cool down before removing the rear cover. • It may be helpful to place the computer face-down on a soft flat surface for this procedure. Lenovo recommends that you use a blanket, towel, or other soft cloth to protect the computer screen from scratches or other damage. Chapter 8. Replacing hardware - Lenovo S50-30 | Lenovo S50-30 All-In-One PC Hardware Maintenance Manual - Page 46
helpful to place the computer face-down on a soft flat surface for this procedure. Lenovo recommends that you use a blanket, towel, or other soft cloth to protect the computer screen from scratches or other damage. To replace the heat-sink 40 Lenovo S50-30 All-In-One PC Hardware Maintenance Manual - Lenovo S50-30 | Lenovo S50-30 All-In-One PC Hardware Maintenance Manual - Page 47
Step 1. Step 2. Step 3. Step 4. Step 5. Step 6. Step 7. Step 8. Remove any media (disks, CDs, DVDs, or memory cards) from the drives, shut down the operating system, and turn off the computer and all attached devices. Unplug all power cords from electrical outlets. Disconnect all cables attached to - Lenovo S50-30 | Lenovo S50-30 All-In-One PC Hardware Maintenance Manual - Page 48
helpful to place the computer face-down on a soft flat surface for this procedure. Lenovo recommends that you use a blanket, towel, or other soft cloth to protect the computer wait 3 to 5 minutes to let it cool down before removing the cover. 42 Lenovo S50-30 All-In-One PC Hardware Maintenance Manual - Lenovo S50-30 | Lenovo S50-30 All-In-One PC Hardware Maintenance Manual - Page 49
it cool down before removing the cover. • It may be helpful to place the computer face-down on a soft flat surface for this procedure. Lenovo recommends that you use a blanket, towel, or other soft cloth to protect the computer screen from scratches or other damage. Chapter 8. Replacing hardware 43 - Lenovo S50-30 | Lenovo S50-30 All-In-One PC Hardware Maintenance Manual - Page 50
the drives, shut down the operating system, and turn off the computer and all attached devices. Step 2. Unplug all power cords from electrical outlets. 44 Lenovo S50-30 All-In-One PC Hardware Maintenance Manual - Lenovo S50-30 | Lenovo S50-30 All-In-One PC Hardware Maintenance Manual - Page 51
Step 3. Disconnect all cables attached to the computer. This includes power cords, input/output (I/O) cables, and any other cables that are connected to the computer. Refer to "Left and right view" and "Rear view" for help with locating the various connectors. Step 4. Remove the computer stand. - Lenovo S50-30 | Lenovo S50-30 All-In-One PC Hardware Maintenance Manual - Page 52
helpful to place the computer face-down on a soft flat surface for this procedure. Lenovo recommends that you use a blanket, towel, or other soft cloth to protect the computer ". Step 19. Remove the camera. Refer to "Replacing the camera". 46 Lenovo S50-30 All-In-One PC Hardware Maintenance Manual - Lenovo S50-30 | Lenovo S50-30 All-In-One PC Hardware Maintenance Manual - Page 53
LED panel: a. Attach all the cables to the new LED panel. b. Reattach all the parts to the chassis. Step 22. Reattach the EMI cover. Step 23. Reattach the rear cover and computer stand. Chapter 8. Replacing hardware 47 - Lenovo S50-30 | Lenovo S50-30 All-In-One PC Hardware Maintenance Manual - Page 54
48 Lenovo S50-30 All-In-One PC Hardware Maintenance Manual - Lenovo S50-30 | Lenovo S50-30 All-In-One PC Hardware Maintenance Manual - Page 55
Main Frame LG WHT W S5030 Main Frame SAM WHT W S5030 Bracket HDD W A9050 Bracket ODD W S5030 Stand Bracket W A9050 Lenovo PN CRU ID 5CB0H29988 1 5CB0H30012 5CB0H34343 5CB0H34344 1 5SE0H30016 5SE0H29999 5SE0H30022 5SE0H29990 1 16200613 16200674 16200535 16200544 16200512 16200688 16200534 16200513 - Lenovo S50-30 | Lenovo S50-30 All-In-One PC Hardware Maintenance Manual - Page 56
+ BlueTooth 2x2 WOI Intel 7260BN 2x2BN+BT PCIE HMC Antenna Antenna Main+Aux W S5030 50 Lenovo S50-30 All-In-One PC Hardware Maintenance Manual Lenovo PN 5S60H30001 SDX0F84991 25215311 SDX0F84995 SDX0F84992 25215310 SDX0F84996 5B30H30014 45K0501 25215311 00FC442 25215310 5F10H29989 5C50H30019 - Lenovo S50-30 | Lenovo S50-30 All-In-One PC Hardware Maintenance Manual - Page 57
S5030 W8P 2G I3-4025U New MB W S5030 NOK 2G I5-4210U New MB W S5030 W8S 2G I5-4210U New MB W S5030 W8P 2G I5-4210U New MB W S5030 NOK 1G 3558U New MB W PRC MB W S5030 W8S I3-4025U UMA PRC MB Lenovo PN 5B20J35787 5B20J35785 5B20J35782 5B20J35781 5B20J35779 5B20J35773 5B20J35807 5B20J35804 5B20J35803 - Lenovo S50-30 | Lenovo S50-30 All-In-One PC Hardware Maintenance Manual - Page 58
-TLF1 Power Supply DELTA ADP-120ZB BBHT common 120W adapter CRU,CMN 90W Common adapter 52 Lenovo S50-30 All-In-One PC Hardware Maintenance Manual Lenovo PN 5B20J35788 5B20J35783 5B20J35805 5B20J35791 1100635 03T7117 1100983 1100967 1100986 1101012 1100643 03T7118 1100985 1100956 1100957 5SB0H30015 - Lenovo S50-30 | Lenovo S50-30 All-In-One PC Hardware Maintenance Manual - Page 59
Liteon SK8821(EN) New F5 USB KB Win8 Chicony KU0989 (TR)NewF5 USB KB Win8 Chicony KU0989(EN) New F5 USB KB Win8 Lenovo PN 00KT357 00PC353 00PC387 00PC379 00PC351 00KT362 00PC356 00KT359 00KT360 00KT361 00PC357 00PC350 00PC386 00KT365 00PC352 00KT358 00PC362 00PC354 00PC355 00PC358 00PC345 25214495 - Lenovo S50-30 | Lenovo S50-30 All-In-One PC Hardware Maintenance Manual - Page 60
single1.0m Brazil Power cord® LiXun(BoShuo) 1.0 M C5 Brazil Power cord HL 士1 M C5 Brazil Power cord 54 Lenovo S50-30 All-In-One PC Hardware Maintenance Manual Lenovo PN 25214485 25209243 25210791 00PC327 25216340 25216246 25214496 00PC324 00PC341 25214494 00PC339 00PC344 25211201 25216343 25216244 - Lenovo S50-30 | Lenovo S50-30 All-In-One PC Hardware Maintenance Manual - Page 61
Power cord longwell black single1.0m SA C5 Power cord® LiXun(BoShuo) 1.0 M C5 SA Power cord HL 士1 M C5 SA Power cord Lenovo PN 31039100 31503356 31049507 31039101 31503360 31049503 31039103 31503361 31049508 31039107 31503362 31049502 31038885 31503354 31049499 31039106 31503358 31049498 31039105 - Lenovo S50-30 | Lenovo S50-30 All-In-One PC Hardware Maintenance Manual - Page 62
56 Lenovo S50-30 All-In-One PC Hardware Maintenance Manual - Lenovo S50-30 | Lenovo S50-30 All-In-One PC Hardware Maintenance Manual - Page 63
is allowed to control the power management features of the computer and the settings for Advanced Power Management (APM) BIOS mode is ignored. Not all operating systems support ACPI BIOS mode. Automatic Power-On features The Automatic Power-On features within the Power Management menu allow you to
-
 1
1 -
 2
2 -
 3
3 -
 4
4 -
 5
5 -
 6
6 -
 7
7 -
8
-
9
-
10
-
11
-
12
-
13
-
14
-
15
-
16
-
17
-
18
-
19
-
20
-
21
-
22
-
23
-
24
-
25
-
26
-
27
-
28
-
29
-
30
-
31
-
32
-
33
-
34
-
35
-
36
-
37
-
38
-
39
-
40
-
41
-
42
-
43
-
44
-
45
-
46
-
47
-
48
-
49
-
50
-
51
-
52
-
53
-
54
-
55
-
56
-
57
-
58
-
59
-
60
-
61
-
62
-
63
 |
 |

Lenovo S50-30 All-In-One PC Hardware
Maintenance Manual
Machine Types: F0BA [S50-30]