Lenovo ThinkPad i Series 1300 ThinkPad i Series 1200/1300, TP 130 - User's Ref - Page 71
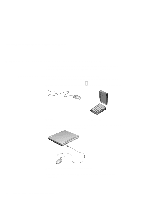
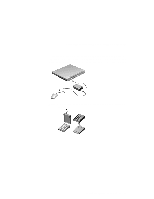
b. Replace the hard disk drive cover, and tighten the screw.
 |
View all Lenovo ThinkPad i Series 1300 manuals
Add to My Manuals
Save this manual to your list of manuals |
Page 71 highlights
Upgrading the hard disk drive 5. Pull the strap of the hard disk drive to remove the drive (3). 6. To install the new hard disk drive, do the following: a. Insert the new hard disk drive into the bay. Make sure you connect the drive firmly. b. Replace the hard disk drive cover, and tighten the screw. c. Turn the computer right-side up, and power it on. Extending the features of your computer 57
-
 1
1 -
2
-
3
-
4
-
5
-
6
-
7
-
8
-
9
-
10
-
11
-
12
-
13
-
14
-
15
-
16
-
17
-
18
-
19
-
20
-
21
-
22
-
23
-
24
-
25
-
26
-
27
-
28
-
29
-
30
-
31
-
32
-
33
-
34
-
35
-
36
-
37
-
38
-
39
-
40
-
41
-
42
-
43
-
44
-
45
-
46
-
47
-
48
-
49
-
50
-
51
-
52
-
53
-
54
-
55
-
56
-
57
-
58
-
59
-
60
-
61
-
62
-
63
-
64
-
65
-
 66
66 -
 67
67 -
 68
68 -
 69
69 -
 70
70 -
 71
71 -
 72
72 -
 73
73 -
 74
74 -
 75
75 -
 76
76 -
77
-
78
-
79
-
80
-
81
-
82
-
83
-
84
-
85
-
86
-
87
-
88
-
89
-
90
-
91
-
92
-
93
-
94
-
95
-
96
-
97
-
98
-
99
-
100
-
101
-
102
-
103
-
104
-
105
-
106
-
107
-
108
-
109
-
110
-
111
-
112
-
113
-
114
-
115
-
116
-
117
-
118
-
119
-
120
-
121
-
122
-
123
-
124
-
125
-
126
-
127
-
128
-
129
-
130
-
131
-
132
-
133
-
134
-
135
-
136
-
137
-
138
-
139
-
140
-
141
-
142
-
143
-
144
-
145
-
146
-
147
-
148
-
149
-
150
-
151
-
152
-
153
-
154
-
155
-
156
-
157
-
158
-
159
-
160
-
161
-
162
 |
 |

Upgrading the hard disk drive
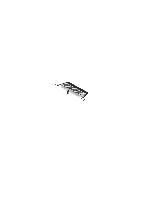
5. Pull the strap of the hard disk drive to remove the drive (3).
6. To install the new hard disk drive, do the following:
a. Insert the new hard disk drive into the bay. Make sure you
connect the drive firmly.
b. Replace the hard disk drive cover, and tighten the screw.
c. Turn the computer right-side up, and power it on.
Extending the features of your computer
57