Lexmark 734DN Print Quality - Page 3
Color misregistration - photoconductor
 |
UPC - 734646086059
View all Lexmark 734DN manuals
Add to My Manuals
Save this manual to your list of manuals |
Page 3 highlights
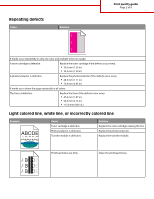
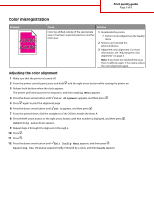
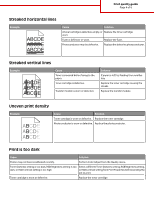
Print quality guide Page 3 of 8 Color misregistration Example ABCDE ABCDE Cause Solution Color has shifted outside of the appropriate area or has been superimposed over another color area. 1 Recalibrate the printer. • Perform Color Adjust from the Quality menu 2 Remove and reinstall the photoconductor. 3 Adjust the color alignment. For more information, see "Adjusting the color alignment" on page 3. Note: If you have not resolved the issue, then recalibrate again. If necessary, adjust the color alignment again. Adjusting the color alignment 1 Make sure that the printer is turned off. 2 From the printer control panel, press and hold and the right arrow button while turning the printer on. 3 Release both buttons when the clock appears. The printer performs its power-on sequence, and then Config Menu appears. 4 Press the down arrow button until Color Alignment appears, and then press . 5 Press again to print the alignment page. 6 Press the down arrow button until Set A appears, and then press . 7 From the printed sheet, find the straightest of the 20 lines beside the letter A. 8 Press the left arrow button or the right arrow button until that number is displayed, and then press . Submitting selection appears. 9 Repeat steps 6 through 8 to align sets A through L. 10 Press . 11 Press . 12 Press the down arrow button until Exit Config Menu appears, and then press . Resetting the Printer appears briefly, followed by a clock, and then Ready appears.
-
 1
1 -
 2
2 -
 3
3 -
 4
4 -
 5
5 -
 6
6 -
 7
7 -
 8
8
 |
 |