Lexmark CX331 Users Guide PDF - Page 34
Linking trays, Installing and updating software, drivers, and firmware
 |
View all Lexmark CX331 manuals
Add to My Manuals
Save this manual to your list of manuals |
Page 34 highlights
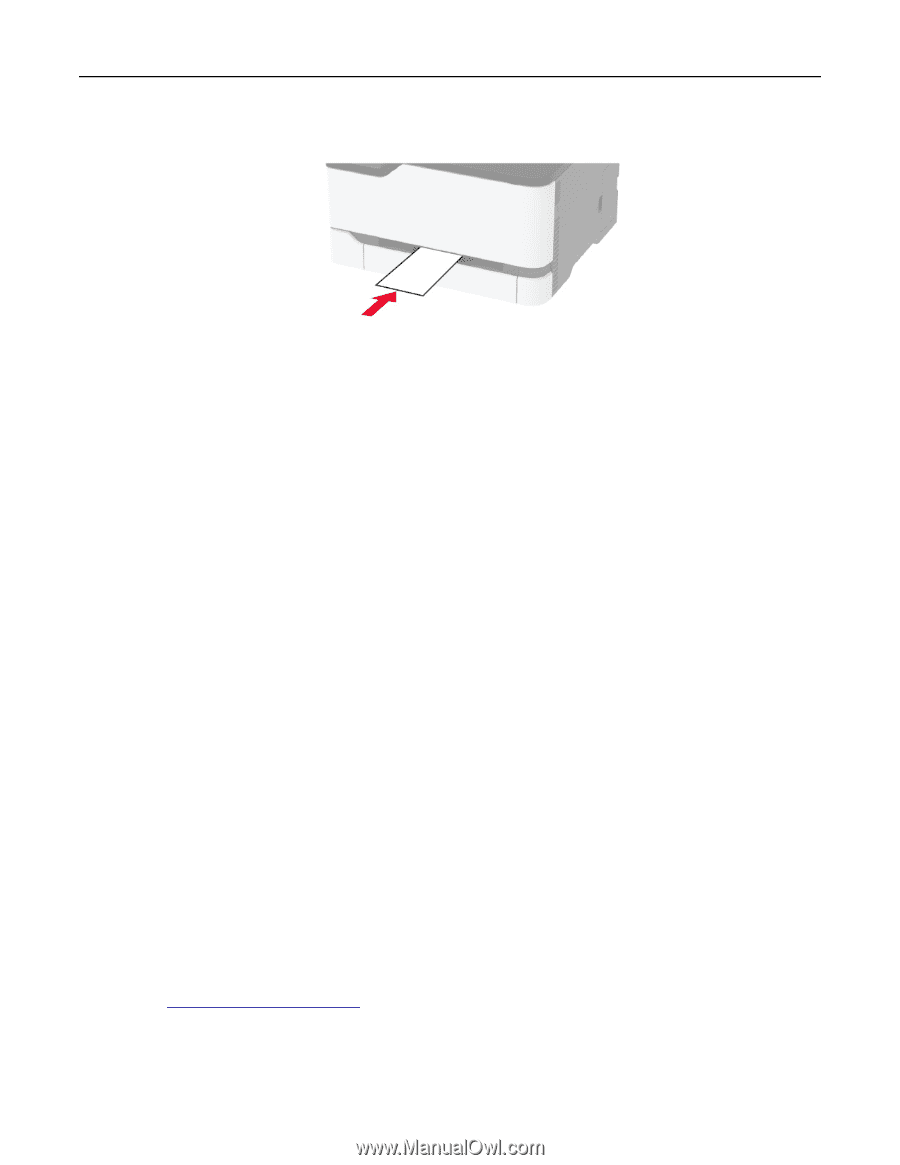
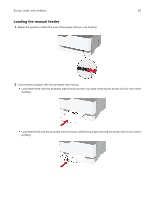
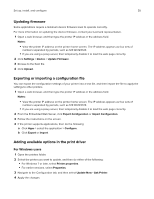
Set up, install, and configure 34 • Load envelope with the flap side down and against the right side of the paper guide. 3 Feed the paper until its leading edge gets pulled in. Notes: • To avoid paper jams, do not force paper into the manual feeder. • Before loading another sheet, wait for a message to appear on the display. Linking trays 1 From the home screen, touch Settings > Paper > Tray Configuration > select a paper source. 2 Set the same paper size and paper type for the trays that you are linking. 3 From the home screen, touch Settings > Device > Maintenance > Config Menu > Tray Configuration > Tray Linking. 4 Touch Automatic. To unlink trays, make sure that no trays have the same paper size and paper type settings. Warning-Potential Damage: The temperature of the fuser varies according to the specified paper type. To avoid printing issues, match the paper type setting in the printer with the paper loaded in the tray. Installing and updating software, drivers, and firmware Installing the printer software Notes: • The print driver is included in the software installer package. • For Macintosh computers with macOS version 10.7 or later, you do not need to install the driver to print on an AirPrint-certified printer. 1 Obtain a copy of the software installer package. • From the software CD that came with your printer. • Go to http://support.lexmark.com, and then select your printer and operating system. 2 Run the installer, and then follow the instructions on the computer screen.
-
 1
1 -
2
-
3
-
4
-
5
-
6
-
7
-
8
-
9
-
10
-
11
-
12
-
13
-
14
-
15
-
16
-
17
-
18
-
19
-
20
-
21
-
22
-
23
-
24
-
25
-
26
-
27
-
28
-
 29
29 -
 30
30 -
 31
31 -
 32
32 -
 33
33 -
 34
34 -
 35
35 -
 36
36 -
 37
37 -
 38
38 -
 39
39 -
40
-
41
-
42
-
43
-
44
-
45
-
46
-
47
-
48
-
49
-
50
-
51
-
52
-
53
-
54
-
55
-
56
-
57
-
58
-
59
-
60
-
61
-
62
-
63
-
64
-
65
-
66
-
67
-
68
-
69
-
70
-
71
-
72
-
73
-
74
-
75
-
76
-
77
-
78
-
79
-
80
-
81
-
82
-
83
-
84
-
85
-
86
-
87
-
88
-
89
-
90
-
91
-
92
-
93
-
94
-
95
-
96
-
97
-
98
-
99
-
100
-
101
-
102
-
103
-
104
-
105
-
106
-
107
-
108
-
109
-
110
-
111
-
112
-
113
-
114
-
115
-
116
-
117
-
118
-
119
-
120
-
121
-
122
-
123
-
124
-
125
-
126
-
127
-
128
-
129
-
130
-
131
-
132
-
133
-
134
-
135
-
136
-
137
-
138
-
139
-
140
-
141
-
142
-
143
-
144
-
145
-
146
-
147
-
148
-
149
-
150
-
151
-
152
-
153
-
154
-
155
-
156
-
157
-
158
-
159
-
160
-
161
-
162
-
163
-
164
-
165
-
166
-
167
-
168
-
169
-
170
-
171
-
172
-
173
-
174
-
175
-
176
-
177
-
178
-
179
-
180
-
181
-
182
-
183
-
184
-
185
-
186
-
187
-
188
-
189
-
190
-
191
-
192
-
193
-
194
-
195
-
196
-
197
-
198
-
199
-
200
-
201
-
202
-
203
-
204
-
205
-
206
-
207
-
208
-
209
-
210
-
211
-
212
-
213
-
214
-
215
-
216
-
217
-
218
-
219
-
220
-
221
 |
 |