Lexmark Interact S606 Quick Reference - Page 20
Canceling an e-mail, Using SmartSolutions, What is SmartSolutions?, Troubleshooting
 |
View all Lexmark Interact S606 manuals
Add to My Manuals
Save this manual to your list of manuals |
Page 20 highlights
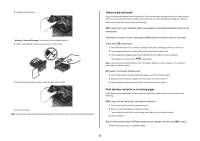
3 If you want to change the default e-mail subject: a Touch Subject. b Enter your subject, and then touch OK. 4 If you want to change the default e-mail message: a Touch Message. b Enter your message, and then touch OK. 5 Select the file to attach: Note: You can attach only one document or photo to each e-mail. • If you want to attach a document: a Touch Attach document to E-mail. b Touch the file name of the document that you want to attach. c Touch Continue. • If you want to attach a photo: a Touch Attach Photo to E-mail. b Touch the photo you want to attach. c Touch Continue. 6 Touch an option to enter or select the recipients: • Enter E-mail Address-enter the e-mail address manually. • Address Book-touch Sort by Name or Sort by Group, and then select the contact. • History-select the name or e-mail address from the history list. If necessary, touch OK or Accept each time you make a selection. 7 To enter additional recipients, touch Add Recipient, and then enter the e-mail address, name, or group you want to add. Touch Accept every time you add a recipient. Note: You can send an e-mail to up to 30 recipients. 8 Touch Send. Canceling an e-mail To cancel an e-mail, press . Using SmartSolutions What is SmartSolutions? SmartSolutions is a set of solutions that you can create, customize, and download from the SmartSolutions Web site (http://smartsolutions.lexmark.com) to your printer. It lets you create one-touch custom solutions to streamline repetitive copying, scanning, and printing tasks. SmartSolutions also lets you view RSS feeds, calendars, and online photo albums from the printer control panel. To access a solution you created or customized, touch SmartSolutions on the printer control panel, and then select the icon or name of the solution. For solutions with an option to send an e-mail, you must first set up your printer to e-mail through from the home screen. Your printer may not come with some of these solutions depending on the features of the printer that you purchased. Creating and customizing printer solutions Before you begin, make sure: • Your printer and computer are each connected to the Internet through an Ethernet or wireless connection. • Your printer is powered on. 1 Go to the SmartSolutions Web site at http://smartsolutions.lexmark.com. 2 Log in or create an account. 3 Add your printer. 4 Use the Web site to create, customize, and download solutions to your printer. For more information, click HELP on the SmartSolutions Web site. Troubleshooting Before you troubleshoot Use this checklist to solve most printer problems: • Make sure the power cord is plugged into the printer and into a properly grounded electrical outlet. • Make sure the printer is not plugged into any surge protectors, uninterrupted power supplies, or extension cords. • Make sure the printer is turned on. 20
-
 1
1 -
2
-
3
-
4
-
5
-
6
-
7
-
8
-
9
-
10
-
11
-
12
-
13
-
14
-
 15
15 -
 16
16 -
 17
17 -
 18
18 -
 19
19 -
 20
20 -
 21
21 -
 22
22 -
 23
23 -
 24
24 -
 25
25
 |
 |