Lexmark MS725 Quick Reference
Lexmark MS725 Manual
 |
View all Lexmark MS725 manuals
Add to My Manuals
Save this manual to your list of manuals |
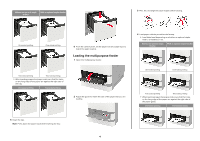
Lexmark MS725 manual content summary:
- Lexmark MS725 | Quick Reference - Page 1
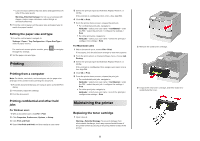
until needed. 1 Remove the tray. Note: To avoid paper jams, do not remove trays while the printer is busy. 4 Load the paper stack with the printable side facedown, and then make sure that the side guides fit snugly against the paper. • Do not slide paper into the tray. • To avoid paper jams, make - Lexmark MS725 | Quick Reference - Page 2
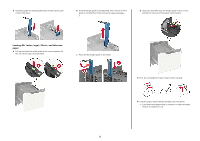
A5 until it clicks into place. • Load envelopes with the flap side up and against the left side of the tray. c Remove the A5 length guide from its holder. Warning-Potential Damage: Do not use envelopes with stamps, clasps, snaps, windows, coated linings, or self‑stick adhesives. 5 Insert the tray - Lexmark MS725 | Quick Reference - Page 3
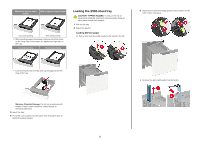
being loaded. Loading A4‑, letter‑, legal‑, Oficio‑, and folio‑size paper a Pull up and slide the width guide to the correct position for the size of the paper being loaded. c Place the A5 length guide in its holder. 3 Flex, fan, and align the paper edges before loading. 4 Load the paper stack - Lexmark MS725 | Quick Reference - Page 4
the holes on the long edge of the paper are against the right side of the tray. One‑sided printing Two‑sided printing 2 Adjust the guide to match the size of the paper that you are loading. 4 Load paper with the printable side faceup. • Load letterhead depending on whether an optional - Lexmark MS725 | Quick Reference - Page 5
flap side down and against the left side of the paper guide. Warning-Potential Damage: Do not use envelopes with stamps, clasps the print job > configure the settings > Print Maintaining the printer Replacing the toner cartridge 1 Open door A. Warning-Potential Damage: To prevent damage from - Lexmark MS725 | Quick Reference - Page 6
the new toner cartridge. • Do against the paper or envelopes. • Push the tray firmly into the printer after loading paper. • If you are loading prepunched paper for use , see the "Loading paper and specialty media" section of the User's Guide. Notes: - If the bin extender is shorter than the size of - Lexmark MS725 | Quick Reference - Page 7
paper. • Flex, fan, and straighten paper or specialty media before loading it. • When Jam Recovery is set to On or Auto, the printer reprints jammed pages. Jam locations 6 Finisher or output option rear door • Door H • Door K • Door L • Door N • Door P 7 Door C 8 Stapler door • Door F • Door - Lexmark MS725 | Quick Reference - Page 8
2 Remove the toner cartridge. 3 Insert the tray. Paper jam in door A 1 Open door A. Warning-Potential Damage: To prevent damage from electrostatic discharge, touch any exposed metal frame of the printer before accessing or touching interior areas of the printer. 3 Remove the imaging unit. 4 Pull - Lexmark MS725 | Quick Reference - Page 9
unit. 7 Insert the imaging unit. 8 Insert the toner cartridge. 9 Close the door. Paper jam in door C 1 Open door C. CAUTION-HOT SURFACE: The inside of the printer touch any exposed metal frame of the printer before accessing or touching interior areas of the printer. 2 Remove the jammed paper from - Lexmark MS725 | Quick Reference - Page 10
• Below the fuser area 4 Reload paper. • Duplex area Paper jam in the multipurpose feeder 1 Remove paper from the multipurpose feeder. Paper jam in the output expander 1 Open door K. 3 - Lexmark MS725 | Quick Reference - Page 11
Paper jam in the high‑capacity output expander 1 Open door L. Paper jam in the 4‑bin mailbox Paper jam in door N 1 Open door N. 2 Remove the jammed paper. Note: Make sure that all paper fragments are removed. 2 Remove the jammed paper. Note: Make sure that all paper fragments are removed. Paper - Lexmark MS725 | Quick Reference - Page 12
Paper jam in the staple, hole punch finisher Paper jam in door P 1 Open door P. 3 Close the door. Paper jam in the staple finisher bin Remove the jammed paper. Note: Make sure that all paper fragments are removed. 2 Remove the jammed paper. Note: Make sure that all paper fragments are removed. - Lexmark MS725 | Quick Reference - Page 13
2 Remove the staple cartridge holder. 3 Remove the loose staples. 4 Press the staples against the metal bracket. Note: If the staples are at the rear of the cartridge, then shake the cartridge downward to bring the staples near the metal bracket. 13 - Lexmark MS725 | Quick Reference - Page 14
5 Insert the staple cartridge holder until it clicks into place. 2 Remove the staple cartridge holder. 6 Close the door. Staple jam in the staple, hole punch finisher 1 Depending on the staple jam location, open either door F or door G. 3 Remove the loose staples. 14 - Lexmark MS725 | Quick Reference - Page 15
4 Press the staples against the metal bracket. 5 Insert the staple cartridge holder until it clicks into place. Note: If the staples are at the rear of the cartridge, then shake the cartridge downward to bring the staples near the metal bracket. 6 Close the door. 15
-
 1
1 -
 2
2 -
 3
3 -
 4
4 -
 5
5 -
 6
6 -
 7
7 -
8
-
9
-
10
-
11
-
12
-
13
-
14
-
15
 |
 |
Quick Reference
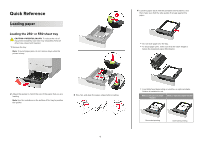
Loading paper
Loading the 250
‑
or 550
‑
sheet tray
CAUTION—POTENTIAL INJURY:
To reduce the risk of
equipment instability, load each tray separately. Keep all
other trays closed until needed.
1
Remove the tray.
Note:
To avoid paper jams, do not remove trays while the
printer is busy.
2
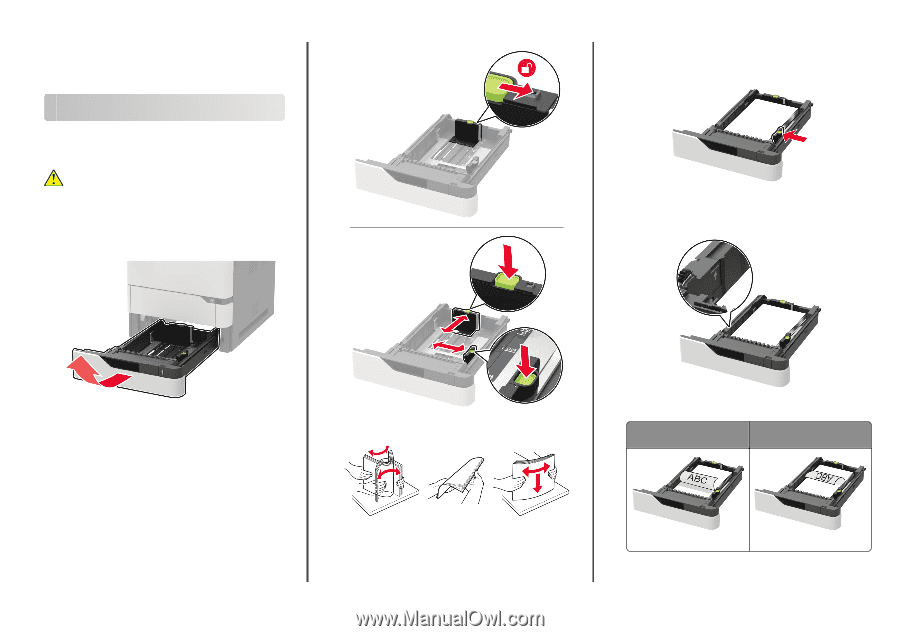
Adjust the guides to match the size of the paper that you are
loading.
Note:
Use the indicators on the bottom of the tray to position
the guides.
3
Flex, fan, and align the paper edges before loading.
4
Load the paper stack with the printable side facedown, and
then make sure that the side guides fit snugly against the
paper.
•
Do not slide paper into the tray.
•
To avoid paper jams, make sure that the stack height is
below the maximum paper fill indicator.
•
Load letterhead depending on whether an optional staple
finisher is installed or not.
Without an optional staple
finisher
With an optional staple finisher
One
‑
sided printing
One
‑
sided printing
1