Lexmark P350 Setup Solutions - Page 9
Using the Photo Edit Mode menu, Using the PictBridge menu, Setup troubleshooting
 |
View all Lexmark P350 manuals
Add to My Manuals
Save this manual to your list of manuals |
Page 9 highlights
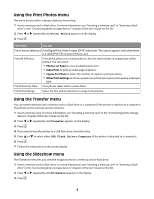
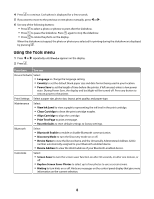
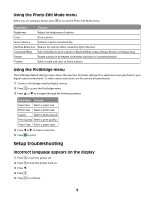
Using the Photo Edit Mode menu When you are viewing a photo, press to access the Photo Edit Mode menu. From here You can Brightness Adjust the brightness of a photo. Crop Crop a photo. Auto Enhance Enhance a photo automatically. Red Eye Reduction Reduce the red-eye effect caused by light reflection. Colorized Effect Select whether to print a photo in Black & White, Sepia, Antique Brown, or Antique Gray. Rotate Rotate a photo in 90-degree increments clockwise or counterclockwise. Frames Select a style and color to frame a photo. Using the PictBridge menu The PictBridge default settings menu allows the selection of printer settings if no selections were specified on your digital camera beforehand. To make camera selections, see the camera documentation. 1 Connect a PictBridge-enabled digital camera. 2 Press to access the PictBridge menu. 3 Press or to navigate through the following options: From here You can Paper Size Select a paper size. Photo Size Select a photo size. Layout Select a photo layout. Print Quality Select a print quality. Paper Type Select a paper type. 4 Press or to make a selection. 5 Press to print. Setup troubleshooting Incorrect language appears on the display 1 Press to turn the printer off. 2 Press to turn the printer back on. 3 Press . 4 Press . 5 Press to continue. 9
-
 1
1 -
2
-
3
-
 4
4 -
 5
5 -
 6
6 -
 7
7 -
 8
8 -
 9
9 -
 10
10 -
 11
11 -
 12
12
 |
 |
