Lexmark S315 User's Guide - Page 11
Warning-Potential Damage, Use - printhead cannot move
 |
View all Lexmark S315 manuals
Add to My Manuals
Save this manual to your list of manuals |
Page 11 highlights
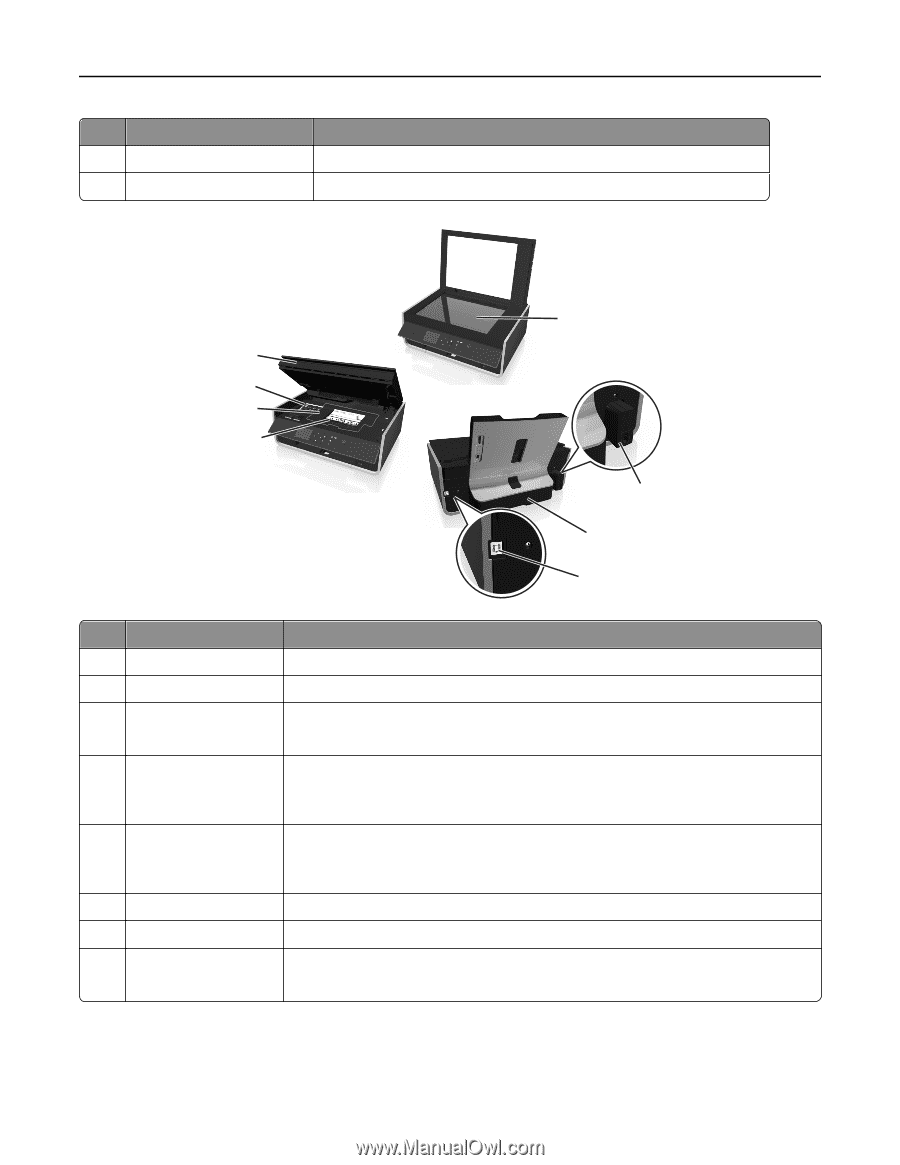
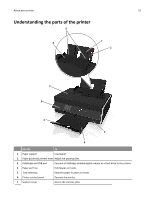
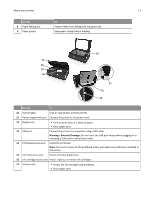
About your printer 11 Use the 8 Paper feed guard 9 Paper guides To Prevent items from falling into the paper slot. Keep paper straight when feeding. 10 17 16 15 14 11 12 13 Use the To 10 Scanner glass Scan or copy photos and documents. 11 Power supply with port Connect the printer to the power cord. 12 Duplex unit • Print on both sides of a sheet of paper. • Clear paper jams. 13 USB port Connect the printer to a computer using a USB cable. Warning-Potential Damage: Do not touch the USB port except when plugging in or removing a USB cable or installation cable. 14 Printhead access area Install the printhead. Note: The carrier moves to the printhead access area when no printhead is installed in the printer. 15 Jam clearance cover Access and clear paper jams. 16 Ink cartridge access area Install, replace, or remove ink cartridges. 17 Scanner unit • Access the ink cartridges and printhead. • Clear paper jams.
-
 1
1 -
2
-
3
-
4
-
5
-
 6
6 -
 7
7 -
 8
8 -
 9
9 -
 10
10 -
 11
11 -
 12
12 -
 13
13 -
 14
14 -
 15
15 -
 16
16 -
17
-
18
-
19
-
20
-
21
-
22
-
23
-
24
-
25
-
26
-
27
-
28
-
29
-
30
-
31
-
32
-
33
-
34
-
35
-
36
-
37
-
38
-
39
-
40
-
41
-
42
-
43
-
44
-
45
-
46
-
47
-
48
-
49
-
50
-
51
-
52
-
53
-
54
-
55
-
56
-
57
-
58
-
59
-
60
-
61
-
62
-
63
-
64
-
65
-
66
-
67
-
68
-
69
-
70
-
71
-
72
-
73
-
74
-
75
-
76
-
77
-
78
-
79
-
80
-
81
-
82
-
83
-
84
-
85
-
86
-
87
-
88
-
89
-
90
-
91
-
92
-
93
-
94
-
95
-
96
-
97
-
98
-
99
-
100
-
101
-
102
-
103
-
104
-
105
-
106
-
107
-
108
-
109
-
110
-
111
-
112
-
113
-
114
-
115
-
116
-
117
-
118
-
119
-
120
-
121
-
122
-
123
-
124
-
125
-
126
-
127
-
128
-
129
-
130
-
131
-
132
-
133
-
134
-
135
-
136
-
137
-
138
-
139
-
140
-
141
-
142
-
143
 |
 |