Lexmark X4690 User's Guide - Page 37
Changing wireless settings after installation, Using Windows, Using Macintosh
 |
View all Lexmark X4690 manuals
Add to My Manuals
Save this manual to your list of manuals |
Page 37 highlights
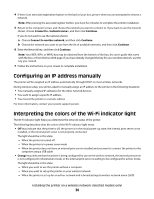
• Blinking orange may indicate that: - The printer is out of the range of the wireless access point (wireless router). - The printer is trying to communicate with the wireless access point (wireless router), but the wireless access point (wireless router) may be turned off or not working properly. - The printer is trying to establish communication with the wireless access point (wireless router). This is true if you have already configured the printer for use on your wireless network. When the printer has been configured, any time you turn the printer off and then turn it back on, the internal print server in the printer will try to connect to your wireless access point (wireless router). - The wireless settings of the printer may no longer be valid. • Green indicates that the printer is connected to a wireless network. The light should be in this state when you want to start using the printer that is already set up on your wireless network. • Blinking green indicates that the printer internal print server is being updated. Changing wireless settings after installation To change wireless settings on the printer, such as the configured network, the security key, or other settings: Using Windows 1 Do one of the following: • In Windows Vista, click . • In Windows XP and earlier, click Start. 2 Click All Programs or Programs, and then select the printer program folder from the list. 3 Click Tools Lexmark Wireless Setup Utility. Note: If the cable is not already connected, you may be prompted to connect the printer to the computer again using the installation cable as part of the setup process. 4 Follow the prompts on the computer screen to reinstall the software, and then make the changes that you want. Using Macintosh 1 From the Finder desktop, double-click the printer folder. 2 Double-click Lexmark Wireless Setup Assistant. 3 Follow the instructions on the computer screen. Installing the printer on a wireless network (selected models only) 37
-
 1
1 -
2
-
3
-
4
-
5
-
6
-
7
-
8
-
9
-
10
-
11
-
12
-
13
-
14
-
15
-
16
-
17
-
18
-
19
-
20
-
21
-
22
-
23
-
24
-
25
-
26
-
27
-
28
-
29
-
30
-
31
-
 32
32 -
 33
33 -
 34
34 -
 35
35 -
 36
36 -
 37
37 -
 38
38 -
 39
39 -
 40
40 -
 41
41 -
 42
42 -
43
-
44
-
45
-
46
-
47
-
48
-
49
-
50
-
51
-
52
-
53
-
54
-
55
-
56
-
57
-
58
-
59
-
60
-
61
-
62
-
63
-
64
-
65
-
66
-
67
-
68
-
69
-
70
-
71
-
72
-
73
-
74
-
75
-
76
-
77
-
78
-
79
-
80
-
81
-
82
-
83
-
84
-
85
-
86
-
87
-
88
-
89
-
90
-
91
-
92
-
93
-
94
-
95
-
96
-
97
-
98
-
99
-
100
-
101
-
102
-
103
-
104
-
105
-
106
-
107
-
108
-
109
-
110
-
111
-
112
-
113
-
114
-
115
-
116
-
117
-
118
-
119
-
120
-
121
-
122
-
123
-
124
-
125
-
126
-
127
-
128
-
129
-
130
-
131
-
132
-
133
-
134
-
135
-
136
-
137
-
138
-
139
-
140
-
141
-
142
-
143
 |
 |
