Lexmark Z2420 User's Guide - Page 33
Warning-Potential Damage, Notes, Load up to, Make sure
 |
UPC - 734646061438
View all Lexmark Z2420 manuals
Add to My Manuals
Save this manual to your list of manuals |
Page 33 highlights
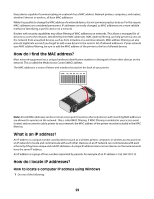
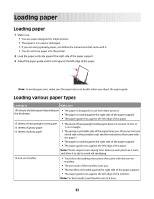
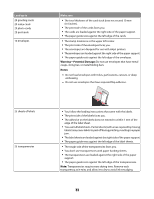
Load up to 25 greeting cards 25 index cards 25 photo cards 25 postcards 10 envelopes Make sure • The total thickness of the card stack does not exceed 10 mm (0.4 inches). • The print side of the cards faces you. • The cards are loaded against the right side of the paper support. • The paper guide rests against the left edge of the cards. • The stamp location is in the upper left corner. • The print side of the envelopes faces you. • The envelopes are designed for use with inkjet printers. • The envelopes are loaded against the right side of the paper support. • The paper guide rests against the left edge of the envelopes. Warning-Potential Damage: Do not use envelopes that have metal clasps, string ties, or metal folding bars. Notes: - Do not load envelopes with holes, perforations, cutouts, or deep embossing. - Do not use envelopes that have exposed flap adhesive. 25 sheets of labels 25 transparencies • You follow the loading instructions that came with the labels. • The print side of the labels faces you. • The adhesive on the labels does not extend to within 1 mm of the edge of the label sheet. • You use full label sheets. Partial sheets (with areas exposed by missing labels) may cause labels to peel off during printing, resulting in a paper jam. • The label sheets are loaded against the right side of the paper support. • The paper guide rests against the left edge of the label sheets. • The rough side of the transparencies faces you. • You don't use transparencies with paper backing sheets. • The transparencies are loaded against the right side of the paper support. • The paper guide rests against the left edge of the transparencies. Note: Transparencies require more drying time. Remove each transparency as it exits, and allow it to dry to avoid ink smudging. 33
-
 1
1 -
2
-
3
-
4
-
5
-
6
-
7
-
8
-
9
-
10
-
11
-
12
-
13
-
14
-
15
-
16
-
17
-
18
-
19
-
20
-
21
-
22
-
23
-
24
-
25
-
26
-
27
-
 28
28 -
 29
29 -
 30
30 -
 31
31 -
 32
32 -
 33
33 -
 34
34 -
 35
35 -
 36
36 -
 37
37 -
 38
38 -
39
-
40
-
41
-
42
-
43
-
44
-
45
-
46
-
47
-
48
-
49
-
50
-
51
-
52
-
53
-
54
-
55
-
56
-
57
-
58
-
59
-
60
-
61
-
62
-
63
-
64
-
65
-
66
-
67
-
68
-
69
-
70
-
71
-
72
-
73
-
74
-
75
-
76
-
77
-
78
-
79
-
80
-
81
-
82
-
83
-
84
-
85
-
86
-
87
 |
 |