LiftMaster 8550 8550 Manual - Page 14
Install the Door Control - accessories
 |
View all LiftMaster 8550 manuals
Add to My Manuals
Save this manual to your list of manuals |
Page 14 highlights
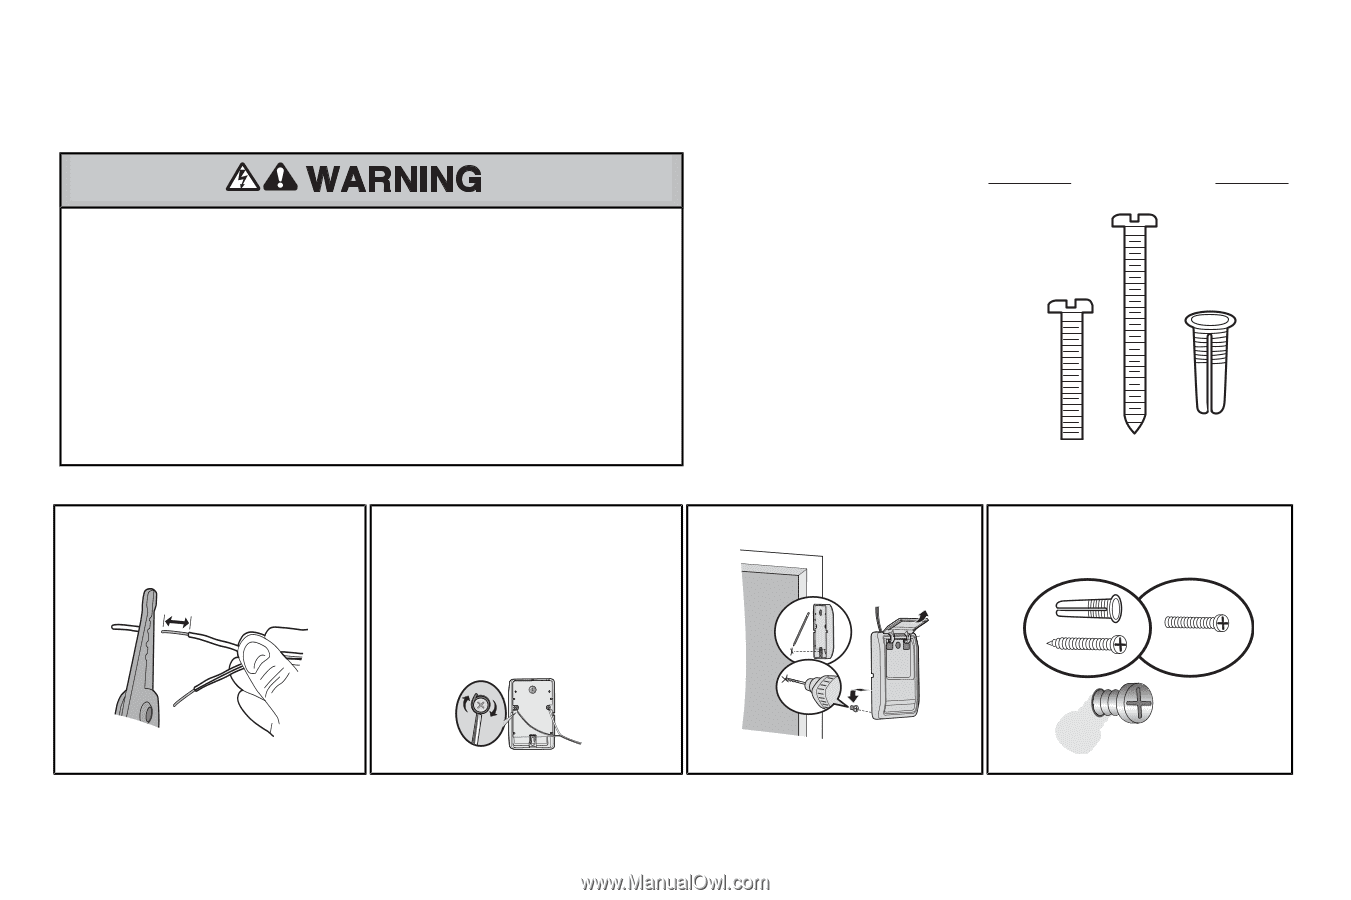
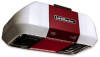
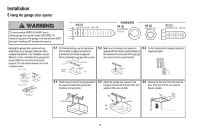
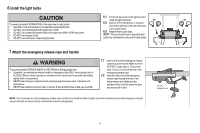
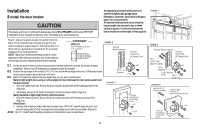
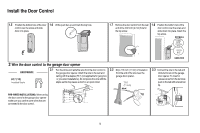
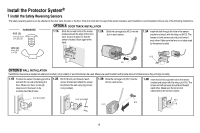
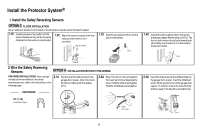
Install the Door Control 1 Install the door control INTRODUCTION Compatible with MyQ™ and Security+®2.0 To prevent possible SERIOUS INJURY or DEATH from electrocution: • Be sure power is NOT connected BEFORE installing door control. • Connect ONLY to 24 VOLT low voltage wires. To prevent possible SERIOUS INJURY or DEATH from a closing garage door: accessories. NOTE: Older LiftMaster accessories and third party products are not compatible.Your garage door opener is compatible with up to 2 Smart Control Panels or 4 of any other Security+®2.0 door controls. • Install door control within sight of garage door, out of reach of children at a minimum height of 5 feet Install the door control within sight of the door at (1.5 m), and away from ALL moving parts of door. a minimum height of 5 feet (1.5 m) where small • NEVER permit children to operate or play with door control push buttons or remote control transmitters. children cannot reach, and away from the moving parts of the door. • Activate door ONLY when it can be seen clearly, is properly adjusted, and there are no obstructions to door travel. NOTE: Your product may look different than moving parts of the door the illustrations. • ALWAYS keep garage door in sight until completely closed. NEVER permit anyone to cross path of closing garage door. HARDWARE H14 (2) Screw 6ABx1-1/4" H15 (2) Screw 6-32x1" H16 (2) Drywall Anchors NOTE: For gang box installations it is not necessary to drill holes or install the drywall anchors. Use the existing holes in the gang box. 1.1 Strip 7/16 inch (11 mm) of insulation from 1.2 Connect one wire to each of the two screws 1.3 Mark the location of the bottom mounting 1.4 Install the bottom screw, allowing 1/8 inch one end of the wire and separate the wires. on the back of the door control. The wires hole and drill a 5/32 inch (4 mm) hole. (3 mm) to protrude from the wall. can be connected to either screw. 7/16" (11 mm) PRE-WIRED INSTALLATIONS: Choose Wall any two wires to connect, note which wires H16 GANG BOX are used so the correct wires are connected at the garage door opener in a later step. H14 H15 DRYWALL 14
-
 1
1 -
2
-
3
-
4
-
5
-
6
-
7
-
8
-
 9
9 -
 10
10 -
 11
11 -
 12
12 -
 13
13 -
 14
14 -
 15
15 -
 16
16 -
 17
17 -
 18
18 -
 19
19 -
20
-
21
-
22
-
23
-
24
-
25
-
26
-
27
-
28
-
29
-
30
-
31
-
32
-
33
-
34
-
35
-
36
-
37
-
38
-
39
-
40
 |
 |