Linksys WAP54GX User Guide - Page 14
Connecting the Wireless-G Access Point with SRX
 |
UPC - 745883565740
View all Linksys WAP54GX manuals
Add to My Manuals
Save this manual to your list of manuals |
Page 14 highlights
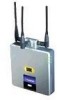
Wireless-G Access Point with SRX Chapter 4: Connecting the Wireless-G Access Point with SRX Overview This chapter explains how to connect the Access Point for setup. Connections for Setup 1. Connect your Ethernet network cable to your network router or switch. Then connect the other end of the network cable to the Access Point's Ethernet port. 2. Connect the included power adapter to the Access Point's Power port. Then plug the power adapter into an electrical outlet. The LEDs on the front panel will light up as soon as the Access Point powers on. Proceed to "Chapter 5: Setting Up the Wireless-G Access Point with SRX." Figure 4-1: Connect the Ethernet Network Cable Figure 4-2: Connect the Power Chapter 4: Connecting the Wireless-G Access Point with SRX 8 Overview
-
 1
1 -
2
-
3
-
4
-
5
-
6
-
7
-
8
-
 9
9 -
 10
10 -
 11
11 -
 12
12 -
 13
13 -
 14
14 -
 15
15 -
 16
16 -
 17
17 -
 18
18 -
 19
19 -
20
-
21
-
22
-
23
-
24
-
25
-
26
-
27
-
28
-
29
-
30
-
31
-
32
-
33
-
34
-
35
-
36
-
37
-
38
-
39
-
40
-
41
-
42
-
43
-
44
-
45
-
46
-
47
-
48
-
49
-
50
-
51
-
52
-
53
-
54
-
55
-
56
-
57
-
58
-
59
-
60
-
61
-
62
-
63
-
64
 |
 |
