Linksys WRT54GR User Guide - Page 20
Time Setting - setup
 |
UPC - 745883566327
View all Linksys WRT54GR manuals
Add to My Manuals
Save this manual to your list of manuals |
Page 20 highlights
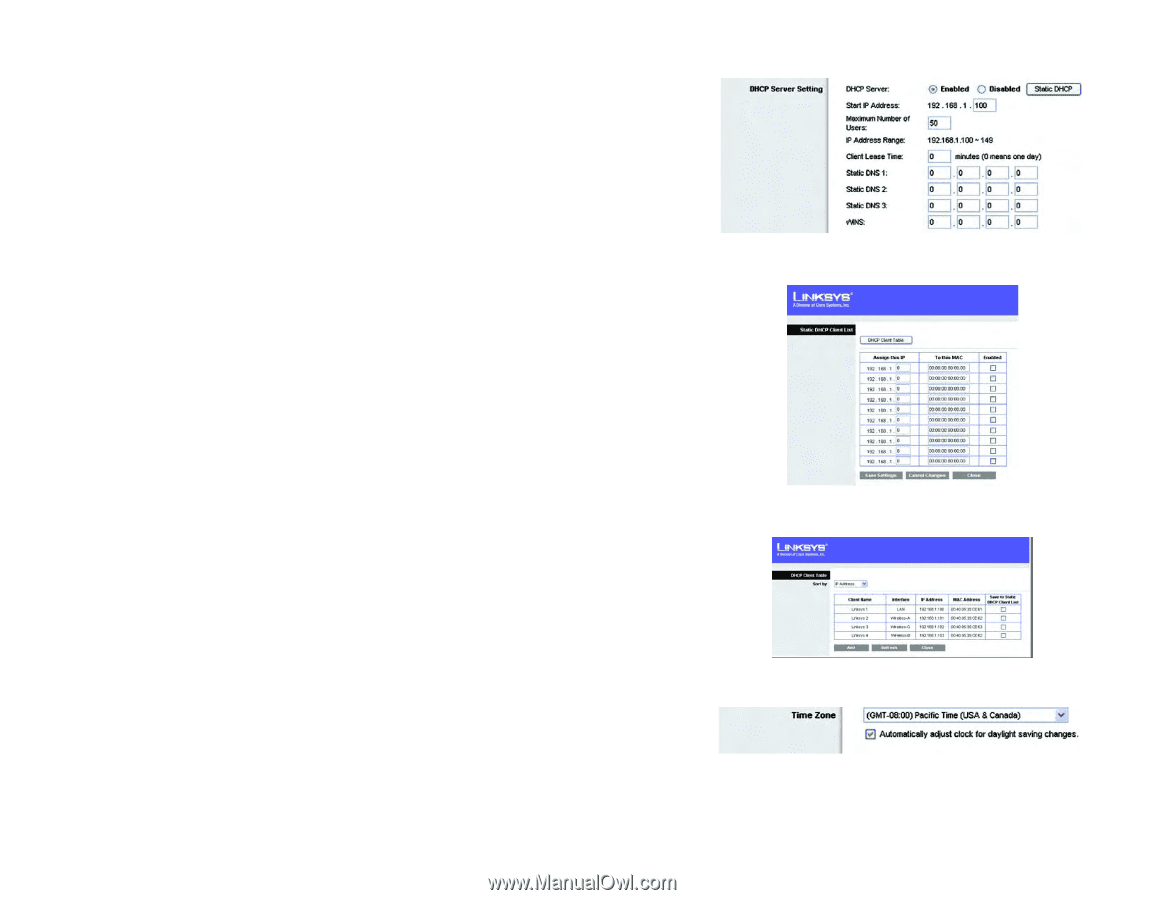
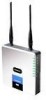
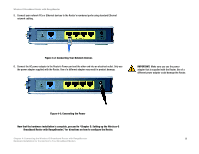
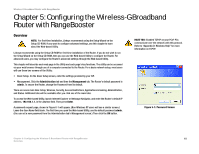
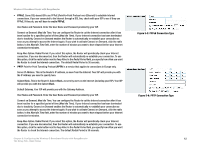
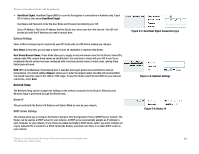
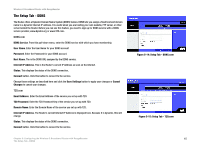
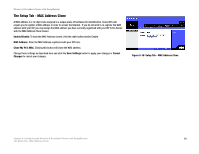
Wireless-G Broadband Router with RangeBooster DHCP Server. DHCP is enabled by factory default. If you already have a DHCP server on your network, or you don't want a DHCP server, then click the Disable radio button (no other DHCP features will be available). Start IP Address. Enter a value for the DHCP server to start with when issuing IP addresses. Because the Router's default IP address is 192.168.1.1, the Starting IP Address must be 192.168.1.2 or greater, but smaller than 192.168.1.253. The default Starting IP Address is 192.168.1.100. Maximum Number of DHCP Users. Enter the maximum number of PCs that you want the DHCP server to assign IP addresses to. This number cannot be greater than 253. The default is 50. Client Lease Time. The Client Lease Time is the amount of time a network user will be allowed connection to the Router with their current dynamic IP address. Enter the amount of time, in minutes, that the user will be "leased" this dynamic IP address. After the time is up, the user will be automatically assigned a new dynamic IP address. The default is 0 minutes, which means one day. Static DNS (1-3). The Domain Name System (DNS) is how the Internet translates domain or website names into Internet addresses or URLs. Your ISP will provide you with at least one DNS Server IP Address. If you wish to use another, type that IP Address in one of these fields. You can type up to three DNS Server IP Addresses here. The Router will use these for quicker access to functioning DNS servers. WINS. The Windows Internet Naming Service (WINS) manages each PC's interaction with the Internet. If you use a WINS server, enter that server's IP Address here. Otherwise, leave this blank. Static DHCP Client button. The Static DHCP Client button is used if you want to assign a fixed IP address to a MAC address. Enter the static local IP address in the Assign this IP field, and enter the MAC address of the PC in the To this MAC field. Then click the Enabled checkbox. When you have finished your entries, click the Save Settings button to save your changes. Click the Cancel Changes button to cancel your changes. To exit this screen, click the Close button. DHCP Client Table button. On the DHCP Client Table screen, you will see a list of DHCP clients with the following information: Client Name, Interface, IP Address, and MAC Address. From the Sort by drop-down menu, you can sort the table by Client Name, Interface, IP Address, or MAC Address. If you want to add any of the DHCP clients to the Static DHCP Client List, then click the Save to Static DHCP Client List checkbox and then click the Save Settings button. Click the Cancel Changes button to cancel your changes. To view the most up-to-date information, click the Refresh button. To exit this screen, click the Close button. Time Setting Change the time zone in which your network functions from this pull-down menu. (You can even automatically adjust for daylight savings time.) Chapter 6: Configuring the Wireless-G Broadband Router with RangeBooster The Setup Tab - Basic Setup Figure 5-10: DHCP Server Settings Figure 5-11: Static DHCP Client List Figure 5-12: DHCP Client Table Figure 5-13: Time Setting 14
-
 1
1 -
2
-
3
-
4
-
5
-
6
-
7
-
8
-
9
-
10
-
11
-
12
-
13
-
14
-
 15
15 -
 16
16 -
 17
17 -
 18
18 -
 19
19 -
 20
20 -
 21
21 -
 22
22 -
 23
23 -
 24
24 -
 25
25 -
26
-
27
-
28
-
29
-
30
-
31
-
32
-
33
-
34
-
35
-
36
-
37
-
38
-
39
-
40
-
41
-
42
-
43
-
44
-
45
-
46
-
47
-
48
-
49
-
50
-
51
-
52
-
53
-
54
-
55
-
56
-
57
-
58
-
59
-
60
-
61
-
62
-
63
-
64
-
65
-
66
-
67
-
68
-
69
-
70
-
71
-
72
-
73
-
74
-
75
-
76
-
77
-
78
-
79
-
80
 |
 |