Linksys WRT600N User Guide - Page 20
Storage > FTP Server, Setup, Access
 |
UPC - 745883573134
View all Linksys WRT600N manuals
Add to My Manuals
Save this manual to your list of manuals |
Page 20 highlights
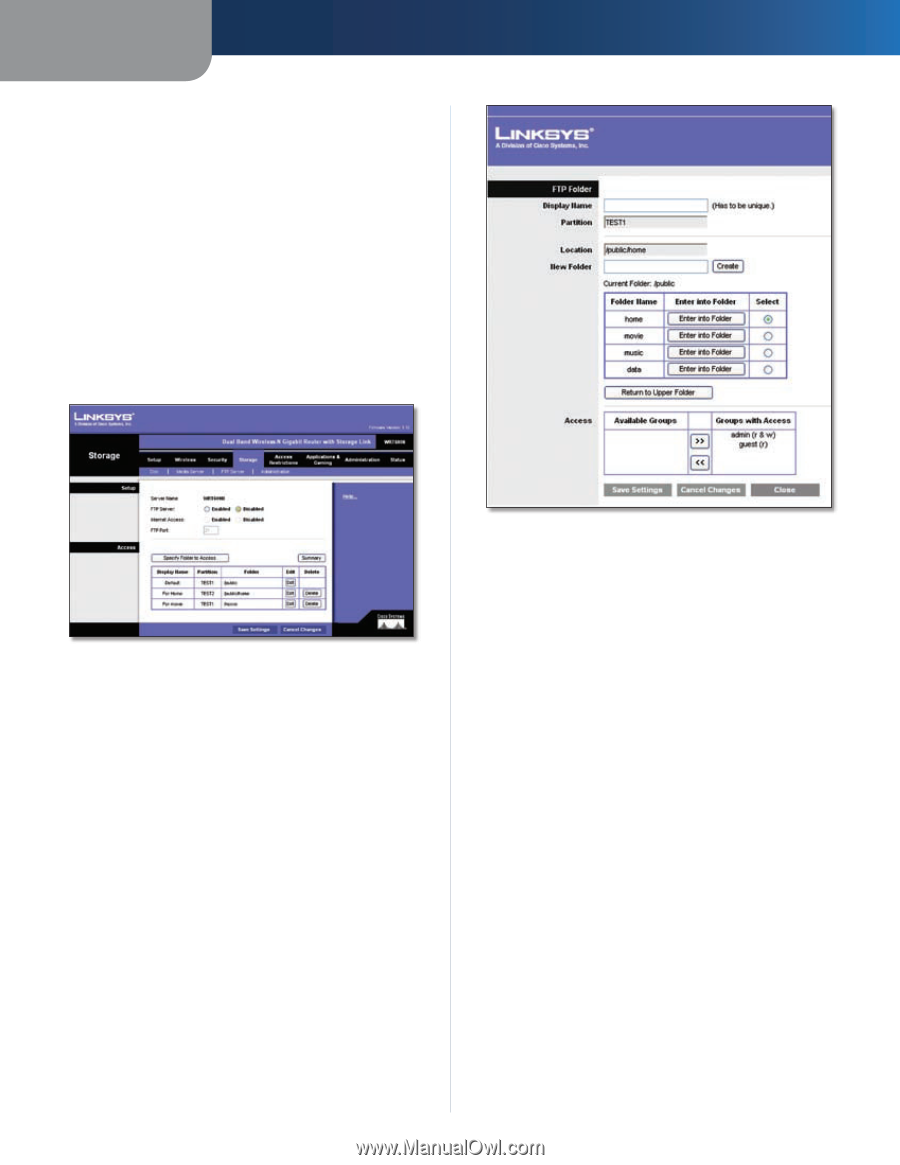
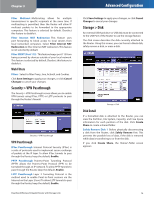
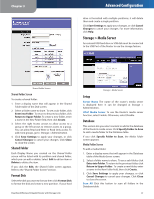
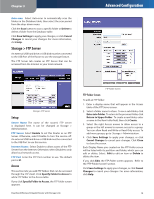
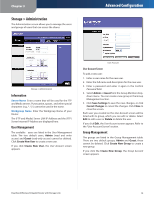
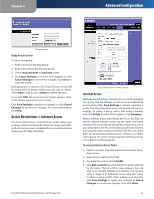
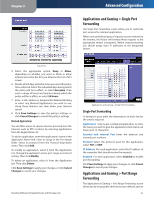
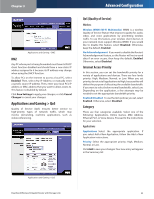
Chapter 3 Auto-scan Select Auto-scan to automatically scan the folders in the Database table, then select the scan period from the drop-down menu. Click the Scan button to scan a specific folder or Delete to delete a folder from the Database table. Click Save Settings to apply your changes, or click Cancel Changes to cancel your changes. For more information, click Help. Storage > FTP Server An external USB hard drive or USB disk must be connected to the USB Port of the Router to use the storage feature. The FTP Server tab creates an FTP Server that can be accessed from the Internet or your local network. Advanced Configuration Storage> FTP Server Setup Server Name The name of the router's FTP server is displayed here. It can be changed at Storage > Administration. FTP Server Select Enable to set this Router as an FTP Server. Otherwise, select Disable to turn the service off. An external USB hard drive or USB disk must be connected to the USB Port to use this service. Internet Access Select Enable to allow access of the FTP Server from the Internet. Otherwise, select Disable to only allow local network access. FTP Port Enter the FTP Port number to use. The default port is 21. Access This section lets you add FTP folders that can be accessed through the FTP client. Click Specify Folder to Access to add a FTP folder to the Access table. If you click Specify Folder to Access, the FTP Folder screen appears. Dual-Band Wireless-N Gigabit Router with Storage Link FTP Folder Screen FTP Folder Screen To add an FTP folder: 1. Enter a display name that will appear in the Access table of the FTP Server screen. 2. Select a folder name to share. To see a sub-folder, click Enter into Folder. To return to the previous folder, click Return to Upper Folder. To create a new folder, enter a name in the New Folder field, then click Create. 3. Select the right Access arrows to allow access to a group or the left arrows to remove access to a group. You can allow Read and Write or Read Only access. To add more groups, go to Storage > Administration. 4. Click Save Settings to apply your changes, or click Cancel Changes to cancel your changes. Click Close to close the screen. Each Display Name you created on the FTP Folder screen will be listed with its partition and folder, which you can edit or delete. Select Edit to edit an item or Delete to delete the item. If you click Edit, the FTP Folder screen appears. Refer to the "FTP Folder Screen" section. Click Save Settings to apply your changes, or click Cancel Changes to cancel your changes. For more information, click Help. 18
-
 1
1 -
2
-
3
-
4
-
5
-
6
-
7
-
8
-
9
-
10
-
11
-
12
-
13
-
14
-
 15
15 -
 16
16 -
 17
17 -
 18
18 -
 19
19 -
 20
20 -
 21
21 -
 22
22 -
 23
23 -
 24
24 -
 25
25 -
26
-
27
-
28
-
29
-
30
-
31
-
32
-
33
-
34
-
35
-
36
-
37
-
38
-
39
-
40
-
41
-
42
-
43
-
44
-
45
-
46
-
47
 |
 |