Logitech BH870 Getting Started Guide - Page 6
Installation and setup - wireless
 |
View all Logitech BH870 manuals
Add to My Manuals
Save this manual to your list of manuals |
Page 6 highlights
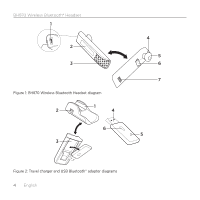
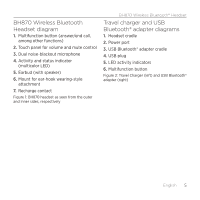
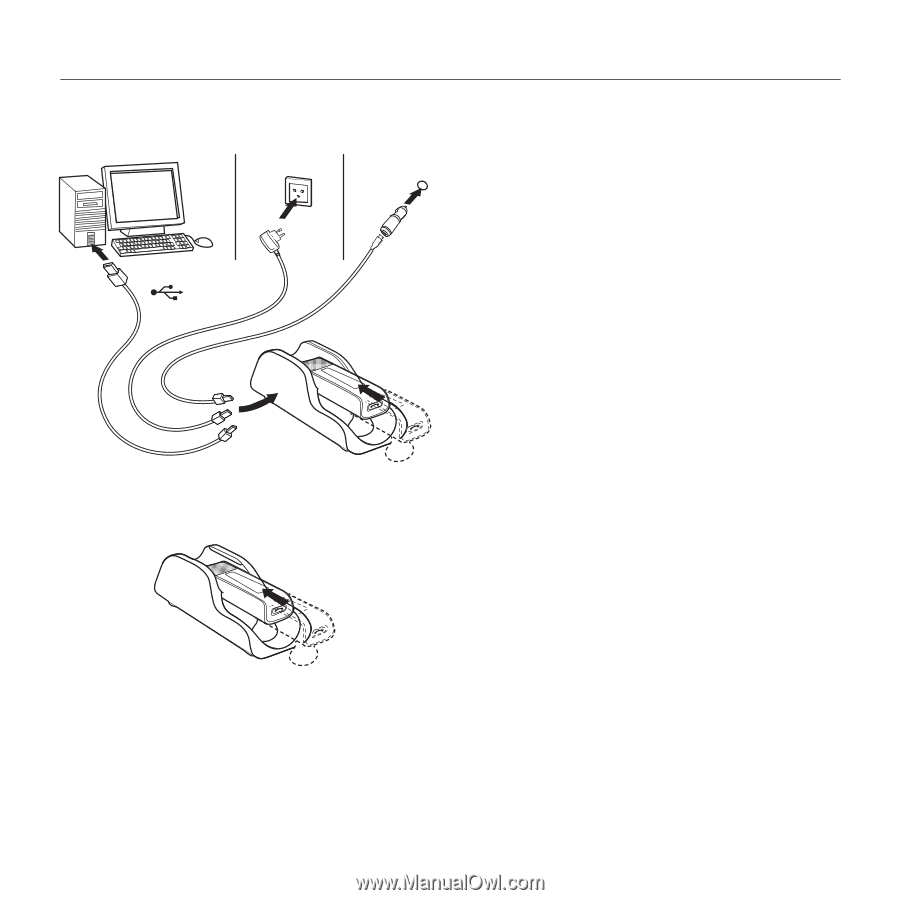
BH870 Wireless Bluetooth® Headset Installation and setup Step 1: Connect power to the travel charger USB Connect the mini-USB port on the 12V Travel Charger to one of the following power sources: • any USB port on a powered-on computer via the supplied mini-USB-toUSB cable (charge time is longer when connected to a PC) • a mains power socket via the supplied mains power adapter • a car's cigarette lighter via the car charge adapter (optional accessory) Step 2: Insert the headset into the travel charger See the figure below: The headset LED shows the current charge status: red (low;
-
 1
1 -
 2
2 -
 3
3 -
 4
4 -
 5
5 -
 6
6 -
 7
7 -
 8
8 -
 9
9 -
 10
10 -
 11
11 -
 12
12 -
13
-
14
-
15
-
16
-
17
-
18
-
19
-
20
 |
 |
BH870 Wireless Bluetooth® Headset
6
English
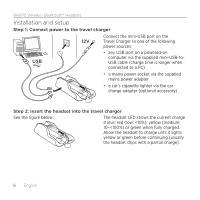
Installation and setup
Step 1: Connect power to the travel charger
Connect the mini-USB port on the
Travel Charger to one of the following
power sources:
•
any USB port on a powered-on
computer via the supplied mini-USB-to-
USB cable (charge time is longer when
connected to a PC)
•
a mains power socket via the supplied
mains power adapter
•
a car’s cigarette lighter via the car
charge adapter (optional accessory)
Step 2: Insert the headset into the travel charger
See the figure below:
The headset LED shows the current charge
status: red (low; <10%), yellow (medium;
10–<100%) or green when fully charged.
Allow the headset to charge until it lights
yellow or green before continuing (usually
the headset ships with a partial charge).
12V
USB