Logitech Transporter SE Owners Guide - Page 4
Installing the SlimServer Software - transporter setup
 |
View all Logitech Transporter SE manuals
Add to My Manuals
Save this manual to your list of manuals |
Page 4 highlights
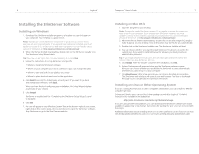
6 Logitech® Installing the SlimServer Software Installing on Windows 1. Download the SlimServer installer program to a location you can find again on your computer. Your Desktop is a good choice. Note: Transporter™ needs SlimServer version 6.5 or greater to access the music you have on your local computer. If you already have SlimServer installed, you must update to version 6.5.0 or later to use with your Transporter You can find the latest version of SlimServer at: http://www.slimdevices.com/download 2. When the file has finished downloading, double-click on the SlimServer installer icon. The SlimServer Setup Wizard starts. Tip: You may see an 'Open File - Security Warning', if so, click Run. 3. Follow the instructions to set up SlimServer, and specify: • Where to install the SlimServer software • Where on your computer your music collection is (you can change this later) • Where to save and look for any playlists you create • Where to place shortcuts and icons for the application 4. Click Next to accept the default value at each panel. If you want to go back and change your selection, click Back. When you have finished configuring your installation, the Setup Wizard displays a summary of your choices. 5. Click Install. SlimServer is installed and the "Completing the SlimServer Setup Wizard" panel is displayed. 6. Click OK. 7. An icon will appear in your Windows System Tray at the bottom right of your screen, right-click on this icon to show a menu and choose to open the SlimServer software, Stop SlimServer or go to the Slim Devices web site. Transporter™ Owner's Guide 7 Installing on Mac OS X 1. Save the .dmg file to your Desktop. Note: Transporter needs SlimServer version 6.5 or greater to access the music you have on your local computer. If you already have SlimServer installed, you must update to version 6.5.0 or later to use with your Transporter You can find the latest version of SlimServer at: http://www.slimdevices.com/download 2. When the file has finished downloading, double-click on the disk image file (.dmg) to make it appear on your desktop. Your web browser may do this for you automatically. 3. Double-click on the SlimServer Installer icon. The SlimServer Installer will start. 4. You can choose whether you want to install SlimServer for all users or just for the current user. If you want to install SlimServer for all users, you must provide an administrator password. Tip: If you install SlimServer for all users, the user that starts SlimServer will be the only user who can stop SlimServer later on. 5. Click Install. After the Installer completes the installation, click OK. 6. System Preferences will open and show you the SlimServer preference pane. Here you can choose whether you would like the SlimServer to start automatically whenever you start or log in to your computer. 7. Click Start Server. After a few seconds you can click on the Web Access button. The SlimServer web interface will open in your web browser. Feel free to bookmark this page so you can get back to it quickly in the future. Installing on Linux or Other Operating System If you are running Red Hat Linux or other compatible distributions, you can install the RPM file using the rpm tool. Debian and Ubuntu users can use the Debian package provided by Logitech®. Detailed instructions for installation are available at http://wiki.slimdevices.com/index.cgi?DebianPackage. If you are using another Unix platform, you can download the SlimServer software perl scripts available in gzipped tar or zip format. Instructions for starting the perl server are included with the scripts. Additional information about installing SlimServer on other platforms can be found on our web site at http://wiki.slimdevices.com or in our forums at http://forums.slimdevices.com.
-
 1
1 -
 2
2 -
 3
3 -
 4
4 -
 5
5 -
 6
6 -
 7
7 -
 8
8 -
 9
9 -
 10
10 -
11
-
12
-
13
-
14
-
15
-
16
-
17
-
18
-
19
-
20
-
21
 |
 |
