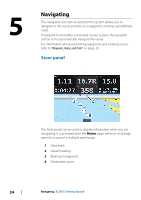
Lowrance Elite-12 Ti Getting Started EN - Page 22
Routes, Creating a new route on the chart panel, Edit a route from the chart panel
 |
View all Lowrance Elite-12 Ti manuals
Add to My Manuals
Save this manual to your list of manuals |
Page 22 highlights
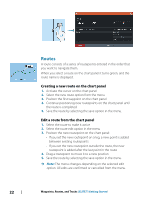
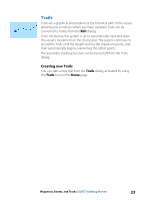
Routes A route consists of a series of routepoints entered in the order that you want to navigate them. When you select a route on the chart panel it turns green, and the route name is displayed. Creating a new route on the chart panel 1. Activate the cursor on the chart panel 2. Select the new route option from the menu 3. Position the first waypoint on the chart panel 4. Continue positioning new routepoints on the chart panel until the route is completed 5. Save the route by selecting the save option in the menu. Edit a route from the chart panel 1. Select the route to make it active 2. Select the route edit option in the menu 3. Position the new routepoint on the chart panel: - If you set the new routepoint on a leg, a new point is added between existing routepoints - If you set the new routepoint outside the route, the new routepoint is added after the last point in the route 4. Drag a routepoint to move it to a new position 5. Save the route by selecting the save option in the menu. Ú Note: The menu changes depending on the selected edit option. All edits are confirmed or cancelled from the menu. 22 Waypoints, Routes, and Tracks | ELITE Ti Getting Started
-
 1
1 -
2
-
3
-
4
-
5
-
6
-
7
-
8
-
9
-
10
-
11
-
12
-
13
-
14
-
15
-
16
-
 17
17 -
 18
18 -
 19
19 -
 20
20 -
 21
21 -
 22
22 -
 23
23 -
 24
24 -
 25
25 -
 26
26 -
 27
27 -
28
-
29
-
30
-
31
-
32
-
33
-
34
-
35
-
36
-
37
-
38
-
39
-
40
-
41
-
42
-
43
-
44
-
45
-
46
-
47
-
48
 |
 |
