Magic Chef MCSCD6W1 User Manual - Page 11
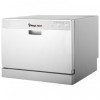
Quick Connect Adapter.
 |
View all Magic Chef MCSCD6W1 manuals
Add to My Manuals
Save this manual to your list of manuals |
Page 11 highlights
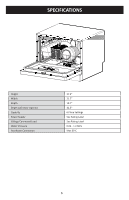
C) Water Intake Hose: Connect to the rear of the dishwasher using the large, 4-corner shaped wing nut. D) Drain Hose: Connect to the rear of the dishwasher. It is suggested you use pliers to tighten but DO NOT over tighten. E) With both hoses connected, make sure you can plug the power cord into a 120 volt, grounded AC outlet, then turn the dishwasher so it is facing forward. F) Red Pressure Release Button: This red button, located on the Quick Release Faucet Adapter, is used to release the water line pressure. When you first connect to the water faucet, you can press the red button to check the water is at the desired temperature or to use the faucet normally without removing the whole Quick Connect Adapter. Red Pressure Release Button Water Hose Drain Hose Red Pressure Release Button This part can be unscrewed into two parts to adjust for different faucet sizes. This end connects to the sink faucet. G) With all the fittings connected, open the water tap to test to make sure there are no leaks. Connect the A/C power cord and use the dishwasher as outlined in the manual. H) When finished using the dishwasher, you need to close the water supply at the tap and disconnect the power supply cord. The water intake hose is now pressurized. Press the Red Pressure Release Button on the Quick Connect Adapter, which will depressurize the water in- take hose to easily remove without squirting water, which can be very hot and cause scalding or personal injury. The Quick Connect Adapter should then be disconnected from the faucet and stored for its next use. DO NOT let children disconnect the dishwasher. Close supervision of children is always important around the appliance. 11
-
 1
1 -
2
-
3
-
4
-
5
-
 6
6 -
 7
7 -
 8
8 -
 9
9 -
 10
10 -
 11
11 -
 12
12 -
 13
13 -
 14
14 -
 15
15 -
 16
16 -
17
-
18
-
19
-
20
-
21
-
22
-
23
-
24
-
25
-
26
-
27
-
28
-
29
-
30
-
31
-
32
-
33
-
34
-
35
-
36
-
37
-
38
-
39
-
40
-
41
-
42
-
43
-
44
-
45
-
46
-
47
-
48
-
49
-
50
-
51
-
52
-
53
-
54
-
55
-
56
-
57
-
58
-
59
-
60
 |
 |
