Makita HR2641X1 HR2631F Instruction Manual - Page 9
Dust cup optional accessory
 |
View all Makita HR2641X1 manuals
Add to My Manuals
Save this manual to your list of manuals |
Page 9 highlights
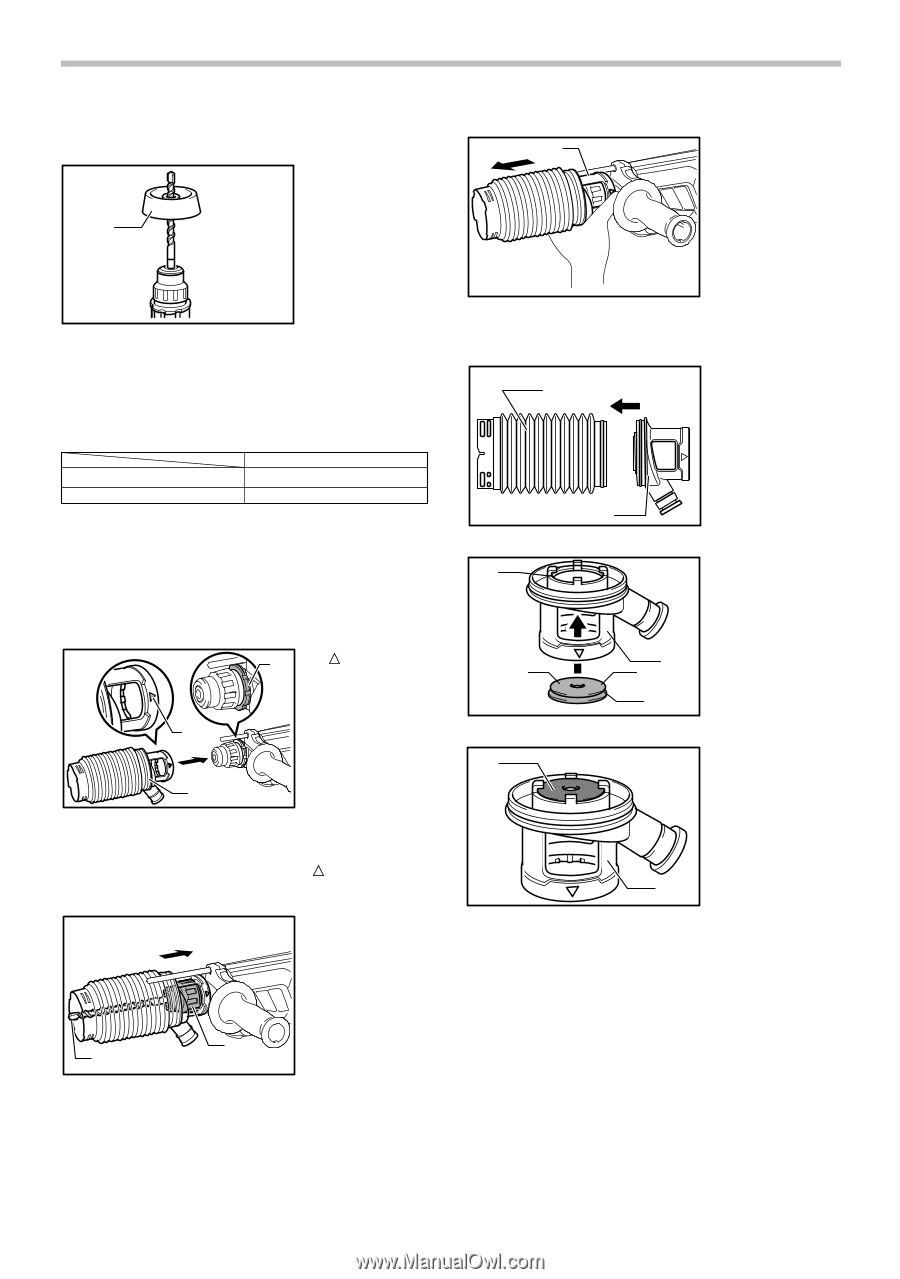
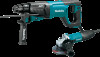
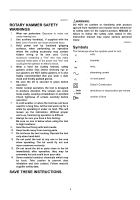
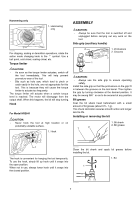
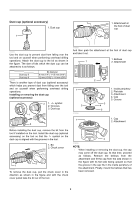
Dust cup (optional accessory) 1. Dust cup 1 1 1. Attachment at the foot of dust cup 010731 Use the dust cup to prevent dust from falling over the tool and on yourself when performing overhead drilling operations. Attach the dust cup to the bit as shown in the figure. The size of bits which the dust cup can be attached to is as follows. Bit diameter Dust cup 5 6 mm (1/4") - 14.5 mm (9/16") Dust cup 9 12 mm (15/32") - 16 mm (5/8") 006386 There is another type of dust cup (optional accessory) which helps you prevent dust from falling over the tool and on yourself when performing overhead drilling operations. Installing or removing the dust cup (optional accessory) 2 1. symbol 2. Grooves 3. Dust cup 1 3 015351 Before installing the dust cup, remove the bit from the tool if installed on the tool. Install the dust cup (optional accessory) on the tool so that the symbol on the dust cup is aligned with the grooves in the tool. 1. Bit 2. Chuck cover 2 1 015352 To remove the dust cup, pull the chuck cover in the direction as shown in the figure and with the chuck cover pulled take the bit out of the tool. 015353 And then grab the attachment at the foot of dust cup and take it out. 1. Bellows 1 2. Attachment 011507 1 2 015256 1 2 3 4 5 1. Inside periphery 2. Flat side 3. Attachment 4. Cap 5. Groove 1. Cap 2. Attachment 2 012896 NOTE: • When installing or removing the dust cup, the cap may come off the dust cup. At that time, proceed as follows. Remove the bellows from the attachment and fit the cap from the side shown in the figure with its flat side facing upward so that the groove in the cap fits in the inside periphery of the attachment. Finally, mount the bellows that has been removed. 9
-
 1
1 -
2
-
3
-
 4
4 -
 5
5 -
 6
6 -
 7
7 -
 8
8 -
 9
9 -
 10
10 -
 11
11 -
 12
12 -
 13
13 -
 14
14 -
15
-
16
-
17
-
18
-
19
-
20
-
21
-
22
-
23
-
24
-
25
-
26
-
27
-
28
-
29
-
30
-
31
-
32
-
33
-
34
-
35
-
36
-
37
-
38
-
39
-
40
 |
 |