Marantz RC2000MKII User Guide - Page 12
Macro, No. 1, Lighting
 |
View all Marantz RC2000MKII manuals
Add to My Manuals
Save this manual to your list of manuals |
Page 12 highlights
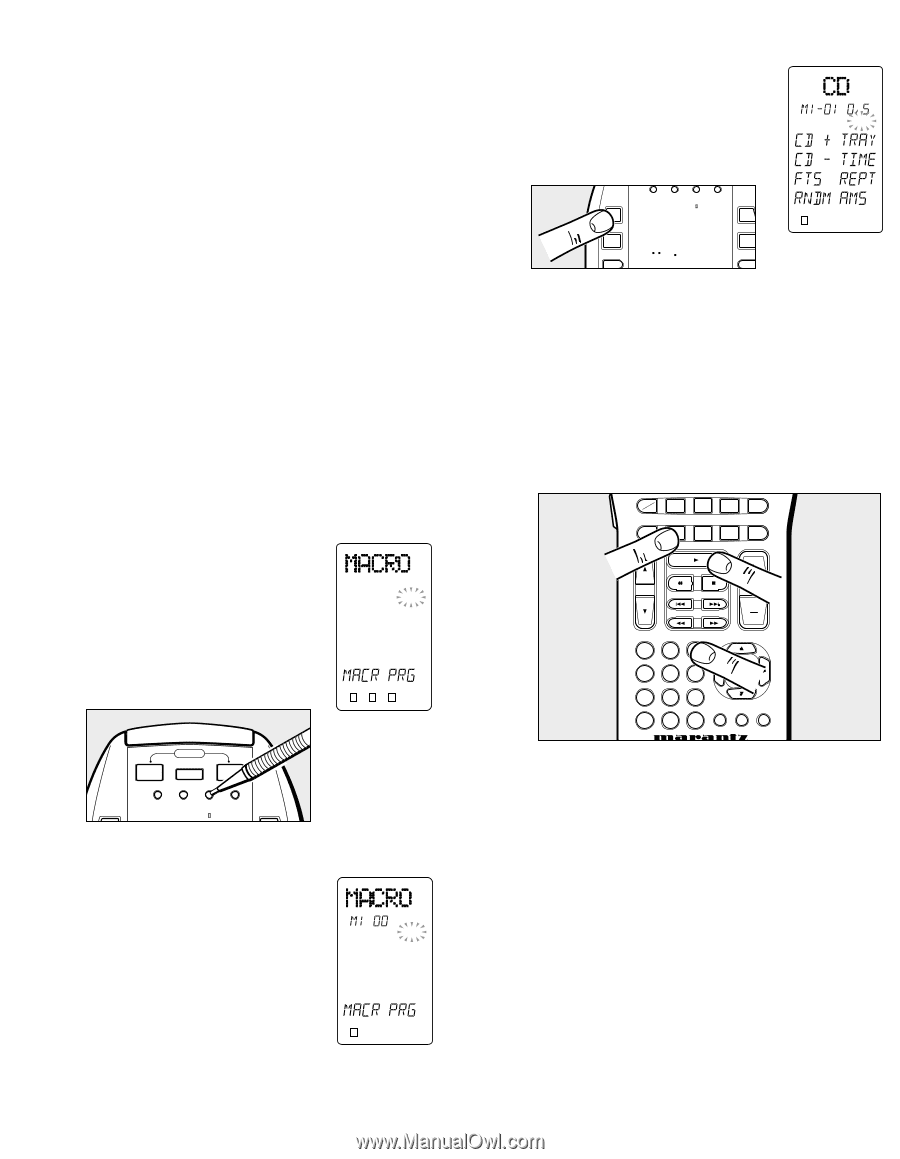
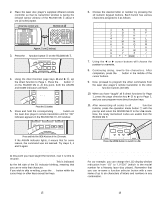
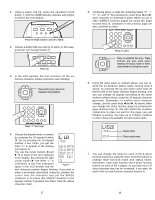
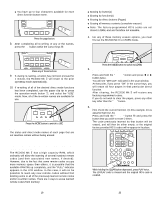
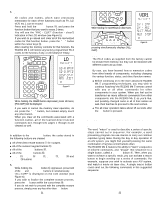
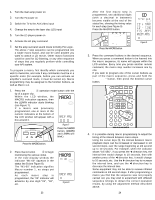
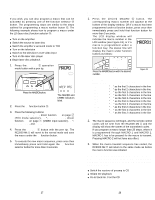
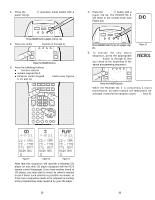
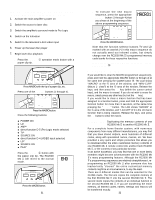
1. Turn the main amp power on 2. Turn the TV power on 3. Switch the TV to the AUX video input 4. Change the amp to the laser disc (LD) input 5. Turn the LD player power on 6. Activate the LD play command 7. Set the amp surround sound mode to Dolby Pro Logic. The above 7 step sequence can be programmed into a single macro button, and can be used anytime you want to watch a LD movie. Other macro functions could be used for CD listening, or any other sequence of steps that you regularly perform while controlling your A/V system. To program a macro, first identify which commands you wish to memorize, and note if any commands must be in a specific order (for example, before you can activate an amplifier's surround mode, it must be turned on). Macro programming may be assigned to the function buttons, as well as Macro 1-4. 1. Press the MACRO w operation mode button with the tip of a paper clip. Within the LCD window, the MACRO indication appears, then the LEARN indicator starts blinking LEARN (see Figure 7). If a macro was previously programmed, one or more of the numeric indicators at the bottom of the LCD window will appear with a box around it. 1234 POWER SOURCE ON ON/OFF OFF CLONE MACRO MODE MACRO LEARNING REMOTE CONTROL RC2000MK MACRO Press the MACRO button. Figure 7 Press the MACRO button. (MACRO and LEARN will blink.) 2. Press macro button No. 1 y to begin memorizing the various codes. In the LCD display window the indicator "M1-00" appears in the status line B (see Figure 8). The "M1-00" indication signifies Macro number 1, no steps yet programmed. As each macro step is programmed, the "00" indicator will advance by one digit-"01", "02", etc. LEARN 1234 Figure 8 23 After the first macro step is programmed, two additional digits (with a decimal in between) become visible at the end of the status line, showing the timing value for each step (see Figure 9) Press the MACRO button. MACRO 1 LEARNING REMOTE CONTROL RC2000MK MACRO 3 2 4 RC-5 LEARN USE NAME D1 D5 Press the MACRO button. LEARN 1234 Figure 9 3. Press the command buttons in the desired sequence. When you press a command button to be learned into the macro sequence, its name will appear within the LCD window. Every time you press another remote command, the macro step number increases one by one. If you wish to program one of the cursor buttons as part of the macro sequence, press and hold the "LIGHTING" button, then press the desired cursor button. DSS MD TV LD DVD VCR TUNER CD TAPE AUX AMP q CH e VOL 123 456 OwK 789 OSD GUIDE MUTE M0C 4. It is possible during macro programming to adjust the timing of the interval between macro steps. Using the cursor keys !6, the interval between macro playback steps can be increased or decreased in 1/2 second steps, over the range beginning at 1/2 second up to 10 seconds. For example, when the indicator shows "0.5 SEC", if you press the ̇ direction key, the interval time would change to 10 seconds, then with another press of the ̇ direction key, it would change to 10 seconds, etc. Use the ̈ direction key to increase the interval time, and use the ̇ direction key to decrease the interval time. Some equipment may not be able to receive infrared commands in 1/2 second steps. If after programming a macro you find that the sequence was not properly carried out, you may wish to experiment with different sequence timings to obtain the correct operation results, by using the adjustment method described above. 24
-
 1
1 -
2
-
3
-
4
-
5
-
6
-
 7
7 -
 8
8 -
 9
9 -
 10
10 -
 11
11 -
 12
12 -
 13
13 -
 14
14 -
 15
15 -
 16
16 -
 17
17 -
18
-
19
-
20
-
21
-
22
-
23
-
24
 |
 |