Marantz SR6001 SR6001 User Manual - Page 54
Recording An Analog Source, Speaker A/b, Selecting Analog Audio Input Or, Digital Audio Input,
 |
View all Marantz SR6001 manuals
Add to My Manuals
Save this manual to your list of manuals |
Page 54 highlights
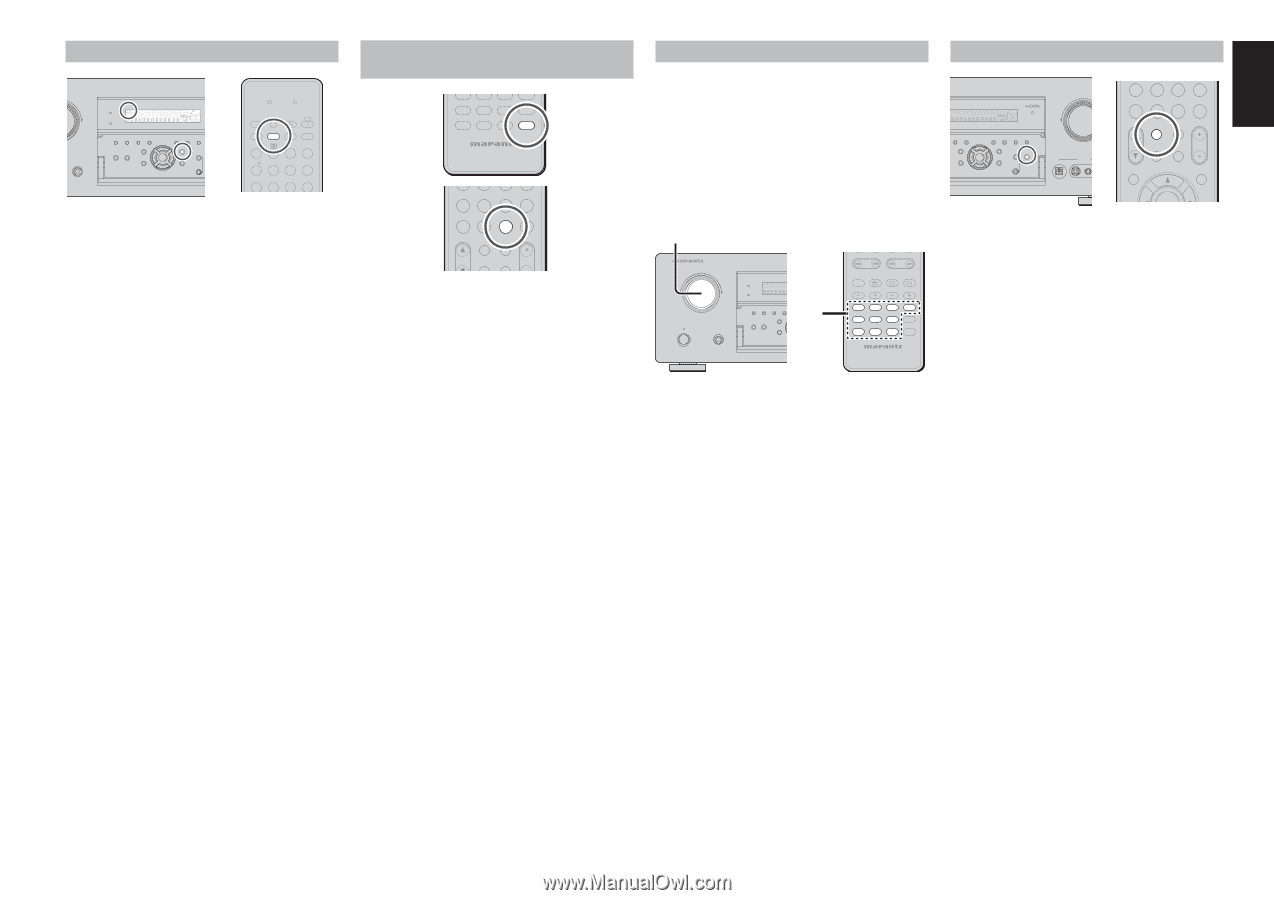
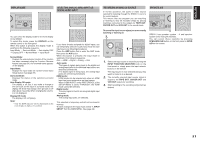
ENGLISH DISPLAY MODE AV SURROUND RECEIVER SR6001 PHONES PURE DIRECT DSD DISP MULTI AUTO TUNED SLEEP AUTO SURR DIRECT ST SPKR A B V-OFF PEAK ATT DISC 6.1 MT X 6.1 NIGHT EQ ANALOG DIGITAL AAC PCM SURROUND DIGITAL LCR LFE SL S SR SURROUND MODE AUTO MULTI MULTI SPEAKER BAND T-MODE MEMORY PURE DIRECT HT-EQ 7.1CH INPUT MENU ENTER DISPLAY EXIT S MultEQ MIC LEARN SEND SOURCE l/ SET SLEEP DISPLAY OFF ON P.DIRECT SURROUND AUTO 12 LIP SYNC/ dts INPUT 3 BAND CS EX/ES VIRTUAL T.MODE 456 M-CH ST 7 STEREO 8 NIGHT 9 P.SCAN You can select the display mode for the front display of the SR6001. To select this mode, press the DISPLAY on the remote control or the front panel. When this button is pressed, the display mode is switched in the following sequence. Input Mode → Surround Mode → Auto display OFF → Display OFF → Normal Mode → Input Mode Normal Mode: Displays the selected input function. If the function has been renamed using the Function Rename feature (see page 30), the renamed name appears on the display. Input Mode: Displays the input mode set via the Function Input Setup feature (see page 29). Surround Mode: Displays the status of the selected surround mode. Auto Display Off mode: The display is off. But, if you make a change to the unit such as the input or surround mode, the display will show that change, then go back to off after about 3 seconds. When changing the volume, it is not displayed. Display Off mode: The display is off completely. Note: • Only the DISP indicator will be illuminated on the front display in display off condition. SELECTING ANALOG AUDIO INPUT OR DIGITAL AUDIO INPUT TV DVD VCR DSS TUNER CD CDR MD TAPE AUX1 AUX2 AMP REMOTE CONTROLLER RC5001SR 456 M-CH ST 7 STEREO 8 NIGHT 9 P.SCAN 7.1CH IN A/D HT-EQ CL 0 +10 MEMO CH/ CAT SPKR A/B MUTE VOLUME MULTI/ CAT M-SPKR If you have already assigned the digital inputs, you can temporarily select the audio input mode for each input source as following procedures. Press the AMP button first to enter the AMP mode then press the A/D button. When this button is pressed, the input mode is switched in the following sequence. Auto → HDMI → Digital → Analog → Auto Auto mode: The types of signals being input to the digital and analog input jacks for the selected input source are detected automatically. If no digital signal is being input, the analog input jacks are selected automatically. HDMI mode: HDMI mode can be selected only when an HDMI input has been assigned as an input source. When "HDMI AUDIO" under PREFERENCE of the SETUP MENU is set to "THROUGH", the HDMI mode cannot be selected. Digital mode: The input signal is fixed to an assigned digital input terminal. Analog mode: The analog input jacks are selected. This selection is temporary and will not be stored in memory. To store changes to the input mode, select "1. INPUT SETUP" from the MAIN MENU. (See page 29) RECORDING AN ANALOG SOURCE In normal operation, the audio or video source selected for listening through the SR6001 is sent to the record outputs. This means that any program you are watching or listening to may be recorded simply by placing machines connected to the outputs for TAPE OUT, CD/CDR OUT and VCR OUT in the record mode. To record the input source signal you are currently watching or listening to 1. AV SURROUND RECEIVER SR6001 INPUT SELECTOR PURE DIRECT DSD DISP MULTI AUTO TUNED SLEEP AUTO SURR DIRECT STANDBY POWER ON/STANDBY PHONES SURROUND MODE AUTO MULTI MULTI SPEAKE PURE DIRECT HT-EQ 7.1CH INPUT MENU 1. - PRESET + - TUNING + DISC+ ANGLE SUB TITLE AUDIO CH-SEL V-OFF ATT. BASS TV DVD TREBLE VCR DSS TUNER CD CDR MD TAPE AUX1 AUX2 AMP REMOTE CONTROLLER RC5001SR 1. Select the input source to record by turning the INPUT FUNCTION SELECTOR knob on the front panel or simply press the input selector buttons on the remote. The input source is now selected and you may watch or listen to it as desired. 2. The currently selected input source signal is output to the TAPE OUT, CD/CDR OUT and VCR OUT outputs for recording. 3. Start recording to the recording component as desired. SPEAKER A/B ULTI AUTO TUNED AUTO SURR DIRECT ST SPKR A B V-OFF PEAK ATT DISC 6.1 MT X 6.1 NIGHT EQ ANALOG DIGITAL AAC PCM SURROUND DIGITAL LCR LFE SL S SR MULTI MULTI SPEAKER BAND T-MODE MEMORY CLEAR 7.1CH INPUT MENU ENTER DISPLAY EXIT MultEQ SPEAKERS A/B MIC VOLUME DOWN DIGITAL AUX 1 INPUT S-VIDEO VIDEO M-CH ST 7 STEREO 8 NIGHT 9 P.SCAN 7.1CH IN A/D HT-EQ CL 0 +10 MEMO CH/ CAT SPKR A/B MUTE VOLUME MULTI/ CAT M-SPKR INFO MENU ENTER SR6001 has speaker system - A and speaker system- B for front L/R channels. You can select these systems by pressing SPEAKERS A/B button on the front panel or SPKR A/B on the remote. 51
-
 1
1 -
2
-
3
-
4
-
5
-
6
-
7
-
8
-
9
-
10
-
11
-
12
-
13
-
14
-
15
-
16
-
17
-
18
-
19
-
20
-
21
-
22
-
23
-
24
-
25
-
26
-
27
-
28
-
29
-
30
-
31
-
32
-
33
-
34
-
35
-
36
-
37
-
38
-
39
-
40
-
41
-
42
-
43
-
44
-
45
-
46
-
47
-
48
-
 49
49 -
 50
50 -
 51
51 -
 52
52 -
 53
53 -
 54
54 -
 55
55 -
 56
56 -
 57
57 -
 58
58 -
 59
59 -
60
-
61
-
62
-
63
-
64
-
65
-
66
-
67
-
68
-
69
-
70
-
71
 |
 |