Marantz SR7200 User Guide - Page 29
Afill Ap'?
 |
View all Marantz SR7200 manuals
Add to My Manuals
Save this manual to your list of manuals |
Page 29 highlights
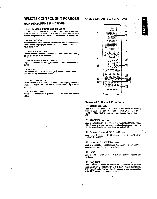
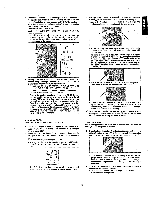
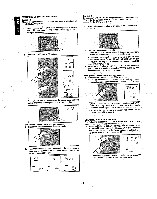
3. Erasing Jog Dial Codes To clear all codes and names previously set for each of the functions (DVD, TV, etc.). 1) Press the function you want to erase. 2) Hold down the CLEAR button T.g and press both ENT buttons at the same time. LCD will display CLR?. CEMPRIG> p lry 61gAir , ET, air Tit i TI jibe jj 6"I .,L„IP„?„„e, • -;• 4.4 be 3) If you wish to continue the clearing operation, press the OK Cursor button to. This will return all 10 commands In the Jog Dial to their factory presets, or leave them empty if no factory- presets are available. Accordingly, the LCD (15)will return to the factory preset displays, or will simply be empty. • 11 KO • Use a similar operation to erase the Jog Dial codes for each function. • • To cancel the memory clearing operation, do not press Cursor button IA and simply touch any other button. 4. Erasing Codes by Function To clear all codes and names previously set for each of the functions (DVD, TV, etc.), press and hold the CLEAR button 3, then press the button for the function to be cleared twice. CLR? will appear on LCD ®. If you wish to continue the clearing operation, press the OK Cursor button g. DVD TAPE Tflr Ti JJ LLI-79 0 mat This will return the button to its factory-presets or leave it empty if no factory presets are available. Accordingly, the LCD a will return to the factory preset displays, or will simply be empty. • To cancel the memory clearing operation, do not press the OK Cursor button lig and simply touch any other button. • The codes for the .4 • ► button 0 cannot be cleared. 5. Erasing All Memory Contents To clear all the memory contents and reset all codes and names to their factory presets, press and hold the CLEAR button B, and press both the power ON and OFF buttons Eel simultaneously. ACLR? will appear on LCD O. Ti!'TI Ilk _LI FILL P'? f you wish to continue the clearing operation, press the OK Cursor button N. This will return the entire memory to its factory-presets, or leave it empty for items for which no factory presets are available. Accordingly, the LCD will return to the factory-preset display or will simply be empty. • To cancel the memory clearing operation, do not press the OK Cursor button 0 and simply touch any other button. After the OK Cursor button is pressed, clearing the entire memory will take approximately 5 seconds. PROGRAMMING MACROS Macros make it possible to use a single function button to perform more complex series of operations that would normally require pressing several buttons. A single button can be programmed to perform up to 10 steps In sequence. A typical example of such a series might be as follows: • Turn the main amplifier power ON -4 Switch the function to DVD -4 Set the Surround Mode to Pro Logic Switch the TV to video input Set the DVD player to PLAY. • No signals may be transmitted during macro programming. • The various steps that make up a macro are set initially to be sent one after another In 1 second intervals, however these intervals may be shortened to as little as 0.5 seconds or lengthened to as much as 5 seconds using the Setup mode. • in the macro mode, the number of steps the macro contains is displayed on LCD ©. Macros may be programmed for each of the 11 function buttons, from DVD to AMP. 1. Use a ballpoint pen or °the!' sharp point to press the MACRO button iD until the MACRO and LEARN indicators are displayed blinking on the LCD. ~rur d"1 Ii 2. Press the Function button for which you wish to program a series of operations. In this case, let's use the example of the DVD player. Press the DVD Function button M. The LCD ® will display DVDM. Characters displayed on LCD ® include the following, depending on the function button for which the macro is being programmed: LD-M, DVD-M, TV-M, DSS-M, VCR-M, AUX-M, TUN-M, CD-M, TP-M, AMP-M, CDR-M (or MD-M for remote controller set for MD). • If a macro has already been set for the selected function button, the LCD a will blink. Also, the number of steps in the macro is displayed on LCD O. 22
-
 1
1 -
2
-
3
-
4
-
5
-
6
-
7
-
8
-
9
-
10
-
11
-
12
-
13
-
14
-
15
-
16
-
17
-
18
-
19
-
20
-
21
-
22
-
23
-
 24
24 -
 25
25 -
 26
26 -
 27
27 -
 28
28 -
 29
29 -
 30
30 -
 31
31 -
 32
32 -
 33
33 -
 34
34 -
35
-
36
-
37
-
38
-
39
-
40
 |
 |
