Maytag MHWE500VW Use and Care Guide - Page 10
Connect the Inlet Hoses, Route the Drain Hose - parts
 |
UPC - 883049134642
View all Maytag MHWE500VW manuals
Add to My Manuals
Save this manual to your list of manuals |
Page 10 highlights
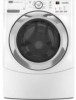
Connect the Inlet Hoses 1. Insert new flat washers (supplied) into each end of the inlet hoses. Firmly seat the washers in the couplings. A B A. Coupling B. Washer 2. Make sure the washer drum is empty. 3. Attach the hose with the red color indicator to the Hot (left) inlet valve. Attaching the red coupling first makes it easier to tighten connection with pliers. Screw on coupling by hand until it is seated on the washer. 4. Attach the hose with the blue color indicator to the Cold (right) water inlet valve. Screw on coupling by hand until it is seated on the washer. H C 9. Turn on the water faucets and check for leaks. NOTE: Replace inlet hoses after 5 years of use to reduce the risk of hose failure. Record hose installation or replacement dates on the hoses for future reference. 10. Periodically inspect and replace hoses if bulges, kinks, cuts, wear, or leaks are found. Route the Drain Hose Proper routing of the drain hose protects your floors from damage due to water leakage. Read and follow these instructions. Remove drain hose from washer cabinet Gently pull the corrugated drain hose from the shipping clips. Laundry tub drain or standpipe drain Connect the drain hose form to the corrugated drain hose. H. Hot water inlet C. Cold water inlet 5. Using pliers, check the tightness of the hose couplings already attached to the washer. NOTE: Do not overtighten. Damage to the coupling can result. 6. Attach hot water hose to the hot water faucet. Screw on coupling by hand until it is seated on the washer. 7. Attach cold water hose to the cold water faucet. Screw on coupling by hand until it is seated on the washer. 8. Using pliers, tighten the couplings with an additional two-thirds turn. NOTE: Do not overtighten. Damage to the coupling can result. A B A. Snap either end of the drain hose form to the drain hose at the point where the corrugation begins. B. Bend drain hose over drain hose form and snap into place. To keep drain water from going back into the washer: „ Do not straighten the drain hose, and do not force excess drain hose into standpipe. Hose should be secure, but loose enough to provide a gap for air. „ Do not lay excess hose on the bottom of the laundry tub. Floor drain You may need additional parts. See Floor drain under "Tools and Parts." 10
-
 1
1 -
2
-
3
-
4
-
 5
5 -
 6
6 -
 7
7 -
 8
8 -
 9
9 -
 10
10 -
 11
11 -
 12
12 -
 13
13 -
 14
14 -
 15
15 -
16
-
17
-
18
-
19
-
20
-
21
-
22
-
23
-
24
-
25
-
26
-
27
-
28
-
29
-
30
-
31
-
32
-
33
-
34
-
35
-
36
-
37
-
38
-
39
-
40
-
41
-
42
-
43
-
44
-
45
-
46
-
47
-
48
-
49
-
50
-
51
-
52
-
53
-
54
-
55
-
56
 |
 |
