Miele F 1901 Vi Operating and Installation manual - Page 66
Preparing the custom door 66, overhead furniture/fixtures.
 |
View all Miele F 1901 Vi manuals
Add to My Manuals
Save this manual to your list of manuals |
Page 66 highlights
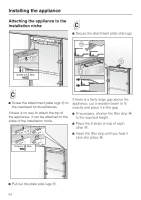
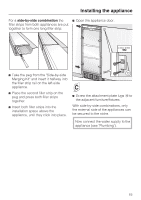
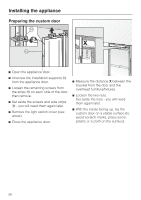
Installing the appliance Preparing the custom door ^ Open the appliance door. ^ Unscrew the installation supports n from the appliance door. ^ Loosen the remaining screws from the strips o on each side of the door, then remove. ^ Set aside the screws and side strips o - you will need them again later. ^ Remove the light switch cover (see arrow). ^ Close the appliance door. ^ Measure the distance X between the bracket from the door and the overhead furniture/fixtures. ^ Loosen the two nuts. Set aside the nuts - you will need them again later. ^ With the inside facing up, lay the custom door on a stable surface (to avoid scratch marks, place some plastic or a cloth on the surface). 66
-
 1
1 -
2
-
3
-
4
-
5
-
6
-
7
-
8
-
9
-
10
-
11
-
12
-
13
-
14
-
15
-
16
-
17
-
18
-
19
-
20
-
21
-
22
-
23
-
24
-
25
-
26
-
27
-
28
-
29
-
30
-
31
-
32
-
33
-
34
-
35
-
36
-
37
-
38
-
39
-
40
-
41
-
42
-
43
-
44
-
45
-
46
-
47
-
48
-
49
-
50
-
51
-
52
-
53
-
54
-
55
-
56
-
57
-
58
-
59
-
60
-
 61
61 -
 62
62 -
 63
63 -
 64
64 -
 65
65 -
 66
66 -
 67
67 -
 68
68 -
 69
69 -
 70
70 -
 71
71 -
72
-
73
-
74
-
75
-
76
-
77
-
78
-
79
-
80
 |
 |
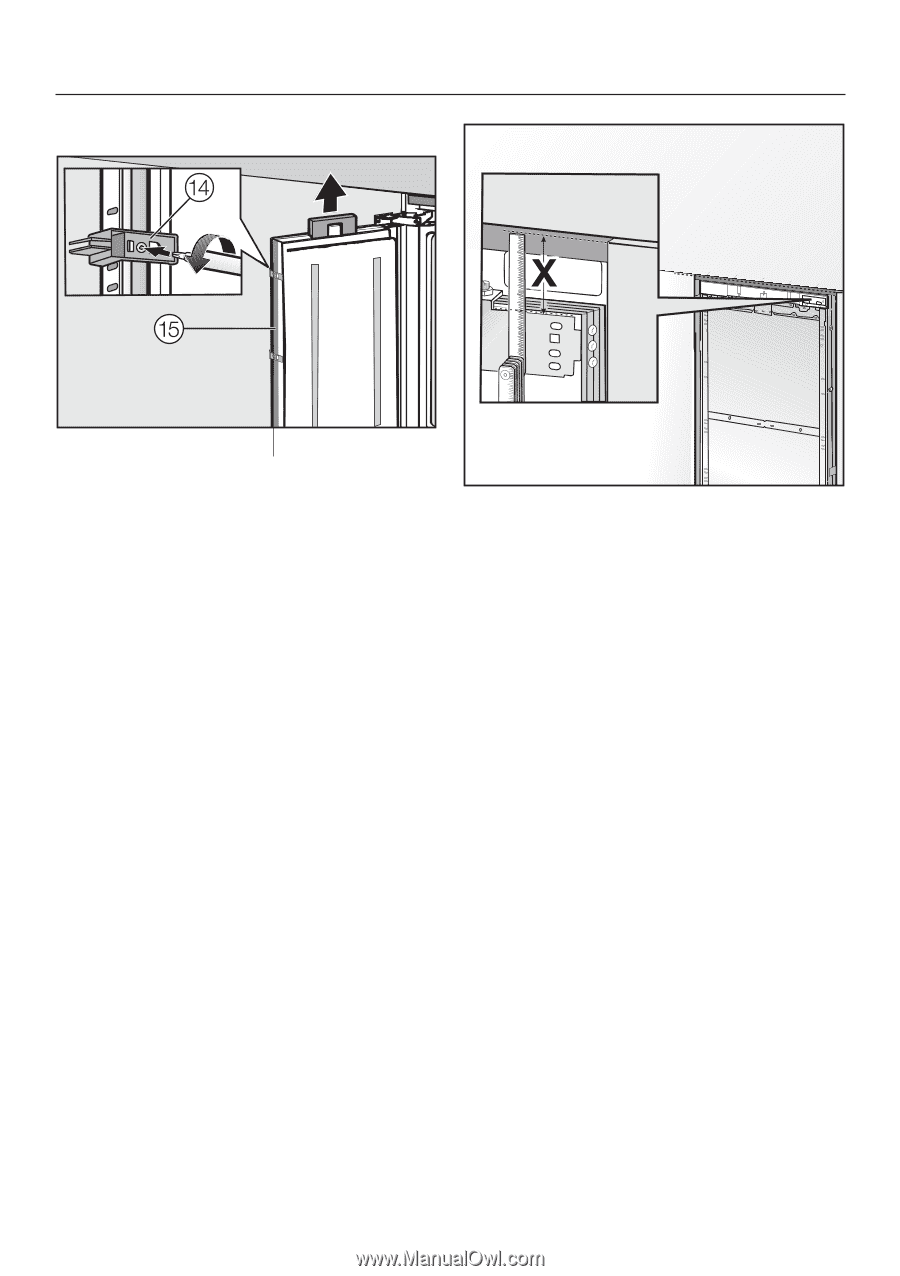
Preparing the custom door
^
Open the appliance door.
^
Unscrew the installation supports
n
from the appliance door.
^
Loosen the remaining screws from
the strips
o
on each side of the door,
then remove.
^
Set aside the screws and side strips
o
- you will need them again later.
^
Remove the light switch cover (see
arrow).
^
Close the appliance door.
^
Measure the distance
X
between the
bracket from the door and the
overhead furniture/fixtures.
^
Loosen the two nuts.
Set aside the nuts - you will need
them again later.
^
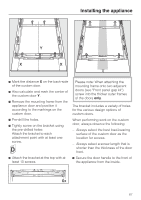
With the inside facing up, lay the
custom door on a stable surface (to
avoid scratch marks, place some
plastic or a cloth on the surface).
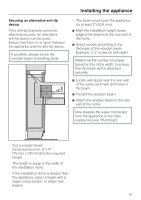
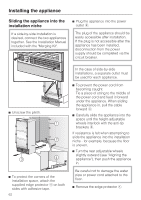
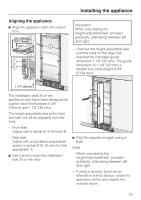
Installing the appliance
66