Motorola IT6-2 User Guide - Page 8
Charging the handset, Connecting the handset and charger
 |
View all Motorola IT6-2 manuals
Add to My Manuals
Save this manual to your list of manuals |
Page 8 highlights
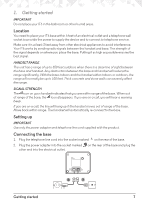
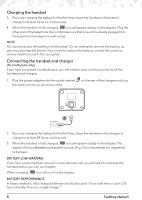
Charging the handset 3. If you are charging the battery for the first time, place the handset on the base to charge for at least 24 hours continuously. 4. When the handset is fully charged, icon will appear steady on the display. Plug the other end of the telephone line cord (make sure that one end is already plugged into the base) into the telephone wall socket. NOTE You cannot access the battery in the handset. Do not attempt to remove the battery, as you may damage the phone. If you need to replace the battery, contact the customer service helpline found in this user guide. Connecting the handset and charger (for multi-pack only) If you have purchased a multiple pack, you will need to carry out this process for all the handsets and chargers. 1. Plug the power adapter into the socket marked on the rear of the charger and plug the other end into an electrical outlet. 2. If you are charging the battery for the first time, place the handset on the charger to charge for at least 24 hours continuously. 3. When the handset is fully charged, icon will appear steady on the display. The display will show Handset and handset number (e.g. 2) to indicate that it is registered to the base. BATTERY LOW WARNING If you hear a warning beep every 2 minutes during a call, you will need to recharge the handset before you can use it again. When charging, icon will scroll on the display. BATTERY PERFORMANCE In ideal conditions, fully charged batteries should give up to 7 hours talk time or up to 130 hours standby time on a single charge.1 8 Getting started
-
 1
1 -
2
-
 3
3 -
 4
4 -
 5
5 -
 6
6 -
 7
7 -
 8
8 -
 9
9 -
 10
10 -
 11
11 -
 12
12 -
 13
13 -
14
-
15
-
16
-
17
-
18
-
19
-
20
-
21
-
22
-
23
-
24
-
25
-
26
-
27
-
28
-
29
-
30
-
31
-
32
-
33
-
34
-
35
-
36
-
37
-
38
-
39
-
40
-
41
-
42
-
43
-
44
-
45
-
46
-
47
-
48
-
49
-
50
-
51
-
52
 |
 |
