NEC E321 E321 : user's manual - Page 12
English-9, Remote control, Power cord installation, Power, Install the base stand, place the display
 |
UPC - 805736032819
View all NEC E321 manuals
Add to My Manuals
Save this manual to your list of manuals |
Page 12 highlights
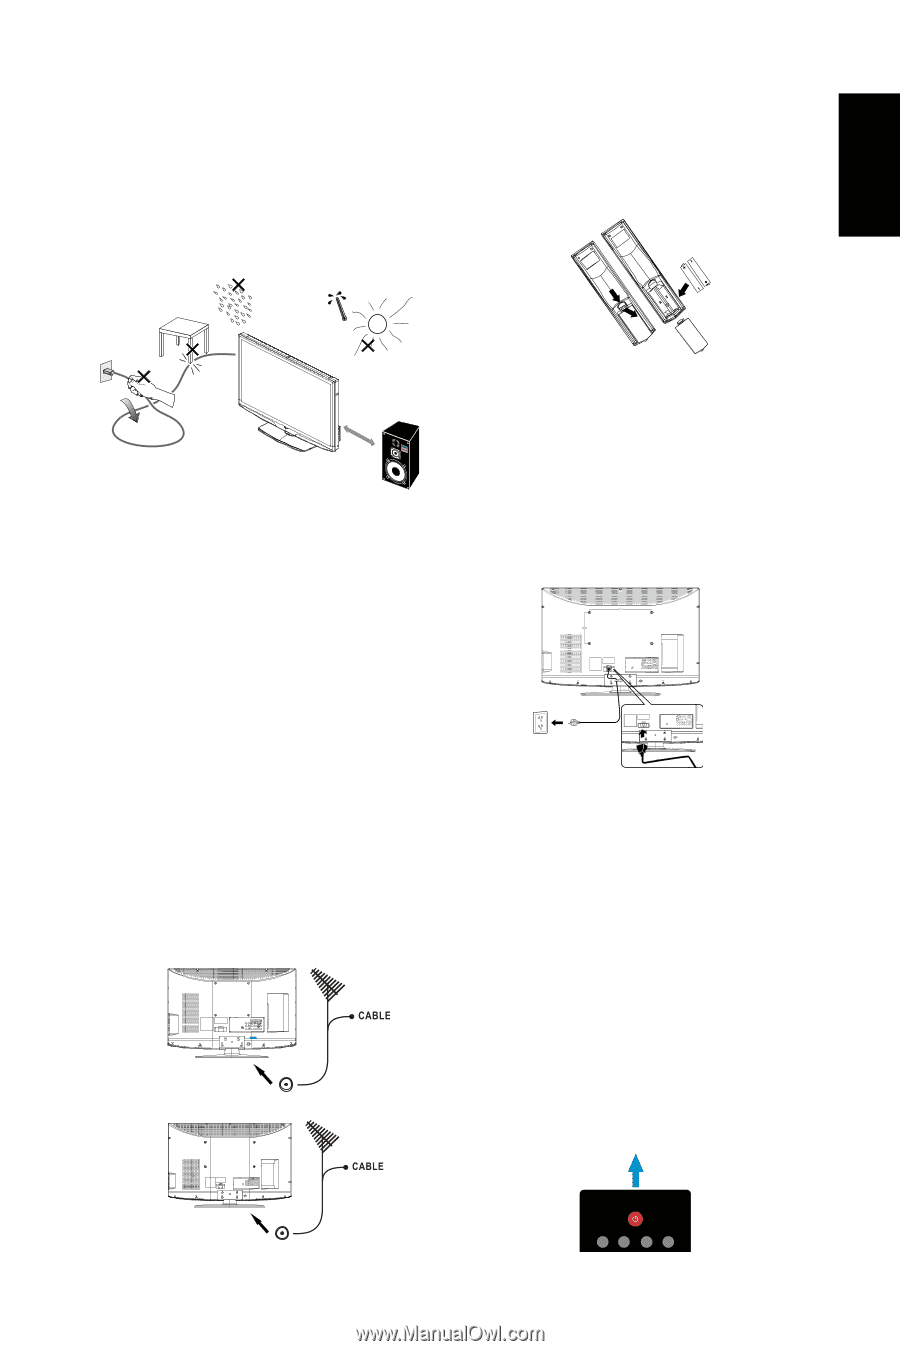
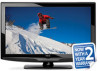
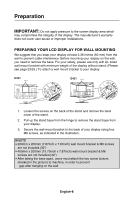
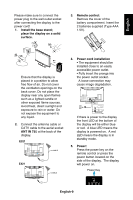
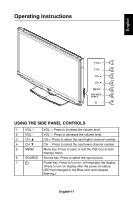
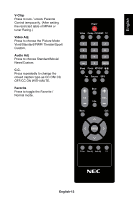
English Please make sure to connect the power plug to the wall outlet socket after connecting the display to the power cord! 1. Install the base stand; place the display on a solid surface. 3. Remote control: Remove the cover of the battery compartment. Insert the 2 batteries supplied (Type AAA 1.5V). Min 1 m Ensure that the display is placed in a position to allow free flow of air. Do not cover the ventilation openings on the back cover. Do not place the display near any open flames such as a lighted candle or other exposed flame sources. Avoid heat, direct sunlight and exposure to rain or water. Do not expose the equipment to any liquid. 2. Connect the antenna cable or CATV cable to the aerial socket ANT IN 75Ω at the back of the display. E321 E421 4. Power cord installation • The equipment should be installed close to an easily accessible power outlet. • Fully insert the prongs into the power outlet socket. A loose connection may cause image degradation. If there is power to the display the front LED at the bottom of the display will be either blue or red. A blue LED means the display is powered on. A red LED means the display is in standby mode. 5. Power: Press the power key on the remote control or press the power button located on the side of the display. The display will power on. Power Key Power Video Comp PC/HDMI TV English-9
-
 1
1 -
2
-
3
-
4
-
5
-
6
-
 7
7 -
 8
8 -
 9
9 -
 10
10 -
 11
11 -
 12
12 -
 13
13 -
 14
14 -
 15
15 -
 16
16 -
 17
17 -
18
-
19
-
20
-
21
-
22
-
23
-
24
-
25
-
26
-
27
-
28
-
29
-
30
-
31
-
32
-
33
-
34
-
35
-
36
-
37
-
38
-
39
-
40
-
41
-
42
-
43
-
44
-
45
-
46
-
47
-
48
-
49
-
50
-
51
-
52
-
53
-
54
-
55
-
56
-
57
-
58
-
59
-
60
-
61
-
62
-
63
-
64
-
65
-
66
-
67
 |
 |