NEC NC900C-A User Manual - Page 11
Rear of the projector, Lamp cover, VOLTAGE SELECT switch, Main power switch
 |
View all NEC NC900C-A manuals
Add to My Manuals
Save this manual to your list of manuals |
Page 11 highlights
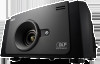
1. What's in the Box? and the Names of the Projector Parts NOTE Do not cover the air inlets and outlet while the projector is in operation. Insufficient ventilation leads to a rise of the internal temperature and may cause a fire or malfunction. 1-3-2. Rear of the projector 8 1 2 7 6 5 34 1. Lamp cover This opens to allow the lamp to be replaced. Refer to "5-3. Replacing the Lamp and the Air Filter" (page 52) on how to replace the lamp. 2. VOLTAGE SELECT switch Can be switched to match the voltage of the power supply. (See page 17) 3. Main power switch While AC power is being supplied, set the main power switch to ON position (1), then your projector will enter a standby state. 4. Power cable stopper Prevents the power plug from falling out from the projector. 5. AC input Connects to the AC power cable. The AC power cable is not an accessory. Consult with your dealer/distributor about the AC power cable. 6. Air inlet / Air filter The air inlet for cooling inside the projector. Do not cover. An air filter is attached over the air inlet to prevent dust. Refer to "5-3. Replacing the Lamp and the Air Filter" (page 52) on how to replace the air filter. 7. Air Outlet The air outlet to exhaust heat inside the projector. Do not cover. 11
-
 1
1 -
2
-
3
-
4
-
5
-
 6
6 -
 7
7 -
 8
8 -
 9
9 -
 10
10 -
 11
11 -
 12
12 -
 13
13 -
 14
14 -
 15
15 -
 16
16 -
17
-
18
-
19
-
20
-
21
-
22
-
23
-
24
-
25
-
26
-
27
-
28
-
29
-
30
-
31
-
32
-
33
-
34
-
35
-
36
-
37
-
38
-
39
-
40
-
41
-
42
-
43
-
44
-
45
-
46
-
47
-
48
-
49
-
50
-
51
-
52
-
53
-
54
-
55
-
56
-
57
-
58
-
59
-
60
-
61
-
62
-
63
-
64
-
65
-
66
-
67
-
68
-
69
-
70
-
71
-
72
-
73
-
74
-
75
-
76
-
77
-
78
-
79
-
80
-
81
-
82
-
83
-
84
-
85
-
86
-
87
-
88
 |
 |
