Naxa NHS-2012 English and Spanish Manual - Page 5
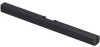
or the sound bar due to incorrect installation.
 |
View all Naxa NHS-2012 manuals
Add to My Manuals
Save this manual to your list of manuals |
Page 5 highlights
Naxa Electronics recommends that wall mounting be 2. For drywall installations only; for wood, skip to preformed by a qualified professional installer. Naxa step 3: Drill holes at the two marked points on the is not liable for any accidents or damage to property wall. Insert the drywall plugs into each of the holes; or the sound bar due to incorrect installation. use a hammer to gently tap them into place. The 1. Using a level and ruler, use a pencil to mark 2 points on the wall that are 21.5 inches apart. Use the level to ensure that the points are on the same horizontal plane and are parallel to the ground. plugs should fit completely into the hole, with the tops of the plug flush with the wall. (For installations in brick or concrete walls, please obtain a masonry bit, plugs, and screws from your local hardware store.) (52416.5mimnc)hes 3. Use a screwdriver to drive the screws partially into the wall at the two marked points. Allow the screws to extend 0.3 inches from the wall. (5241.65minmch)es 1. Screws 2. Drywall plugs (optional) www.naxa.com Page 5
-
 1
1 -
 2
2 -
 3
3 -
 4
4 -
 5
5 -
 6
6 -
 7
7 -
 8
8 -
 9
9 -
 10
10 -
 11
11 -
12
-
13
-
14
-
15
-
16
-
17
-
18
-
19
-
20
-
21
-
22
-
23
-
24
-
25
-
26
-
27
-
28
-
29
-
30
-
31
-
32
-
33
-
34
-
35
-
36
-
37
 |
 |
