Netgear AX3000-Nighthawk User Manual - Page 27
Requirements for entering IPv6 addresses, Use auto detect for an IPv6 Internet connection
 |
View all Netgear AX3000-Nighthawk manuals
Add to My Manuals
Save this manual to your list of manuals |
Page 27 highlights
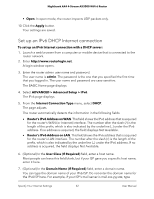
Nighthawk AX4 4-Stream AX3000 WiFi 6 Router 4. Select ADVANCED > Advanced Setup > IPv6. The IPv6 page displays. 5. From the Internet Connection Type menu, select the IPv6 connection type: • If you are not sure, select Auto Detect so that the router detects the IPv6 type that is in use. • If your Internet connection does not use PPPoe or DHCP, or is not fixed, but is IPv6, select Auto Config. Your Internet service provider (ISP) can provide this information. 6. Click the Apply button. Your settings are saved. Requirements for entering IPv6 addresses IPv6 addresses are denoted by eight groups of hexadecimal quartets that are separated by colons. You can reduce any four-digit group of zeros within an IPv6 address to a single zero or omit it. The following errors invalidate an IPv6 address: • More than eight groups of hexadecimal quartets • More than four hexadecimal characters in a quartet • More than two colons in a row Use auto detect for an IPv6 Internet connection To set up an IPv6 Internet connection through autodetection: 1. Launch a web browser from a computer or mobile device that is connected to the router network. 2. Enter http://www.routerlogin.net. A login window opens. 3. Enter the router admin user name and password. The user name is admin. The password is the one that you specified the first time that you logged in. The user name and password are case-sensitive. The BASIC Home page displays. 4. Select ADVANCED > Advanced Setup > IPv6. The IPv6 page displays. 5. From the Internet Connection Type menu, select Auto Detect. The page adjusts. Specify Your Internet Settings 27 User Manual
-
 1
1 -
2
-
3
-
4
-
5
-
6
-
7
-
8
-
9
-
10
-
11
-
12
-
13
-
14
-
15
-
16
-
17
-
18
-
19
-
20
-
21
-
 22
22 -
 23
23 -
 24
24 -
 25
25 -
 26
26 -
 27
27 -
 28
28 -
 29
29 -
 30
30 -
 31
31 -
 32
32 -
33
-
34
-
35
-
36
-
37
-
38
-
39
-
40
-
41
-
42
-
43
-
44
-
45
-
46
-
47
-
48
-
49
-
50
-
51
-
52
-
53
-
54
-
55
-
56
-
57
-
58
-
59
-
60
-
61
-
62
-
63
-
64
-
65
-
66
-
67
-
68
-
69
-
70
-
71
-
72
-
73
-
74
-
75
-
76
-
77
-
78
-
79
-
80
-
81
-
82
-
83
-
84
-
85
-
86
-
87
-
88
-
89
-
90
-
91
-
92
-
93
-
94
-
95
-
96
-
97
-
98
-
99
-
100
-
101
-
102
-
103
-
104
-
105
-
106
-
107
-
108
-
109
-
110
-
111
-
112
-
113
-
114
-
115
-
116
-
117
-
118
-
119
-
120
-
121
-
122
-
123
-
124
-
125
-
126
-
127
-
128
-
129
-
130
-
131
-
132
-
133
-
134
-
135
-
136
-
137
-
138
-
139
-
140
-
141
-
142
 |
 |
