Netgear M4100-24G-POE Hardware Installation Guide - Page 18
Install the Switch on a Wall M4100-D12G, M4100-D10-PoE, and, M4100-D12G-POE+ Only
 |
View all Netgear M4100-24G-POE manuals
Add to My Manuals
Save this manual to your list of manuals |
Page 18 highlights
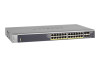
NETGEAR Managed Switch Install the Switch on a Wall (M4100-D12G, M4100-D10-PoE, and M4100-D12G-POE+ Only) If you install the switch on a wall in the vertical position, be sure to orient the switch as shown in the following figure. The switch should be mounted so that the ports face up or down. Do not mount the switch with the ports to the side. The exhaust air should come out the side of the switch case. Note: The switch should have a minimum of 5 inches (130 millimeters) of clearance on all sides. 1. Attach the supplied mounting brackets to the sides of the switch. 2. Use four Phillips head screws to fasten each bracket to the sides of the switch. 3. Tighten the screws with a No. 1 Phillips screwdriver to secure each bracket. 4. Mark the position of bracket holes on the wall. 5. Drill holes 4.7 mm diameter and 22.2 mm depth at each mark. 6. Hammer caps into holes in the wall. 7. Use two Phillips head screws to fasten each bracket to the wall. 8. Tighten the screws with a No. 2 Phillips screwdriver to secure the switch to the wall. Hardware Installation 18
-
 1
1 -
2
-
3
-
4
-
5
-
6
-
7
-
8
-
9
-
10
-
11
-
12
-
 13
13 -
 14
14 -
 15
15 -
 16
16 -
 17
17 -
 18
18 -
 19
19 -
 20
20 -
 21
21 -
 22
22 -
 23
23 -
24
-
25
-
26
-
27
-
28
-
29
-
30
-
31
-
32
-
33
-
34
 |
 |
